How to Unlock Every Aberrant Form in Control Resonant
Dylan’s Aberrant weapon can take six Aberrant Forms in Control Resonant: three Primaries for light attacks and three Secondaries for heavy ones. Your first Primary and first Secondary are free picks during Downtown’s opening hours, and the other four cost Living Shards at the Gap. Whether this is your first Control or the sequel you waited on as Control 2, the Downtown map of the prologue pylon marks where your first choice happens.
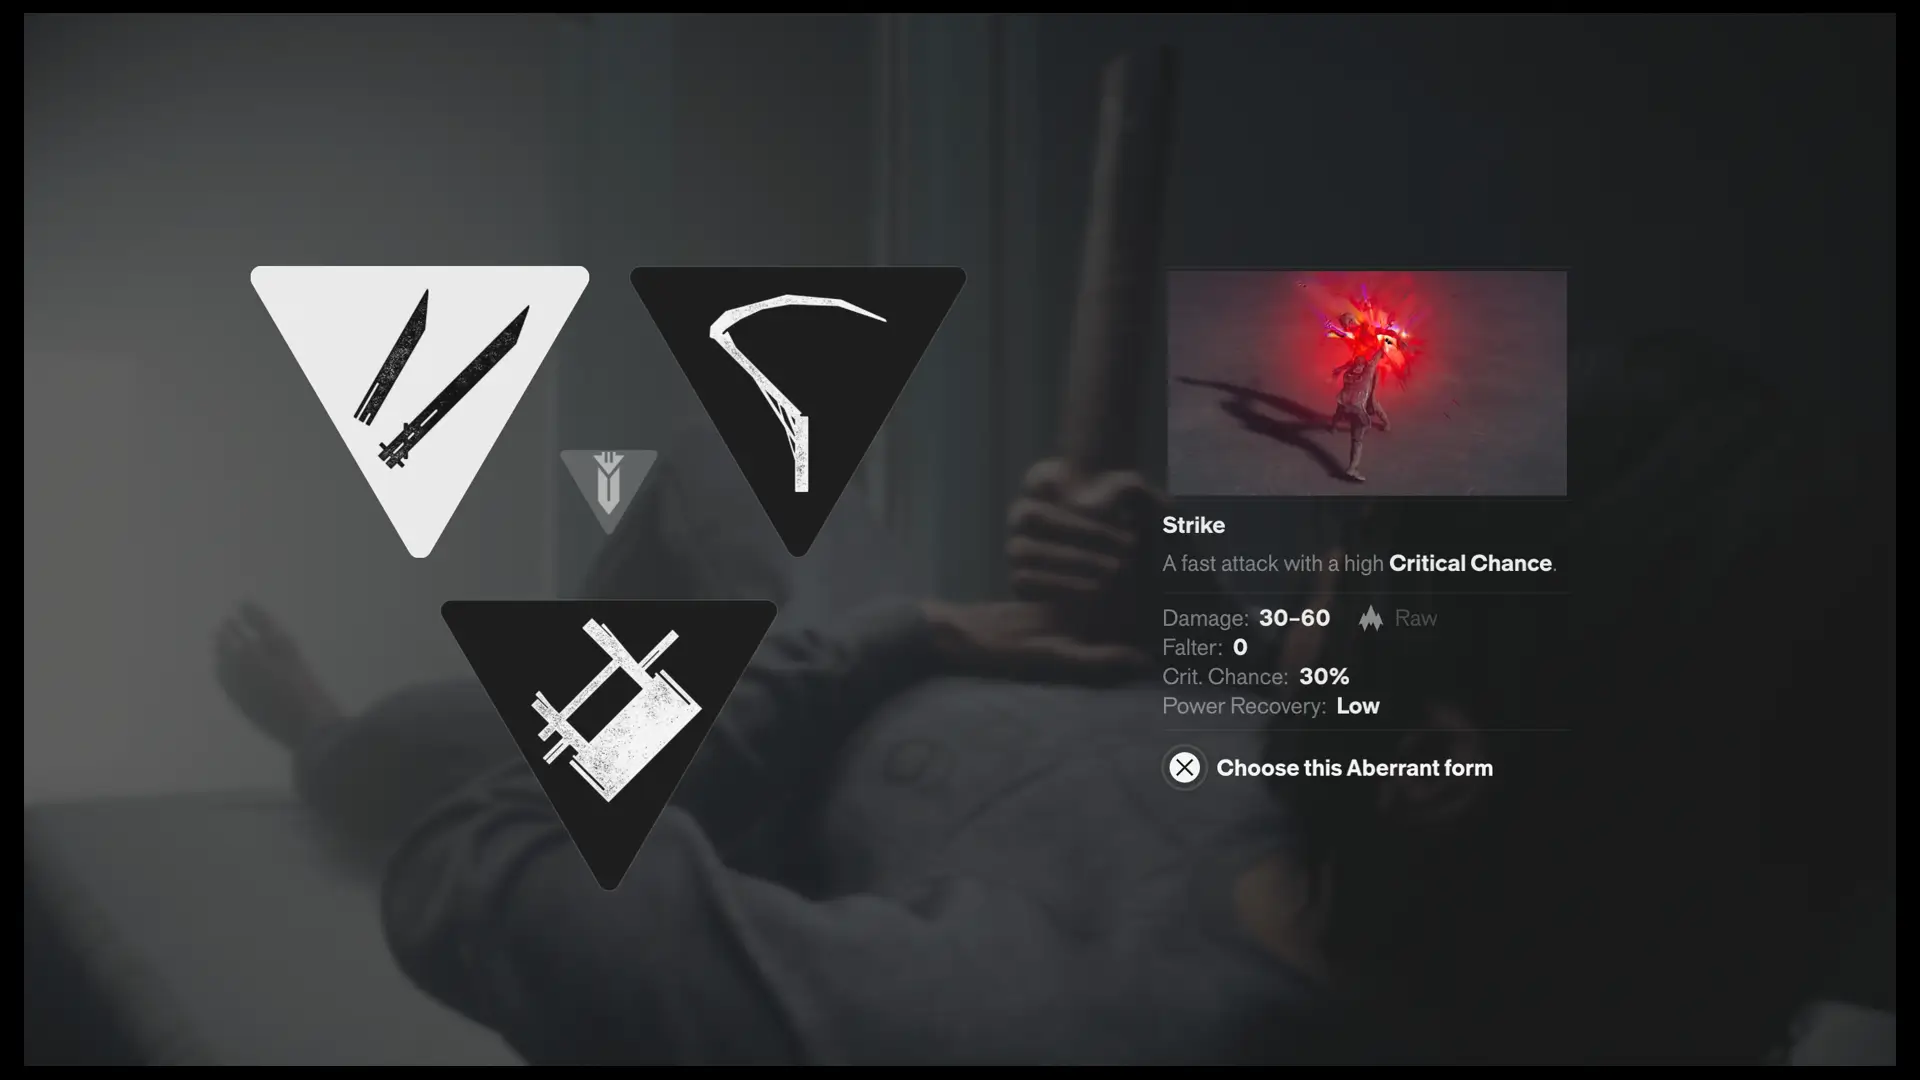
Vlad Susanu tried all six in fights across Manhattan for Map Master, and the Control Resonant combat and build maps connect them to every system they touch. No form fits both slots, so the real decision is one Primary plus one Secondary, nine possible pairs, and the stats make some of those pairs much stronger than others.
Primary vs. Secondary Aberrant Forms: Light Attacks, Heavy Attacks, and Falter
Primaries shape your light attacks. Strike turns the weapon into dual blades, Glaive into a scythe, and Cleave into an axe, and you choose one of them at the pylon in the prologue. Secondaries shape your heavy attacks: Crush is a hammer, Drill bores into a single target, and Extend reaches across a group, with the pick coming in an Orientation back alley.
The split matters more than the names suggest. None of the three Primaries deals any Falter, and all three recover Power slowly, while every Secondary staggers enemies and recovers Power at a medium rate. Your Secondary is your stagger and Power tool, and your Primary decides how you handle a crowd.
Best Aberrant Form for Each Job: What the Stats Say
Crush leads every form in Falter, with 21 to 42 on charged hits, double the cap of Drill and Extend, which makes it the form for bosses and the tougher Apex and named elite enemies. Drill has the highest ceiling instead, 280 Sharp when fully charged, nearly triple its 95 uncharged hit.
Among the Primaries, each has one clear strength. Glaive’s 70 to 90 Raw is the best Primary damage, and its sweep pushes groups back. Strike is the only form with a Critical Chance, a flat 30 percent that makes up for its modest damage, while Cleave hits harder from behind. Extend trades damage for reach, and a perfectly timed charge gets the most out of it.
Which Aberrant Forms to Pick First in Control Resonant
For a safe first pair, take Glaive and Crush. Glaive keeps crowds off Dylan with the strongest Primary damage, and Crush supplies the stagger no Primary can, which shortens the early Resonant boss fights. If you can only settle one slot with confidence, settle the Secondary, because it changes boss fights the most.
Other pairs suit other habits. Strike is for fast combos and crits, Drill is the better Secondary if you’d rather melt one target than knock several down, and Cleave rewards circling enemies instead of trading hits head-on. A pick that doesn’t click isn’t permanent, since the forms you skipped wait at the Gap.
How to Unlock the Other Aberrant Forms With Living Shards
Unlocking a form takes Living Shards, not Talent Points, usually two or three per form. You get 33 shards per playthrough across seven zones, 18 free from story missions, Faults, and quests and 15 bought from Vendors, and the Living Shard locations and sources list every one.
Those shards also pay for Combo Finishers and the last skill upgrades, so the four locked forms compete with everything else for the same supply. Spend your first shards on the Secondary you passed on, since a second stagger option matters more than another light attack, and buy the Vendor shards as each Vendor’s stock grows with zone level.
Upgrading Aberrant Forms: Skill Trees, Materials, and Resets
Each form has its own skill tree, paid for in Source and Aberrant materials such as Slivers and Splinters, and every upgrade node lists what it needs before you commit. Those materials drop from the Resource Crates across Manhattan, so opening every crate you pass keeps your upgrades moving.
A Reset Item undoes a form’s upgrades, along with any Combo Finisher upgrades, so you can rebuild a form from scratch when your playstyle changes. Reset Items come from Resonant bosses, Vendors, the disguised Vending Machines that hide Reset Items, and the arcade cabinet scoreboard prizes.
Aberrant Forms You Can’t Lose, and the Names Used Before Launch
No Aberrant Form locks out, because every form you skip at the start stays on sale at the Gap for the rest of the game. Unlocks and upgrades happen at the same tower there, so one stop handles both once you have the shards and materials.
Older videos may use different names for the Primaries. Before launch they appeared as Flurry, Slash, and Slice, and they arrived as Strike, Glaive, and Cleave, so a tier list or build video using the old names is describing the same three light-attack forms.
| Name | Map Location | Details | Found |
|---|---|---|---|
| StrikeDowntownStrike | Downtown | The Strike Aberrant Form is unlocked during the prologue, after you interact with the large pylon in the first area. Strike Aberrant Form Details:
| |
| GlaiveDowntownGlaive | Downtown | The Glaive Aberrant Form is unlocked during the prologue, after you interact with the large pylon in the first area. Glaive Aberrant Form Details:
| |
| CleaveDowntownCleave | Downtown | The Cleave Aberrant Form is unlocked during the prologue, after you interact with the large pylon in the first area. Cleave Aberrant Form Details:
| |
| CrushDowntownCrush | Downtown | The Crush Aberrant Form is unlocked during the Orientation Main Quest, after you defeat the enemies in the back alley on your way to meet Zoe at the Hotel Building. Crush Aberrant Form Details:
| |
| DrillDowntownDrill | Downtown | The Drill Aberrant Form is unlocked during the Orientation Main Quest, after you defeat the enemies in the back alley on your way to meet Zoe at the Hotel Building. Drill Aberrant Form Details:
| |
| ExtendDowntownExtend | Downtown | The Extend Aberrant Form is unlocked during the Orientation Main Quest, after you defeat the enemies in the back alley on your way to meet Zoe at the Hotel Building. Extend Aberrant Form Details:
|

© MapMaster.io 2024. All rights reserved.