Assassin's Creed Black Flag Resynced: Chest Locations & Interactive Tracking Guide
Treasure Chests in Assassin's Creed Black Flag Resynced are the 79 loot containers hidden across the Caribbean's 46 named islands and caves — on balconies, in restricted yards, behind vines, and at the bottom of the sea beside sunken ships.
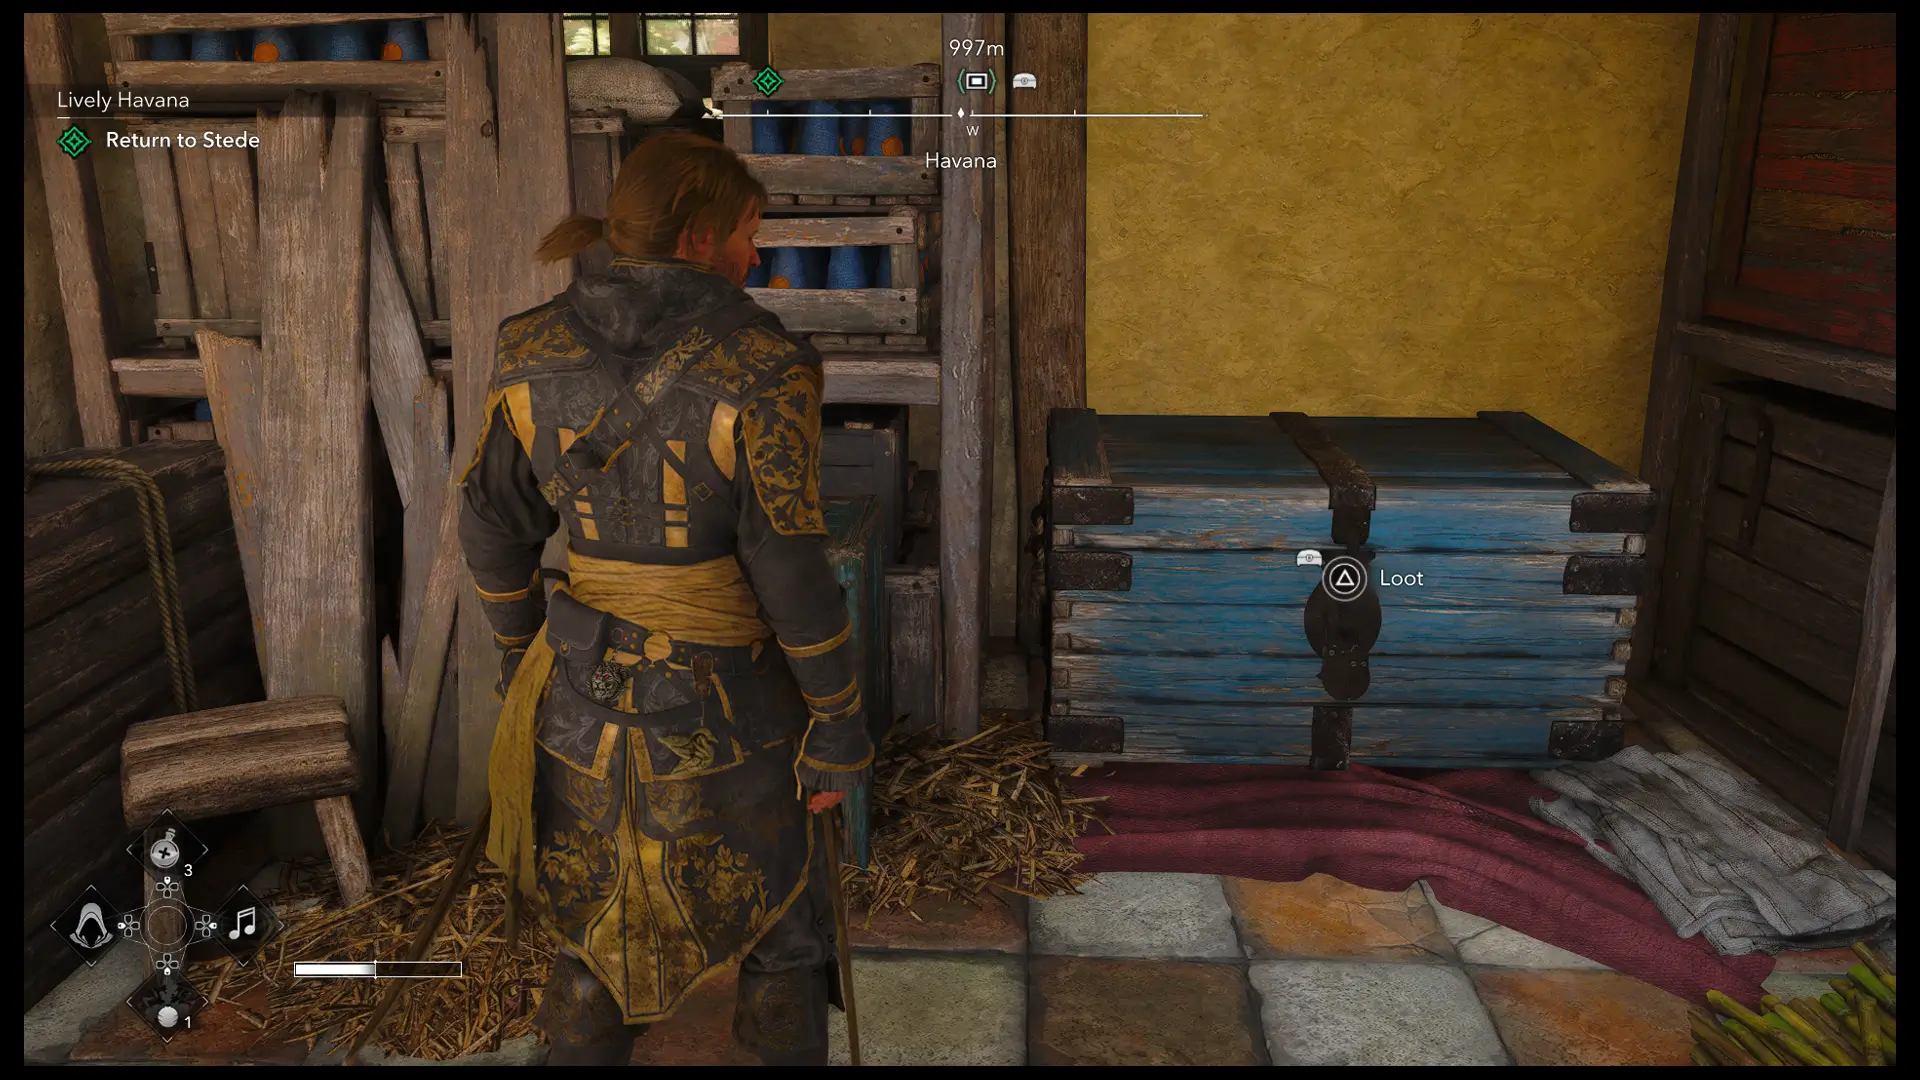
Every chest rewards Reales and crafting materials used to upgrade Edward's inventory and the Jackdaw.
Chest locations appear on the map after syncing the nearest Viewpoint — press D-Pad Down to filter the map and isolate chest icons. All confirmed chest locations are visible on Map Master's Assassin's Creed Black Flag Resynced interactive maps.
Chests vs Buried Treasure Chests
Two distinct chest categories exist in Resynced. This guide covers the 79 standard Treasure Chests — open-world loot containers found on land and underwater.
Buried Treasure Chests are a separate category entirely: 30 dig sites requiring a paired Treasure Map before any dig prompt appears, carrying far higher-value rewards including Design Plans, Ultimate Ship Plans, and unique Outfits.
Chest Totals Across All Regions
The 79 standard chests are distributed across 12 main regions and 46 named locations. Major islands with the highest chest concentrations include Havana (7 chests), Nassau (5 chests), Kingston (5 chests), Great Inagua (3 chests), and Tulum (4 chests).
Smaller islands and caves typically hold 1–3 chests each alongside other collectibles.
Underwater Chests: Diving Required
Havana Chest #6 — at the bottom of the ocean on the eastern side of Havana Town, beside a sunken shipwreck. Standard swimming depth — no diving bell required.
Abaco Island Chest — inside the hull of the sunken ship on the northeastern side of Abaco Island. Dive to the ship and collect from within its structure.
Note that the 7 Underwater Shipwrecks spread across the Caribbean Sea contain a separate set of 61 chests and 7 secrets, accessible only after Sequence 6 – Mission 1: Diving for Medicines, and tracked under the Secret guide.
Story Gates and Access Notes
Cape Bonavista Chest #2 — on the upper side of a cave near a haystack. Cannot be collected on the first visit. Return after completing "This Tyro Captain" (Sequence 3, Mission 1) when fast travel to Cape Bonavista unlocks.
Several entire islands with chests only become accessible through story progress: Tulum (northern section after Sequence 4 – Mission 3), Isla Providencia (Sequence 8 – Mission 3: Marooned), Long Bay (Sequence 10 – Mission 3: The Observatory), and Princípe (Sequence 9 – Mission 2: Trust is Earned). Nothing is permanently missable — all remain available in post-story free-roam.
Restricted Areas and Parkour Routes
Several chests sit in elevated or guarded positions. Havana Chest #2 sits on a southwest manor balcony — sneak across the rooftops to avoid the guarded ground entrance.
Havana Chest #3 is inside a restricted storage yard on the southern docks. Nassau Chest #1 requires crossing the western swamp via tree branches and trunks.
The most efficient approach for restricted-area chests is to use Edward's parkour to arrive from above rather than entering through guarded ground-floor access points.
| Name | Map Location | Details | Screenshot | Found |
|---|---|---|---|---|
| San Ignacio Wreck Chest #4San Ignacio Wreck | San Ignacio Wreck | The fourth San Ignacio Wreck chest can be found on the lower deck of the shipwreck. Rewards:
| ||
| Principe Chest #4- Underwater ChestPrincipe | Principe | The first underwater chest in Principe can be found in the ocean, just north of Principe.
| ||
| San Ignacio Wreck Chest #5San Ignacio Wreck | San Ignacio Wreck | The fifth San Ignacio Wreck chest can be found in the open at the bottom of the ocean. Rewards:
| ||
| Punta Guarico Chest #1Caribbean Sea | Caribbean Sea | The first Punta Guarico chest is located near a small unnamed island that can be found in the Punta Guarico area of the Caribbean, just southeast of Cumberland Bay. Chest Coordinates: 708,288. Look for it underwater, at the base of a mast. Rewards:
| ||
| San Ignacio Wreck Chest #8San Ignacio Wreck | San Ignacio Wreck | The eighth and final San Ignacio Wreck chest can be found on the ground, behind a wooden structure, at the base of the stone wall. Rewards:
| ||
| San Ignacio Wreck Chest #7San Ignacio Wreck | San Ignacio Wreck | |||
| Princípe Chest #1Principe | Principe | The first chest in Príncipe is located in the northwestern section of the large Portuguese Camp. Look for a guard tower along the camp’s outer perimeter. The chest is inside a small hut directly behind (south of) the tower. Chest Coordinates: 105, 19. Rewards:
| ||
| Cumberland Bay Chest #1Cumberland Bay | Cumberland Bay | Related Quests:The first Chest collectible in Cumberland Bay is located in the small camp you'll need to investigate while playing the "Loyalty, Discipline, and Courage" Officer Quest. Rewards:
| ||
| Principe Chest #2Principe | Principe | The second chest in Príncipe is located in the north-central section of the large restricted area. Look for a short, sturdy building directly across from (north of) a guard tower. The chest is sitting on the roof of this building. Chest Coordinates: 110, 20 Rewards:
| ||
| Cumberland Bay Chest #2Cumberland Bay | Cumberland Bay | The second chest in Cumberland Bay is found underwater. It can be found inside of a shipwreck. Swim to the lower deck to spot it. Chest Coordinates: 641,357. Rewards:
| ||
| Principe Chest #3Principe | Principe | The third chest in Príncipe is located in the central section of the large Portuguese Camp. Look for a cluster of small houses near a guard tower. The chest can be found inside one of the nearby white tents. Chest Coordinates: 114, 17. Rewards:
| ||
| Petite Caverne ChestPetite Caverne | Petite Caverne | The Petite Caverne Chest collectible is found in front of a stack of crates in the large cave and pirates' camp. It sits several steps away from the skeleton with the treasure map. Rewards:
| ||
| Seranilla Underwater ChestCaribbean Sea | Caribbean Sea | The easiest way to locate this chest is during the main quest Black Bart's Gambit. After returning to the Jackdaw with the cut-down flag, swim directly underneath the ship to find the chest sitting on underwater debris near some jellyfish. Chest Coordinates: 72, 54 Rewards:
| ||
| Charlotte Chest #1Caribbean Sea | Caribbean Sea | An underwater chest can be found at the bottom of the water in the center of the unnamed island southwest of Cumberland Bay. To reach it, start at the shore on the southeastern part of the island and walk toward the creepy rock archway ahead. Once you reach the water, dive straight down. You will find this chest hidden in a small underwater alcove to the east, directly underneath the archway. Chest Coordinates: 596,306 Rewards:
| ||
| Anotto Bay Chest #1Anotto Bay | Anotto Bay | The first chest in Anotto Bay is hidden deep within the flooded tunnel leading to the main cave. Head into the cave, take your first left, and carefully maneuver around the stinging urchins. Take the next left near the stream of bubbles (which indicates places you can take a breath; just swim up!), brace yourself to survive a sudden terrifying ordeal, and swim straight ahead to secure your hard-earned loot. Chest Coordinates: 592, 243. Rewards:
| ||
| Grand Cayman Chest #1Grand Cayman | Grand Cayman | The first Grand Cayman chest is located on top of the stairs at the end of the underwater hidden tunnel on the southeastern side of the area. To get to the chest, look for an underwater tunnel outside the village. Rewards:
| ||
| Grand Cayman Chest #2Grand Cayman | Grand Cayman | The second Grand Cayman chest is found under a beach tent. Look for it in the small Spanish camp northeast of the village. Rewards:
| ||
| San Juan ChestSan Juan | San Juan | The only chest in San Juan is found in the smuggler's main camp. Once you get to the camp, check the northern wall of the lower section to spot it by the cave's wall. Chest Coordinates: 454, 463. Rewards:
| ||
| Pinos Isle Chest #1Pinos Isle | Pinos Isle | The first Pinos Isle Chest is found on the northern side of the Mayan ruins. You can find it on the upper side of the ruins, at the base of the mountain wall. Rewards:
| ||
| Pinos Isle Chest #2Pinos Isle | Pinos Isle | The second chest on Pinos Isle is found underwater, just off the northeastern beach inside the cove (note: there is no official dock here). Stand at the broken end of the large shipwreck's severed bow and face the ocean. Use Eagle Vision to spot the chest's glow below, then dive into the water to find it hidden inside a small underwater tunnel. Chest Coordinates: 316, 451. Rewards:
| ||
| Pinos Isle Chest #3Pinos Isle | Pinos Isle | The third chest on Pinos Isle is found on the southwestern side of the area, in the den of a Black Jaguar. Deal with the predator first. Rewards:
| ||
| Cayman Sound Chest #1Cayman Sound | Cayman Sound | The first Chest on Cayman Sound is found next to the large rock on the northwestern side of the island. Look for it several steps away from the Treasure Map. Rewards:
| ||
| Chinchorro Underwater Chest #1Caribbean Sea | Caribbean Sea | An underwater chest can be found in the Chinchorro sector of the Caribbean. Chest Coordinates: 248,267. Look for it on the eastern side of the unnamed island southwest of Cayman Sound, inside a flooded Mayan ruin. | ||
| Chinchorro Underwater Chest #2Caribbean Sea | Caribbean Sea | Another underwater chest can be found in the Chinchorro sector of the Caribbean. Chest Coordinates: 248,265. Look for it on the eastern side of the unnamed island southwest of Cayman Sound, inside a flooded Mayan ruin. | ||
| Santanillas Chest #1Santanillas | Santanillas | The first Santanillas chest is found on the southwestern side of the island in the upper room of the Mayan Temple. Look for it directly under the viewpoint you must synchronize. Rewards:
| ||
| Santanillas Chest #2Santanillas | Santanillas | The second Santanillas chest is found on the southeastern side of the island, on the beach at the base of the Mayan Temple. Rewards:
| ||
| Tulum Chest #2Tulum | Tulum | The second chest in Tulum is also located underwater. Look for it resting in the small gulf just south of the southeastern beach, right next to the wreckage of a boat. Chest Coordinates: 43, 371 To get there, dive off Tulum Viewpoint #1 and swim straight ahead. Eliminate the guard behind the boat, then whistle from the bushes to lure and take out the second guard. Look left toward the shoreline water and use Eagle Vision to spot the submerged chest. Rewards:
| ||
| Tulum Chest #3Tulum | Tulum | The third chest in Tulum is found at the end of the southern gulf. Look for it resting on a ledge at the base of the stone wall, with a skeleton sitting right beside it. You can easily swim over to this spot directly from where you collected Chest #2. Rewards:
| ||
| Tulum Chest #4Tulum | Tulum | Prerequisite: Overrun and Outnumbered—Main Quest The last Tulum Chest is found on the southwestern side of the jungle, inside a Mayan building, behind the Mayan Stela. If you can't reach it during your first visit, consider completing the "Overrun and Outnumbered" Main Quest. Rewards:
| ||
| Ile à Vache ChestIle à Vache | Ile à Vache | The only Ile à Vache Chest collectible is found on the southern side of the island in the small enemy camp. Rewards:
| ||
| Long Bay Chest #1Long Bay | Long Bay | The first chest in Long Bay can be found near the shoreline inside the western cove. As soon as you jump from Viewpoint #1 you can find this chest in the shallow water below, resting atop some wooden debris. Rewards:
| ||
| Kingston Chest #2Kingston | Kingston | The second chest in Kingston is found in the restricted courtyard east of the central church. You'll get to visit the courtyard while playing the "Traveling Salesman" main quest. Rewards:
| ||
| Kingston Chest #3Kingston | Kingston | The third chest collectible in Kingston is found in the covered area of the British Camp located southwest of the northern Warehouse. Rewards:
| ||
| Kingston Chest #5Kingston | Kingston | The fifth and final Kingston Chest is located inside the large barn on the western side of the city. Look for it on the ground after sneaking inside via the windows. Rewards:
| ||
| Isla Providencia-Chest #3Isla Providencia | Isla Providencia | The third chest on Isla Providencia is located in the Mayan ruins at the center of the area. This is also the second location you chase Charles Vane to during the main quest, Marooned. If you are following the trail north from the southern beach (as you do in the quest), take the ramp on the left side up toward the ruins. Cross over the long fallen log to reach the opposite side, where you will find the chest resting against the cliff wall on the far edge of the ruins. Chest Coordinates: 477, 26. Rewards:
| ||
| Isla Providencia—Underwater Chest #1Isla Providencia | Isla Providencia | The first Isla Providencia chest is located underwater, right off the southeastern beach of the island. Position yourself at Viewpoint #1 and look just below it to spot a circle of broken boards floating in the water. This is your clue to the chest's whereabouts. Swim down to find the goods tucked safely next to a sunken rowboat. Rewards:
| ||
| Isla Providencia Chest #4Isla Providencia | Isla Providencia | The fourth and final chest on Isla Providencia is located within the northern ruins. You will find it just two levels down from the Mayan Temple containing Viewpoint #3, tucked inside one of the structure's rooms. Rewards:
| ||
| Gibara Chest #2Caribbean Sea | Caribbean Sea | Strike fear into the hearts of your enemies with the Legendary Kraken Sail Set! To claim this set, travel to the unnamed island northeast of Fort Gibara, follow the path to its end, and crack open the large chest waiting for you. Rewards: | ||
| Port Royal Chest #2Port Royal | Port Royal | The second Port Royal chest is found inside Fort Charles. Look for it in the central courtyard by the southeastern wall, next to a cannon. Rewards:
| ||
| Isla Providencia Chest #2Isla Providencia | Isla Providencia | The second Isla Providencia chest is located among the southeastern ruins of the island. You can find it resting on a stone ledge directly behind a large tree inhabited by a Red Howler Monkey. Chest Coordinates: 480, 15. Rewards:
| ||
| New Bone ChestNew Bone | New Bone | The only Chest you must retrieve from New Bone is located in the western area of the plantation. Look for it on the upper floor of the manor. Rewards:
| ||
| Misteriosa Chest #1 (Underwater)Misteriosa | Misteriosa | The first Misteriosa chest is found underwater, at the bottom of the lake in the middle of the island. Rewards:
| ||
| Misteriosa Chest #2Misteriosa | Misteriosa | The second chest on Misteriosa is found inside a small cave you can access while on the ground. Look for it in front of a skeleton. Rewards:
| ||
| Misteriosa Chest #3Misteriosa | Misteriosa | The third and final chest on Misteriosa is found inside the Mayan Ruins, on the middle upper level. Look for it in an open stone structure on the northwestern side of the ruins. Rewards:
| ||
| Antocha Wreck Chest #1Antocha Wreck | Antocha Wreck | Found on the northern side of Antocha Wreck, on the ground under the upper deck of a ship. Rewards:
| ||
| Antocha Wreck Chest #2Antocha Wreck | Antocha Wreck | This chest is found inside the Antocha wreck, inside the sunken ship, under the main deck. Rewards:
| ||
| Antocha Wreck Chest #3Antocha Wreck | Antocha Wreck | Found on the middle deck of a sunken ship within the Anotcha Wreck. To reach the chest, enter the shipwreck via the stairs on the upper deck, then follow the linear corridors. Rewards:
| ||
| Antocha Wreck Chest #4Antocha Wreck | Antocha Wreck | Found outside the large shipwreck on the eastern side of the Anotcha Wreck. Look for it by a large wooden wall, at the base of the shipwreck. Rewards:
| ||
| Antocha Wreck Chest #5Antocha Wreck | Antocha Wreck | Found on the upper side of the shipwreck within Anotcha Wreck. From the upper deck, descend one level to locate it at the end of a small room. Rewards:
| ||
| Antocha Wreck Chest #6Antocha Wreck | Antocha Wreck | The sixth chest in Antocha Wreck is found on the upper deck, behind the front mast. Rewards:
| ||
| Antocha Wreck Chest #7Antocha Wreck | Antocha Wreck | The last chest collectible in Antocha Wreck is found inside the back of the ship. To reach it, swim along the southern side of the shipwreck and look for a hole close to the back, up towards the top. Head through and find the chest in the back of the room straight ahead. Rewards:
| ||
| Blue Hole Chest #1The Blue Hole | The Blue Hole | The first chest in The Blue Hole is found inside the small ship hull, right under the diving spot. As soon as you exit the diving bell, turn around, and look down to your left, you should spot it easily. Rewards:
| ||
| Blue Hole Chest #2The Blue Hole | The Blue Hole | The second chest within the Blue Hole shipwreck can be found on the upper deck of the large ship. Rewards:
| ||
| Blue Hole Chest #4The Blue Hole | The Blue Hole | The fourth chest within the Blue Hole shipwreck is located inside the large shipwreck, just under the main deck. Rewards:
| ||
| Blue Hole Chest #6The Blue Hole | The Blue Hole | Dive deep into the ravine to claim the sixth chest hidden within the Blue Hole shipwreck! From the center of the main wreckage, swim straight down to the ocean floor and push toward the far western side of the area. You will find your loot resting next to a massive rock and scattered ship debris. Rewards:
| ||
| Blue Hole Chest #8The Blue Hole | The Blue Hole | The eighth chest within the Blue Hole shipwreck is located in the torn-off bow of the ship, which is found toward the northern part of the area. Look for the chest resting on the sea floor, just inside the wooden frame. Rewards:
| ||
| Blue Hole Chest #7The Blue Hole | The Blue Hole | The seventh chest within the Blue Hole shipwreck is located inside the ship itself, directly under what used to be the main deck. To reach it, head toward the northwestern side of the large wreckage and look for a hole in the hull to swim through. Once you are through the opening, veer slightly right, then look to your left to spot the chest tucked in a corner. Rewards:
| ||
| Blue Hole Chest #9The Blue Hole | The Blue Hole | The ninth chest within the Blue Hole shipwreck is located on the eastern side of the area, just east of the large central wreckage. Look for a massive rocky ocean structure; if you swim about halfway up the formation from the sea floor, you will spot the chest resting on top of an arched stone on its eastern side. Rewards:
| ||
| Blue Hole Chest #10The Blue Hole | The Blue Hole | The tenth chest within the Blue Hole shipwreck is located on the eastern side of the area, just east of the central ship. You will find it resting near the sea floor inside a small, broken-off piece of the wreckage. Rewards:
| ||
| Blue Hole Chest #3The Blue Hole | The Blue Hole | The third chest within the Blue Hole shipwreck is located at the bottom of the ravine, tucked inside a small section of the wreckage. Head to the center of the main broken ship and swim straight down to easily spot the chest below. Rewards:
| ||
| Dry Tortuga Chest #1Caribbean Sea | Caribbean Sea | Related Activities: To locate the Dry Tortuga Chest head to the open ocean slightly southeast of Fort Dry Tortuga and look for a small island cluster. Chest Coordinates are: 357, 700 Locate the half-sunken ship on the northeastern side of the southernmost island—from the deck, you can spot the treasure's glow directly below you. Dive down to the sunken ship's upper deck to grab your loot, carefully avoiding the stinging jellyfish and sea urchins along the way. Note: Alongside the Dry Tortuga "Buried" treasure, the chest's location is also revealed by Havana Trasure Map #2 you'll find during the "Smelly Sailors" Local Event in Havana. Rewards:
| ||
| Devil's Eye Caverns Chest #5Devil's Eye Caverns | Devil's Eye Caverns | The fifth Devil's Eye Caverns Chest can be found on the ground inside the shipwreck. You can access it via the hatch on the deck. It is also the location of the exit tunnel, where you will also find this location's last chest. Rewards:
| ||
| Devil's Eye Caverns Chest #10Devil's Eye Caverns | Devil's Eye Caverns | The tenth Devil's Eye Caverns Chest can be located on a ledge halfway up the underwater cave, next to a shortcut leading to the southern side of the caverns. To reach this area, right after heading through the eastern tunnel to get here, immediately veer to your left to find the cave opening to this area with the two chests inside. Rewards:
| ||
| Black Trench Chest #1The Black Trench | The Black Trench | The first cgest collectible in The Black Trench is found inside the hull of the sunken ship, southwest of the diving point. | ||
| Black Trench Chest #2The Black Trench | The Black Trench | Found on board the sunken ship, under the main deck. | ||
| Black Trench Chest #3The Black Trench | The Black Trench | Found on board the sunken ship, two levels under the main deck. You can access it via the floor hole near the second chest. | ||
| Black Trench Chest #4The Black Trench | The Black Trench | Found on the ground, next to some barrels, under the ship hull. | ||
| Black Trench Chest #5The Black Trench | The Black Trench | Found next to some barrels, under the main deck. | ||
| Black Trench Chest #6The Black Trench | The Black Trench | Found inside the shipwreck, under the main deck. | ||
| Black Trench Chest #7The Black Trench | The Black Trench | Found on a wooden platform, close to the bottom of the canyon. | ||
| Chest #2Long Bay | Long Bay | To reach the second chest in Long Bay, head toward the northeasternmost point of the beach and cross the bundle of wood serving as a small bridge. You will spot the chest inside an alcove just ahead, though the direct path is blocked. Continue moving past the alcove until you see wooden handholds on the rocks indicating a climbable path. Scale the rocks, drop down twice on the other side, and you will land directly in front of the chest against the rock wall. Rewards:
| ||
| Chest #3Long Bay | Long Bay | To locate the third chest in Long Bay, upon arriving in the enemy cave, descend to the lower level and take the first opening on the left. You will find the chest resting against the rock wall, with the letter in a bottle lying on the ground directly in front of it. Rewards:
| ||
| Tulum Chest #1Tulum | Tulum | The first Tulum chest is located underwater by the southeastern beach, resting next to an arched stone. Chest Coordinates: 43, 374. To reach it, dive off Tulum Viewpoint #1. As soon as you hit the water, plunge beneath the surface and head to your left. You should immediately start to spot the glow of the submerged chest waiting just ahead. Rewards:
| ||
| Blue Hole Chest #5The Blue Hole | The Blue Hole | The fifth chest within the Blue Hole shipwreck is located near the sea floor, down in the deep ravine below the central wreckage. From the large shipwreck, head to its broken center, swim all the way down, and veer slightly east to find this chest tucked into a broken-off section of the ship's hull on the ocean floor. Rewards:
| ||
| Special Community Chest #3Caribbean Sea | Caribbean Sea | The third Special Community Chest in Assassin's Creed Black Flag Resynced is found in the Charlotte sector of the Caribbean. Look for it on a rock, halfway down to the bottom of the ocean. Chest Coordinates: 501, 168 Rewards: | ||
| Kabah Ruins Chest #1Kabah Ruins | Kabah Ruins | The first chest in the Kabah Ruins is located in a small alcove directly behind the diving bell. Upon reaching the ocean floor, look for the chest resting behind a stone pillar near the starting dive spot. Rewards:
| ||
| Kabah Ruins Chest #11Kabah Ruins | Kabah Ruins | Swim inside the large Mayan temple near your diving spot to claim the eleventh chest in the Kabah Ruins. Head straight for the altar and snatch the look for it tucked behind a stone pillar. Rewards:
| ||
| Kabah Ruins Chest #4Kabah Ruins | Kabah Ruins | The fourth Kabah Ruins chest can be found on the ground, under the remains of a ship hull. Rewards:
| ||
| Kabah Ruins Chest #3Kabah Ruins | Kabah Ruins | The third chest in the Kabah Ruins is located on the ocean floor directly behind the flooded Mayan tower. Swim down to the base of the structure to reach the area and claim the chest. Rewards:
| ||
| Kabah Ruins Chest #2Kabah Ruins | Kabah Ruins | The second chest in the Kabah Ruins is located on the roof of a submerged Mayan tower. Swim up to the top of the structure to claim the chest. Rewards:
| ||
| Cape Bonavista Chest #1Cape Bonavista | Cape Bonavista | The first Cape Bonavista Chest can be found under a stone wall on the northern side of the island. Chest Coordinates: 161, 596. Rewards:
| ||
| Havana Chest #1Havana | Havana | The chest is found on the upper floor of the house in northern Havana. You can get inside via the open window on the upper floor. | ||
| Havana Chest #2Havana | Havana | Found on the balcony of the manor in southwestern Havana City. To reach it without being spotted, you can drop down off the east side of the roof onto the pergola below, then hoist yourself onto the balcony where you'll find this chest. | ||
| Havana Chest #3Havana | Havana | Found in the storage yard of the restricted area on the southern Havana City docks. Rewards:
| ||
| Cape Bonavista Chest #2Cape Bonavista | Cape Bonavista | Prerequisites:
The second Cape Bonavista chest is tucked away in an upper rock alcove near a haystack, located in the southeastern part of the area. To reach it, head to the tree-hut village around this area, and enter the ground-level cave instead of taking the stairs. Walk all the way through the cave to exit the other side. From there, follow the upper wooden platform around and over the bridge to find this chest tucked into the rock face. Chest Coordinates: 161, 582. Important Note: This chest cannot be accessed during your first visit (Sequence 1: Edward Kenway). Return to claim it after unlocking fast travel and completing the quest, This Tyro Captain. Rewards:
| ||
| Havana Chest #4Havana | Havana | The fourth Havana Chest is found on the terrace in the back of a house southwest of the Tavern. Look for it behind a small fence. | ||
| Havana Chest #5Havana | Havana | The fifth Havana Chest is found in the small backyard of a house. Climb the wall and drop from above to reach it. | ||
| Havana Chest #6Havana | Havana | Found at the bottom of the ocean, next to a shipwreck on the eastern side of Havana Town. | ||
| Havana Chest #7Havana | Havana | Head just southwest of the Castillo de la Real Fuerza and slip inside the adjacent mansion's courtyard to claim this chest. | ||
| Kabah Ruins Chest #10Kabah Ruins | Kabah Ruins | The tenth chest in the Kabah Ruins is located on the northwestern side of the area, situated on a cliff inside a small, sunken Mayan ruin. Swim through the open doorway and continue back into the small connected cave to find the chest resting in the sand. Rewards:
| ||
| Kabah Ruins Chest #9Kabah Ruins | Kabah Ruins | Swim up to claim the ninth chest in the Kabah Ruins! You will find this loot resting on a bed of coral on a ledge, halfway up a towering stone wall! Rewards:
| ||
| Kabah Ruins Chest #8Kabah Ruins | Kabah Ruins | Dive to the bottom of the ravine to claim the eighth chest in the Kabah Ruins. Swim inside the hull of the sunken wreckage to locate the chest inside, but watch your surroundings—navigate carefully to avoid the damaging sea urchins clinging to the interior! Rewards:
| ||
| Kabah Ruins Chest #7Kabah Ruins | Kabah Ruins | The seventh chest in the Kabah Ruins is located out in the open within the ravine on the southwestern side of the area. Rewards:
| ||
| Kabah Ruins Chest #6Kabah Ruins | Kabah Ruins | Head to the southern side of the Kabah Ruins to claim the sixth chest. Swim down to the seafloor and check directly beneath the hull of the sunken ship to locate the chest sitting beneath it in the sand. Be cautious of the sea urchins stuck to the inside! Rewards:
| ||
| Kabah Ruins Chest #5Kabah Ruins | Kabah Ruins | The fifth chest in the Kabah Ruins is located on a ledge near the top of a large sea cliff, close to the water's surface. Swim straight up from the lower levels to spot it. Rewards:
| ||
| Abaco Island ChestAbaco Island | Abaco Island | The Abaco Island Chest can be found at the bottom of the sunken ship on the northeastern side of the island. Rewards:
| ||
| Nassau Chest #1Nassau | Nassau | The first chest in Nassau is found on an upper ledge, on the western side of the region. To reach it, you'll have to use the tree branches and tree trunks, starting with the one in the middle of the swamp (east side of the chest). Rewards:
| ||
| Cumberland Bay Chest #3Cumberland Bay | Cumberland Bay | The Pedestal Bowl is an Art Piece found inside the Cumberland Bay special chest. The chest can be spotted inside a tent in the camp in the center of the island. From the viewpoint you can jump into the leave pile below, and the camp will be straight ahead. Rewards: | ||
| Nassau Chest #2Nassau | Nassau | The second Chest in Nassau is found on the balcony of the mansion on the western side of the town. | ||
| Nassau Chest #3Nassau | Nassau | The third chest in Nassau is found on the western side of the southern beach. Look for it behind some vines, at the base of the stone wall next to a skeleton. Rewards:
| ||
| Anotto Bay Chest #2Anotto Bay | Anotto Bay | The second chest collectible in Anotto Bay is hidden deep within the flooded tunnel leading to the main cave. From the start of the tunnel, take your first left and carefully maneuver around the stinging urchins. Ignore the next left that leads to the first chest, and instead press forward to the very end of the urchin-filled passage. Follow the rising bubbles and swim all the way up the ladder on your right to find this hidden loot waiting on your left. To exit the tunnel system and make it the hideout, turn back around and head down the opposite tunnel until you see another ladder with bubbles leading up. You'll have a brief on-land moment, but then you'll need to head through another tunnel, but this one is a straight shot all the way to the hideout. Chest Coordinates: 592, 243. Rewards:
| ||
| Salt Key Bank ChestSalt Key Bank | Salt Key Bank | The Salt Key Bank Chest is found in the small enemy camp east of the docks in Salt Key Bank. Look for it by a tent. Rewards:
| ||
| Andreas Island Chest #1Andreas Island | Andreas Island | Found on the northern side of the guarded pier on the eastern Andreas Island. Rewards:
| ||
| Andreas Island Chest #2Andreas Island | Andreas Island | The second chest on Andreas Island is found underwater, close to the eastern beach. Look for it next to a pile of tree logs. Rewards:
| ||
| Cat Island ChestCat Island | Cat Island | The Cat Island Chest is found outside the Warehouse, by the eastern wall. Rewards:
| ||
| Salt Lagoon ChestSalt Lagoon | Salt Lagoon | The Salt Lagoon Chest is found on the southern side of the island. Look for it underwater, in the hull of a sunken ship. It can be found at these coordinates: 723,598. Rewards:
| ||
| Mariguana Island Chest #1Mariguana Island | Mariguana Island | The first Mariguana Island Chest is found underwater. Look for it in the hull of a sunken ship, east of the viewpoint. The coordinates for this chest are around 855,516. Rewards:
| ||
| Mariguana Island Chest #2Mariguana Island | Mariguana Island | The second Chest on Mariguana Island is located at the base of the stone wall, on the southeastern side of the island. Look for it near some barrels and a fallen palm tree. Rewards:
| ||
| Cayman Sound Underwater Chest #2Cayman Sound | Cayman Sound | This special underwater chest in Cayman Sound can be found just west of the island, underwater. Chest Coordinates: 295, 308. Look for it next to the front deck of a sunken ship. Rewards: | ||
| Great Inagua Chest #1Great Inagua | Great Inagua | The first Chest in Great Inagua is found in the southern ruins that you'll have to ascend while looking for Du Casse. Before reaching the top of the ruins and jumping to the wooden boardwalk on your right, climb straight above you to find a small balcony you can reach using the ledges on the wall. Rewards:
| ||
| Great Inagua Chest #2Great Inagua | Great Inagua | The second chest in Great Inagua is found on a suspended wooden platform in the small clearing with straw huts. To reach it, you'll need to use the tree branches and tree roots, starting with the one by the hut, south of the chest's location. Chest Coordinates: 818,438. Rewards:
| ||
| Devil's Eye Caverns Chest #4Devil's Eye Caverns | Devil's Eye Caverns | The fourth chest in Devil's Eye Caverns is located on the ground next to some barrels and a piece of ship wreckage. Rewards:
| ||
| Devil's Eye Caverns Chest #3Devil's Eye Caverns | Devil's Eye Caverns | The third chest in Devil's Eye Caverns can be found on the seafloor, underneath the wooden section of the hull. Rewards:
| ||
| Devil's Eye Caverns Chest #1Devil's Eye Caverns | Devil's Eye Caverns | The first chest in the Devil's Eye Caverns is found in the shipwreck east of the diving spot. Rewards:
| ||
| Devil's Eye Caverns Chest #2Devil's Eye Caverns | Devil's Eye Caverns | The second chest in the Devil's Eye Caverns is found under the hull of the sunken ship. Look for it southwest of the diving spot. Rewards:
| ||
| Devil's Eye Caverns Chest #6Devil's Eye Caverns | Devil's Eye Caverns | The sixth chest in Devil's Eye Caverns can be located right after entering the tunnel and reaching the room where you can partially surface for air. If you dive back down after catching your breath, you should spot it just inside the entrance of a different tunnel (the exit tunnel) on a ledge. Rewards:
| ||
| Devil's Eye Caverns Chest #7Devil's Eye Caverns | Devil's Eye Caverns | The seventh chest in Devil's Eye Caverns is found at the bottom of the tunnel you'll jump into, right after having emerged into the dry part of the cave. Rewards:
| ||
| Great Inagua Chest #3Great Inagua | Great Inagua | Prerequisite:
The third chest in Great Inagua is found on a wooden suspended platform overlooking the southern beach. To get to it, climb the northwestern stone walls, then use the tree trunks and branches while moving south. This chest can be collected only after completing the "This Old Cove" quest. Rewards:
| ||
| Devil's Eye Caverns Chest #8Devil's Eye Caverns | Devil's Eye Caverns | The eighth chest in Devil's Eye Cavern sits at the end of the cavern's western tunnel, but skip the obvious approach: swim in that way and the current will just spit you right back out. Save yourself the frustration. Instead, loop around through the northeastern tunnel. Follow it all the way to its end, then exit and reenter through another tunnel tucked inside a sunken ship nearby. Ride that one out to its end too, where you'll briefly surface onto dry land inside the cave, just enough to catch your breath before diving back down. From there, drop into yet another tunnel. Push forward until you hit a point where the current takes over; this is the part where it gets a little chaotic. You'll get tossed around and knocked into rocks, so just ride it out and keep your bearings. Once the current finally lets go of you, you'll find the chest waiting calmly next to a stone pillar. Rewards:
| ||
| Devil's Eye Caverns Chest #9Devil's Eye Caverns | Devil's Eye Caverns | The ninth Devil's Eye Caverns Chest can be located at the bottom of the underwater cave, under the anchor. To reach this area, right after heading through the eastern tunnel to get here, immediately veer to your left to find the cave opening to this area with the two chests inside. Rewards:
| ||
| Port Royal Chest #1Port Royal | Port Royal | The first chest in Port Royal is found underwater in the small gulf north of the city. Look for it at the bottom of the sea, next to some ruins and a shipwreck. Chest Coordinates: 598, 145. Rewards:
| ||
| Black Island ChestBlack Island | Black Island | This Black Island Chest can be found on the southern side of the compound near the main house. Head to the upper floor of the mansion to find the chest sitting in the office. For the quickest entry, slip in through the back window on the western side of the main house. Rewards:
| ||
| Underwater ChestBlack Island | Black Island | A Black Island Underwater Chest can be found on the northern side of the island, underneath the hull of a sunken ship. Note: Chest coordinates are 914, 620. After looting Secret #3, swim over to the half-sunken ship protruding from the water and scale it. Leap from the wreckage into the rocky alcove just above, then run to the cliff's edge and perform a dive into the water below! Once you land, swim straight down to claim the loot tucked beneath the sunken hull. Note: The chest doesn't count as one of the Black Island collectibles, but we recommend grabbing it anyway, as it contains a good amount of loot. Rewards:
| ||
| Eleuthera Underwater Chest #1Caribbean Sea | Caribbean Sea | Found at the bottom of the sunken ship by the small unnamed island, located on the northwestern side of Eleuthera. Chest Coordinates: 655,883. | ||
| Gibara Underwater Chest #1Caribbean Sea | Caribbean Sea | An Underwater Chest can be found in Gibara, at the bottom of a sunken ship on the northern beach of an unnamed island (Coordinates: 826,569). Rewards:
| ||
| Sacrifice Island Chest #1Sacrifice Island | Sacrifice Island | The first Sacrifice Island Chest can be found at the bottom of the excavation site on the southwestern side of the island, within a restricted area. To get there, swim to the southeastern beach, bypass the guards via the steps, and cross the tree branch to view the camp. Locate the giant excavation pit in the western corner, then head down to the bottom to find the chest sitting between some skeletons. Rewards:
| ||
| Sacrifice Island Chest #2Sacrifice Island | Sacrifice Island | The second chest on Sacrifice Island is found behind the haystack under the northern viewpoint. To easily grab this chest, start at the Sacrifice Island Viewpoint #2 and take a "Leap of Faith" from the very top where you synchronized the location to land safely in the pile of leaves below. As soon as you land, turn around to find the chest tucked into a small alcove in the temple wall right behind you. Rewards:
| ||
| Nassau Chest #4Nassau | Nassau | Found inside a small cave, guarded by British soldiers in eastern Nassau. You can access it via the eastern beach. Rewards:
| ||
| Nassau Chest #5Nassau | Nassau | This fifth chest is located in the restricted fort area in northeastern Nassau. To reach it, you must climb the outside tower up to the open room at the top. You will find the chest just inside. Note: If you are in the area for the Now Hiring quest, you will NOT be able to access this area if you are currently still in the quest. You must complete any active main quests before you can infiltrate this location. Rewards:
| ||
| La Concepcion Wreck Chest #3La Concepcion Wreck | La Concepcion Wreck | The third chest within the La Concepcion Wreck is located on the ground in the hull of the sunken ship. You can access it via the hole in the eastern wooden wall. Rewards:
| ||
| La Concepcion Wreck Chest #8La Concepcion Wreck | La Concepcion Wreck | The eighth chest within the La Concepcion Wreck is located out on the main deck of the large sunken ship. Rewards:
| ||
| La Concepcion Wreck Chest #7La Concepcion Wreck | La Concepcion Wreck | The seventh chest within the La Concepcion Wreck is located out in the open, next to some ruins. You will also find it right beside the broken front half of the large sunken ship. Rewards:
| ||
| La Concepcion Wreck Chest #9La Concepcion Wreck | La Concepcion Wreck | The ninth chest within the La Concepcion Wreck can be found in the open, next to some ruins. Rewards:
| ||
| La Concepcion Wreck Chest #4La Concepcion Wreck | La Concepcion Wreck | The fourth chest within the La Concepcion Wreck can be found on the top deck of the ship. Rewards:
| ||
| La Concepcion Wreck Chest #6La Concepcion Wreck | La Concepcion Wreck | The sixth chest within the La Concepcion Wreck is located out in the open, halfway up the stone wall. Rewards:
| ||
| La Concepcion Wreck Chest #5La Concepcion Wreck | La Concepcion Wreck | The fifth chest within the La Concepcion Wreck can be located inside the ship, in the back, under the main deck. Use the southwestern middle deck entrance and follow, veering to your right into the corridor to reach it. Rewards:
| ||
| La Concepcion Wreck Chest #2La Concepcion Wreck | La Concepcion Wreck | The second chest within the La Concepcion Wreck can be found on the roof of the sunken Mayan Tower. Rewards:
| ||
| La Concepcion Wreck Chest #1La Concepcion Wreck | La Concepcion Wreck | The first chest in La Concepcion Wreck is found northeast of Edward's diving spot, behind the main deck of the shipwreck. It will be in the same area where you find the special secret chest. Rewards:
| ||
| Special Community Chest #2Caribbean Sea | Caribbean Sea | The second Special Community Chest in Assassin's Creed Black Flag Resynced is found in the Chinchorro sector of the Caribbean. Chest Coordinates: 28, 293. Look for it on a rock, halfway down to the bottom of the ocean. Rewards: | ||
| Eleuthera Underwater Chest #2Caribbean Sea | Caribbean Sea | Found at the bottom of the sunken ship by the small unnamed island, south of Fort Eleuthera. Note: Chest coordinates are 694,710. Rewards:
| ||
| Jiguey ChestJiguey | Jiguey | The only "official" chest collectible in Jiguey is found on an upper ledge near the back of the cave. Note: The Chest Coordinates are 536,508. Rewards:
| ||
| Kingston Chest #2Kingston | Kingston | The Triptych is an Art Piece found in Kingston, inside a special chest. Look for the chest in a gazebo located in a restricted area north of the central church. Rewards: | ||
| Florida Chest #1Florida | Florida | Related Quest:The first chest on Florida Island can be found underwater, just off the western coast and northwest of the Florida Viewpoint. You will find it resting just past the lower deck of a shipwreck, through a small underwater cove. Note: Chest Coordinates are 380,800. The chest contains the Gold Locket you'll need to find to complete the "Gold Locket Local Event" in Havana. Rewards:
| ||
| Florida Chest #2Florida | Florida | The second Chest on Florida Island can be found underwater, just off the western coast and northwest of the Florida Viewpoint. You'll find it just a short distance south of Chest #1, down in the ship wreckage and surrounded by coral. Chest Coordinates: 380,798. Rewards:
| ||
| Special Community Chest #1Caribbean Sea | Caribbean Sea | The first Special Community Chest in Assassin's Creed Black Flag Resynced is found in Dry Tortuga, at coordinates 421, 939. Look for it on a rock, halfway down to the bottom of the ocean. Rewards:
| ||
| Kingston Chest #4Kingston | Kingston | The fourth chest in Kingston is found inside the storage building outside the large northwestern manor. Rewards:
| ||
| Matanzas Chest #1Matanzas | Matanzas | The first Chest in Matanzas is located underwater, in the small northeastern gulf. Look for it at coordinates 311,623. Rewards:
| ||
| Matanzas Chest #2Matanzas | Matanzas | The second Matanzas chest is found in the center of the plantation. Look for it outside the building with the guard tower, right by the Alarm Bell. Rewards:
| ||
| Kingston Chest #1Kingston | Kingston | The first Kingston Chest is found on an upper ledge in the eastern forest outside the city. To get to the chest, climb the tree in the small camp southwest of the chest's location. Tree Coordinates: 628, 165. Chest Coordinates: 630, 168. Rewards:
| ||
| Tortuga Chest #1Tortuga Island | Tortuga Island | The first chest on Tortuga Island is located on the northeastern cliff inside the restricted area of the plantation. You will find it just below the Viewpoint near the center of the area, resting between two cannons. Note: Dispatch the two nearby Redcoats before attempting to open it. Rewards:
| ||
| Tortuga Chest #2Tortuga Island | Tortuga Island | The second chest on Tortuga Island is located on the northeastern side of the plantation, directly behind the main manor house. Make your way directly behind the manor and look along the northern back wall, where you can spot the chest sitting right against the staircase. Rewards:
| ||
| Navassa Underwater Chest #2Caribbean Sea | Caribbean Sea | The second chest in the Navassa sector is also found between the two small islands southwest of Ile à Vache. Chest Coordinates: 738, 74. Rewards:
| ||
| Navassa Underwater Chest #1Caribbean Sea | Caribbean Sea | The first chest collectible in the Navassa sector is found between the two small islands southwest of Ile à Vache. Chest Coordinates: 739, 75. Rewards:
| ||
| Crooked Island ChestCrooked Island | Crooked Island | The only Crooked Island chest is located northeast of the village, in a small guarded camp. Look for it next to a rock by the water. Rewards:
| ||
| Corozal ChestCorozal | Corozal | The only chest collectible in Corozal is in the ruined temple on the eastern side of the island. Deal with the bandits guarding it, then loot it for 100% completion. Rewards:
| ||
| Caracol ChestCaracol | Caracol | While exploring Caracol, you must find a single chest. It can be found in a clearing at the end of the narrow southeastern path through the jungle, in front of a small Mayan ruin. Chest Coordinates are: 915,338. Here's how to reach it: Starting from the docks, follow the main path past Padre cooking the pig, and continue up the hill to Dinah's house (these are both characters you meet in the Officer Quest—A Second Chance). Head behind her house, through the tomato patch, and run up the tree branch to the upper-left area. Follow the stone path to the stone statue to find this chest resting just beyond it. Rewards:
| ||
| Ambergris Key ChestAmbergris Key | Ambergris Key | The chest in Ambergris Key is found at the bottom of the underwater tunnel you must use to get inside the cave. Look for it in a larger cave full of jellyfish. Rewards:
| ||
| San Ignacio Wreck Chest #6 (Special Chest)San Ignacio Wreck | San Ignacio Wreck | The sixth chest will contain a design plan. The Hull Armor Ultimate Design Plan is found inside the special chest on the lower deck of the sunken ship in the northern area of San Ignacio Wreck. Rewards: | ||
| San Ignacio Wreck Chest #1San Ignacio Wreck | San Ignacio Wreck | The first San Ignacio Chest is found on the lower deck of the shipwreck on the southern side of the area. Rewards:
| ||
| San Ignacio Wreck Chest #3San Ignacio Wreck | San Ignacio Wreck | The thrid San Ignacio Wreck chest can be found on the lower deck of the sunken ship. Rewards:
| ||
| Arroyos Chest #1Arroyos | Arroyos | The first chest in Arroyos is found underwater. Look for it directly under the southwestern dock. Chest Coordinates : 159, 540 Rewards:
| ||
| Arroyos Chest #2Arroyos | Arroyos | The second chest in Arroyos is also found underwater on the northwestern side of the area. Look for it resting on the ocean floor, right between the perimeter of the village boardwalks and the large rock cliff faces. Chest Coordinates: 157, 544. Rewards:
| ||
| Arroyos Chest #3Arroyos | Arroyos | The third and final chest in Arroyos is located in a small restricted area controlled by the Spanish. Look for the chest east of the village, on the small island, and next to some palm trees. Rewards:
| ||
| San Ignacio Wreck Chest #2San Ignacio Wreck | San Ignacio Wreck | The second chest in the San Ignacio Wreck is found at the back of a sunken ship. Rewards:
|

© MapMaster.io 2024. All rights reserved.