Control Resonant Paranatural Freeze Camera Locations
Paranatural Freeze Cameras are Altered tripod cameras that freeze anything in front of the lens, Dylan included, and Control Resonant hides 14 of them across all eight zones. Shutting every one leads into the Freeze Frame finale, but you’ll need Reach, Shift, and fire before the set is done. Your first camera in the sequel fans once called Control 2 is two floors below Zoe, and the Watchtower map of the floors under Zoe’s office leads you to it.
These pins come from Vlad Susanu’s own Freeze Frame run for Map Master, the site he owns and edits, and the Control Resonant puzzle maps for every zone connect each camera to the rest of the city. Ten of the 14 need a power you don’t start with, so expect to finish most of the set after The Incursion Fault.
How to Disable a Paranatural Freeze Camera
Every camera falls the same way: reach it from behind without being seen, then use Shut Camera Lid. If the lens catches you, Dylan freezes, the camera vanishes, and it only comes back once you walk far enough away. Most drop an Instant Photo when they go dark, and the first Evacuation Zone camera adds an Undefined Reading.
Getting frozen is sometimes part of the plan. In Central, at the first Evacuation Zone camera, and at the Unknown’s laundromat, the freeze lets you open a way in behind the lens. Walk off, let the camera reset, and return by the new route. The Unknown map of the Factory Island laundromat has the clearest example, with a barrier in the back room.
Where Freeze Frame Starts: The Watchtower and Central Freeze Cameras
Walking up to the Watchtower camera starts Freeze Frame, once Welcome to Manhattan is under way. It’s tucked above an unfinished room, so look up through the ceiling rather than along the corridors. Its Instant Photo sends you to the Field Office for a Completed Instant Photo, and many of the photos you collect after that hint at where the next cameras are.
Central has just one camera, on a rooftop in the southwest, and you reach it by gliding over from the parking lot roof to the south, as the Central map of the southwestern warehouse roof shows. This is one to let freeze you first, because the warehouse behind it becomes your way back in.
Freeze Camera Locations That Need Reach or a Power Core
Three cameras open up once The Subway Fault gives you Reach: both in the Evacuation Zone and the first in Downtown. The Evacuation Zone’s southern camera is the easiest in the game, since a Power Core by its back door lets you walk straight in behind it, and the Evacuation Zone map around Railyard Street Station has the other one on a nearby roof.
Power Cores are the key to three cameras. Besides that easy Evacuation Zone one, Downtown’s southern camera below the Deserted Area works the same way, and The Park’s first camera needs a core on the street to run the elevator up to its window-cleaning platform. The Power Core Stations that open doors and lifts explain how charging works.
Freeze Camera Locations That Need Shift or Fire
Six cameras wait for Shift from The Incursion Fault: both in the West Incursion Zone, both in the Underpass, Downtown’s northern camera, and the Unknown’s second. The West Incursion Zone pair are the quickest of the six, one on a roof west of the Vendor and one on a balcony you reach from floating barrels, which the West Incursion Zone map north of the West Supply Route Station places.
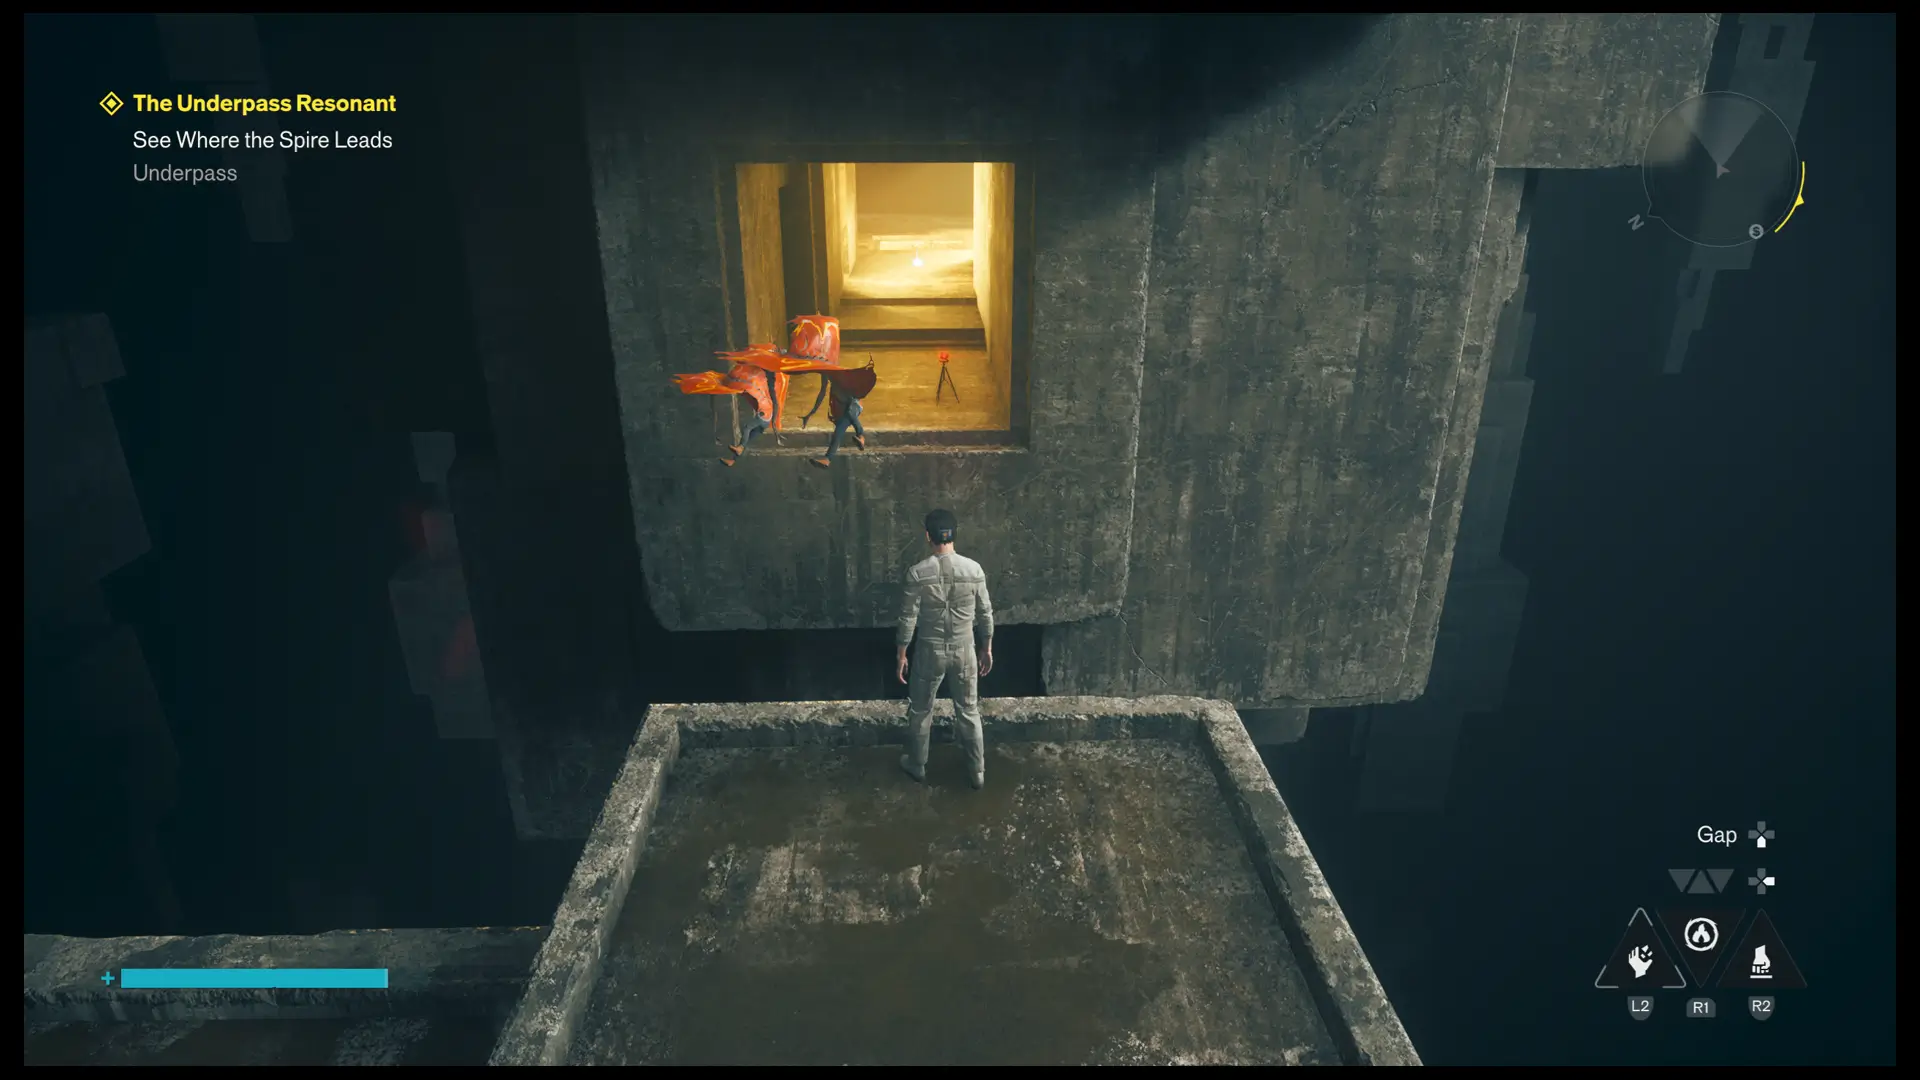
The Underpass pair hide in tunnels halfway up the stone blocks, and the northeastern one also needs Reach and a fight with the elite Thomas, as the Underpass map of Thomas’s stone block tunnel shows. The Park’s second camera is the only one behind a fire barrier, so bring Ignite or Inferno from the Deserter to the Park map of the Nomad Avenue Station checkpoint.
The Freeze Frame Finale: Seven More Freeze Cameras in Downtown
Shut down all 14 and seven more cameras appear inside an enclosure in the research area east of the Oldest House. They stay inside the enclosure, so after you disable the first, watch where the next one appears and work through them one at a time, since getting spotted can reset the round. The Downtown map of the Oldest House research enclosure shows the east side, the easiest way in.
The finale ends Freeze Frame and unlocks a recipe for the Untapped Shiny Pebble, which the Untapped Artifacts you can craft at the Gap describe. Freeze Frame is also one of the six quests behind Panopticon Intern, and the Control Resonant trophy requirements list the other five.
Freeze Camera Count by Zone and the Best Order to Shut Them
Six zones have two cameras each, while Central and the Watchtower have one. Only four need no power at all: the Watchtower, Central, The Park’s first, and the Unknown’s laundromat, though you won’t reach the Unknown until you have Shift anyway. Three need Reach, six need Shift, and one needs fire.
The best order follows the story. Shut the Watchtower and Central cameras right away, the Reach trio after The Subway Fault, and the rest once you have Shift and have beaten the Deserter, then finish in Downtown. Every camera stays where it is after the credits, and the Freeze Frame and the other Altered Item quests list the full objective chain.
| Name | Map Location | Details | Found |
|---|---|---|---|
| Evacuation Zone Freeze Camera #1Evacuation ZoneEvacuation Zone Freeze Camera #1 | Evacuation Zone | The first Evacuation Zone Freeze Camera is found on the roof of the building southeast of the Railyard Street Station. You can reach it after unlocking the Reach Ability by completing The Subway Fault Main Quest. How to Disable the Northern Camera in the Evacuation Zone:
| |
| The Park Freeze Camera #2The ParkThe Park Freeze Camera #2 | The Park | The second Park Freeze Camera is found on the upper floor of the Nomad Avenue Station. How to Disable the Southern Camera in the Park:
| |
| Evacuation Zone Freeze Camera #2Evacuation ZoneEvacuation Zone Freeze Camera #2 | Evacuation Zone | The second Evacuation Zone Freeze Camera is found on the roof of the building on the southeastern side. You should consider approaching it after unlocking the Reach Ability by completing The Subway Fault Main Quest. How to Disable the Southern Camera in the Evacuation Zone:
| |
| Downtown Freeze Camera #1DowntownDowntown Freeze Camera #1 | Downtown | The first Downtown Freeze Camera is found on the street south of the Deserted Area you can explore after unlocking the Reach Ability by completing The Subway Fault Main Quest. How to Disable the Camera in Southern Downtown:
| |
| Central Freeze CameraCentralCentral Freeze Camera | Central | The Central Freeze Camera is found on the roof of the building on the southwestern side of Central Manhattan. You can reach it by elevating and dodging in the air after jumping from the roof of the southern parking lot. How to Disable the Camera in Central Manhattan:
| |
| West Incursion Zone Freeze Camera #1West Incursion ZoneWest Incursion Zone Freeze Camera #1 | West Incursion Zone | The first West Incursion Zone Freeze Camera is found on the roof of the building west of the Vendor. You can approach it only after unlocking the Shift Ability by completing The Incursion Fault Mission in the West Incursion Zone. How to Disable the Northern Camera in the West Incursion Zone:
| |
| West Incursion Zone Freeze Camera #2West Incursion ZoneWest Incursion Zone Freeze Camera #2 | West Incursion Zone | The second West Incursion Zone Camera is found on the balcony halfway up the building north of the West Supply Route Station. You can approach it only after unlocking the Shift Ability by completing The Incursion Fault Mission in the West Incursion Zone. How to Disable the Southern Camera in the West Incursion Zone:
| |
| Downtown Freeze Camera #2DowntownDowntown Freeze Camera #2 | Downtown | The second Downtown Freeze Camera is found inside a room on the roof of a building you can reach using the Shift Ability. How to Disable the Camera in Northern Downtown:
| |
| The Unknown Freeze Camera #1UnknownThe Unknown Freeze Camera #1 | Unknown | The first Freeze Camera in the Unknown area is found at the entrance to the Wash'em & Wear'em laundromat on Factory Island. How to Disable the Southern Camera in the Unknown:
| |
| The Unknown Freeze Camera #2UnknownThe Unknown Freeze Camera #2 | Unknown | The second Freeze Camera in the Unknown is found on the ground floor of the mold-infested building under construction in the central section of the region. How to Disable the Central Camera in the Unknown:
| |
| Underpass Freeze Camera #1UnderpassUnderpass Freeze Camera #1 | Underpass | The first Underpass Freeze Camera is found in the tunnel halfway up the northeastern stone block. How to Disable the Northern Camera in the Underpass :
| |
| Underpass Freeze Camera #2UnderpassUnderpass Freeze Camera #2 | Underpass | The second Underpass Freeze Camera is found in the tunnel halfway up the stone block south of Tubes Island. How to Disable the Western Camera in the Underpass :
| |
| The Park Freeze Camera #1The ParkThe Park Freeze Camera #1 | The Park | The first Park Freeze Camera is found on the window-cleaning platform above the southern Sewer Entrance. How to Disable the Eastern Camera in the Park:
| |
| Watchtower Freeze CameraWatchtowerWatchtower Freeze Camera | Watchtower | The Watchtower Freeze Camera is found in the Watchtower. To find it, exit Zoe's office and head left down the stairs by the Underground Supply Route sign. Descend two floors, then head left and right to get to a room under construction. Elevate through the hole in the ceiling (the one above the scaffolding). Once you approach it, you'll trigger the Freeze Frame Side Quest. How to Disable the Camera in the Watchtower:
|

© MapMaster.io 2024. All rights reserved.