Control Resonant Power Core Stations and How to Charge Them
Control Resonant has 76 Power Core Stations: 28 Active ones you charge your weapon from and 46 Inactive ones you bring that charge to, plus two quest stations in the Oldest House. They open doors, start elevators, and drive several quests, and Central has the most at 23. For Control 2 searchers, the Downtown map of the Welcome to Manhattan relay shows the first puzzle the story makes you solve.
Vlad Susanu charged every core himself while mapping Control Resonant for Map Master, and the Control Resonant puzzle and route maps cover the rest of Manhattan. Which core powers which is in the list below. Read on for the rule, the quests built on it, and what all that charging actually unlocks.
How to Solve Power Core Station Puzzles: Charge an Active Core, Hit an Inactive One
Every Power Core puzzle uses one rule. Hit an Active station to charge your weapon, then take the charge to an Inactive station and hit it before the charge fades, which takes about 20 seconds. A charge parked in a core waits there, so on long routes you can rest at a powered core before the next leg.
The twists come from the route, not the rule. Some puzzles keep you on the rooftops, some need a fast run across a gap, and the hardest ask you to open a door first so the way back is clear in time. If a charge keeps fading, look for a shorter path or an open door before you try again.
Downtown Power Core Stations: The Welcome to Manhattan Relay and More
The story’s first relay uses six stations: one Active core by the gate to the Deserted Area and five Inactive ones leading to the Central Checkpoint, the crossing out of Downtown. The charge changes direction several times, so read the Power Core Servicing Diagram first, since it numbers every core in order.
Downtown has 11 stations in all. Two more serve a Freeze Camera south of the Deserted Area, and the Freeze Camera solutions show the cameras that use a Power Core trick instead of the usual freeze. The House in Distress adds two stations and a pattern puzzle in the Interactions Lab, where the solution is a sequence of shapes on a wall of cores.
Power Core Stations Built Into Quests
Power Lines has eight, spread across the underground stations Dylan reroutes, and the Central map of the Vanished Station and Perimeter Station places both. In Vanished Station, powering the right cores also shuts off the lights the Mold grows from, which matters for the calibration steps.
The Underpass has six, all tied to quests. Three Active cores in Recursions and Iterations restore power to the Research Site office near Ayad, reached with Shift, and three Inactive cores take part in fixing the Electrosensitive Bulb in Maintenance Protocol. The Underpass map of the Research Site offices shows both groups.
Power Core Stations in the Testing Facilities
Sixteen stations are inside the Testing Facilities, where moving charge between cores for 60 seconds is how three of the six labs are shut down: Central has four, The Park five, and the Unknown five. The Testing Facility Power Core balance explains the pillar colors that tell you where to move it next.
The Unknown lab has two more in the tunnel beyond it, on the way to the Threshold at the end of Unsupervised Science. The Unknown map of the security gates also has three open-world stations behind a jump you can only make with Shift, tied to a locked security door and gate.
Power Core Stations That Open Loot, Shortcuts, and Elevators
The best payoffs come from optional cores. Under the Watchtower, the Watchtower map with the sewer shortcut has five stations, and two of their iron doors hide a Power Upgrade crate and a tunnel back to the elevator. In Central, cores open the Patterned Factory’s Generator Room and start the elevator up to the Dig Site Threshold.
The Park has 14 stations, and the Park map of the Mold Colony shows the elevators they power, including the one up to the Mysterious Dog’s toy. The Evacuation Zone map with the Hiss Node garage has a rooftop core that unlocks that garage, and several of these doors guard Large Resource Crates behind powered doors.
Power Core Station Locations by Zone and What’s Optional
There are 76 Power Core Stations: 23 in Central, 14 in The Park, 11 in Downtown, ten in the Unknown, six in the Underpass, five each in the Evacuation Zone and the Watchtower, and two in the West Incursion Zone. The West Incursion Zone map of the House of Mirrors lobby has that pair, one inside and one up the street.
42 of the 76 belong to quests or labs, and the other 34 are optional puzzles in the open world. None of them are missable, since every station stays in place after the credits, and a puzzle you can’t finish early usually just needs Shift or a shorter route.
| Name | Map Location | Details | Found |
|---|---|---|---|
| Active Power Core StationCentralActive Power Core Station | Central | Found in the lower area of the Central FBC Testing Facility, the Core Station must be used to shut down the experiments, after interacting with the nearby terminal. | |
| Active Power Core StationCentralActive Power Core Station | Central | Found in the lower area of the Central FBC Testing Facility, the Core Station must be used to shut down the experiments after interacting with the nearby terminal. | |
| Active Power Core StationCentralActive Power Core Station | Central | Found on the upper ledge of the Central FBC Testing Facility, the Core Station must be used to shut down the experiments after interacting with the nearby terminal. | |
| Active Power Core StationCentralActive Power Core Station | Central | Found by the large metal door in the upper section of the Central FBC Testing Facility, the Core Station must be used to shut down the experiments after interacting with the nearby terminal. | |
| Active Power Core StationEvacuation ZoneActive Power Core Station | Evacuation Zone | Found at the intersection southwest of the Evac Building. Use it to charge your weapon and activate all nearby Inactive Power Cores. | |
| Inactive Power Core StationEvacuation ZoneInactive Power Core Station | Evacuation Zone | Found on the roof of the building. You can activate it from the northeastern Active Power Core Station. After you activate the power core, head to the southern back alley to find a garage that is unlocked. Inside, you'll find one of the Hiss Nodes you'll need to destroy. | |
| Inactive Power Core StationEvacuation ZoneInactive Power Core Station | Evacuation Zone | Found on the street. You can activate it from the eastern Active Power Core Station. | |
| Inactive Power Core StationEvacuation ZoneInactive Power Core Station | Evacuation Zone | Found on the wall of the building by the street. You can activate it from the eastern Power Core Station. | |
| Inactive Power Core StationEvacuation ZoneInactive Power Core Station | Evacuation Zone | Found by the locked door on the roof. You can activate it from the southeastern Power Core Station to open the locked door. | |
| Interactions Lab Power Core Station PuzzleDowntownInteractions Lab Power Core Station Puzzle | Downtown | The Power Core Station Puzzle must be solved as part of the House in Distress Quest, while visiting the Interactions Lab in the Prime Candidate Training area of the Oldest House. To start the puzzle, first activate the Power Core Station by the door of the room with multiple Power Cores, then get inside the room and hit one of the active stations. Eventually, you'll be locked inside, and you'll have to find a way to get out. Here is how to deal with this:
| |
| Power Core Station x2DowntownPower Core Station x2 | Downtown | The Power Core Stations are found in the Interactions Lab area of the Prime Candidate Training. You'll discover them while playing the House in Distress Quest, and you'll have to power both of them to progress the quest. To do so, start by carrying the energy from the active core to the door that you'll have to enter to solve the Interactions Lab Power Core Station Puzzle; then, once the puzzle is complete, carry the energy back to power both cores. | |
| Inactive Power Core StationDowntownInactive Power Core Station | Downtown | Found on the roof of the building. Activate it from the northwestern Power Core while working on disabling the Downtown Freeze Camera. | |
| Active Power Core StationDowntownActive Power Core Station | Downtown | Found at the intersection east of the Lookout Point. Use it to charge your weapon and activate all nearby Inactive Power Cores. | |
| Inactive Power Core StationDowntownInactive Power Core Station | Downtown | Found by the door at the back of the office where the Freeze Camera is located. Activate from the northern Power Core. | |
| Active Power Core StationCentralActive Power Core Station | Central | Found on the ground floor of the office on the street east of the Southeast Gate. To reach the station, you need the Level 2 Security Card from the Evacuation Zone. Use the Power Core to activate the one outside on the upper floor. | |
| Inactive Power Core StationCentralInactive Power Core Station | Central | Found on the upper floor of the office on the street east of the Southeast Gate. You can activate it using the Core on the ground floor, but to get inside, you need the Level 2 Security Card from the Evacuation Zone. Once activated, you'll be able to enter the office. | |
| Inactive Power Core StationWest Incursion ZoneInactive Power Core Station | West Incursion Zone | Found at the end of the street northwest of the House of Mirrors. You can charge it from the Active Power Core Station inside the House of Mirrors. | |
| Active Power Core StationWest Incursion ZoneActive Power Core Station | West Incursion Zone | Found in the lobby of the House of Mirrors. You can use it to charge the northwestern Inactive Power Core Station. | |
| Inactive Power Core StationUnderpassInactive Power Core Station | Underpass | Found halfway up the stone block. Charge it while working on fixing the Electrosensitive Bulb. | |
| Inactive Power Core StationUnderpassInactive Power Core Station | Underpass | Found halfway up the stone block. Charge it while working on fixing the Electrosensitive Bulb. | |
| Inactive Power Core StationUnderpassInactive Power Core Station | Underpass | Found halfway up the stone block. Charge it while working on fixing the Electrosensitive Bulb. | |
| Active Power Core StationUnknownActive Power Core Station | Unknown | Found on the street, past a gap you can jump over, and after using the Shift Ability. | |
| Inactive Power Core StationUnknownInactive Power Core Station | Unknown | Found behind the locked security door. Activate it from the western core. | |
| Inactive Power Core StationUnknownInactive Power Core Station | Unknown | Found in front of the locked security gate. You can activate it from the western core; however, make sure you jump over the tall fence above the western security door. | |
| Active Power Core StationUnknownActive Power Core Station | Unknown | Found in the upper area of the Unknown FBC Testing Facility, the Core Station must be used to shut down the experiments after interacting with the nearby terminal. | |
| Inactive Power Core StationUnknownInactive Power Core Station | Unknown | Found in the upper area of the Unknown FBC Testing Facility, the Core Station must be used to shut down the experiments after interacting with the nearby terminal. | |
| Inactive Power Core StationUnknownInactive Power Core Station | Unknown | Found in the upper area of the Unknown FBC Testing Facility, the Core Station must be used to shut down the experiments after interacting with the nearby terminal. | |
| Active Power Core StationUnknownActive Power Core Station | Unknown | Found in the lower area of the Unknown FBC Testing Facility, the Core Station must be used to shut down the experiments after interacting with the nearby terminal. | |
| Active Power Core StationUnknownActive Power Core Station | Unknown | Found in the lower area of the Unknown FBC Testing Facility, the Core Station must be used to shut down the experiments after interacting with the nearby terminal. | |
| Active Power Core StationUnknownActive Power Core Station | Unknown | Found on the wall in the tunnel past the locked door, which you can open after you shut down the Testing Facility Dutch in the Unknown. After you destroy the Power Panel, carry the energy from the power core to the one in the next tunnel on your way towards the Threshold during the Unsupervised Science Quest. | |
| Inactive Power Core StationUnknownInactive Power Core Station | Unknown | Found on the wall in the tunnel past the locked door, which you can open after you shut down the Testing Facility Dutch in the Unknown. After you destroy the Power Panel, carry the energy from the active power core to the inactive one on your way to the Threshold during the Unsupervised Science Quest. | |
| Active Power Core StationCentralActive Power Core Station | Central | Found in the underground Perimeter Station, you'll explore during the Power Lines Quest. Use it to activate the Power Station on the other side of the corridor and get to the resource crate. Once you do that, make sure you carry the energy back because the door by the station must remain open. | |
| Inactive Power Core StationCentralInactive Power Core Station | Central | Found in the underground Perimeter Station, which you'll explore during the Power Lines Quest. Activate it from the Power Station on the other side of the corridor. | |
| Inactive Power Core StationCentralInactive Power Core Station | Central | Found in the underground Perimeter Station, which you'll explore during the Power Lines Quest. Look for it at the end of the tunnel, and activate it from the Power Station on the upper floor to open the nearby door. | |
| Inactive Power Core StationCentralInactive Power Core Station | Central | The Inactive Power Core Station is found in the underground Vanished Station you'll explore during the Power Lines Quest. Look for it near the Platform B Calibration Device. After finding the Calibration Devices near Dr. Florez and carrying them to the squares nearby, make sure the station is powered up. | |
| Active Power Core StationCentralActive Power Core Station | Central | Found in the upper section of the underground Vanished Station Platform B, which you'll reach during the Power Lines Quest. Use it to power the core by the door and to shut down the lights feeding the Mold. | |
| Inactive Power Core StationCentralInactive Power Core Station | Central | Found in the upper section of the underground Vanished Station Platform B, which you'll reach during the Power Lines Quest. It can be powered from the nearby core. | |
| Inactive Power Core StationCentralInactive Power Core Station | Central | Found by the wall near the underground Vanished Station Platform A Calibration Device you must activate during the Power Lines Quest. Make sure you power it up using one of the Active Cores found around Platform B. | |
| Active Power Core StationUnderpassActive Power Core Station | Underpass | During the Recursions and Iterations Quest, while working on restoring the power of the Underpass Research Site, follow the yellow tape on the ground to find the office on the eastern side. Use the Shift ability to reach it, then carry the power from the Active Power Core to one of the Inactive Cores in the office near Ayad. | |
| Active Power Core StationUnderpassActive Power Core Station | Underpass | During the Recursions and Iterations Quest, while working on restoring the power of the Underpass Research Site, follow the yellow tape on the ground to find the office on the southwestern side. Use the Shift ability to reach it, then carry the power from the Active Power Core to one of the Inactive Cores in the office near Ayad. | |
| Active Power Core StationUnderpassActive Power Core Station | Underpass | During the Recursions and Iterations Quest, while working on restoring the power of the Underpass Research Site, follow the yellow tape on the ground to find the office on the northwestern side. Use the Shift ability to reach it, then carry the power from the Active Power Core to one of the Inactive Cores in the office near Ayad. | |
| Active Power Core StationCentralActive Power Core Station | Central | The Active Power Core Station is found in the underground Vanished Station you'll explore during the Power Lines Quest. Look for it at the bottom of the stairs in front of the Platform B Calibration Device. After finding the Calibration Devices near Dr. Florez and carrying them to the squares nearby, make sure the station is powered up. | |
| Active Power Core StationDowntownActive Power Core Station | Downtown | The Charged Power Core Station is found in front of the southeastern gate leading to the Deserted Area. Use it to charge your weapon and carry the charge to the northwestern Inactive Power Core. Note: Moving the Charge to nearby inactive Power Cores is a mandatory step in the Welcome to Manhattan Main Quest. | |
| Inactive Power Core StationDowntownInactive Power Core Station | Downtown | The Inactive Power Core Station is found at the intersection near the Orientation Point. Carry the charge from the southeastern Active Power Core during the Welcome to Manhattan Main Quest. | |
| Inactive Power Core StationDowntownInactive Power Core Station | Downtown | The Inactive Power Core Station is found in the back alley. Carry the charge from the southeastern Active Power Core during the Welcome to Manhattan Main Quest. | |
| Inactive Power Core StationDowntownInactive Power Core Station | Downtown | The Inactive Power Core Station is found on the roof of the building. Carry the charge from the southwestern Active Power Core during the Welcome to Manhattan Main Quest. | |
| Inactive Power Core StationDowntownInactive Power Core Station | Downtown | The Inactive Power Core Station is found in the enclosed area east of the Oldest House. Carry the charge from the southern Active Power Core during the Welcome to Manhattan Main Quest. | |
| Inactive Power Core StationDowntownInactive Power Core Station | Downtown | The Inactive Power Core Station is found on the street in front of the Central Checkpoint. Carry the charge from the southern Active Power Core during the Welcome to Manhattan Main Quest. | |
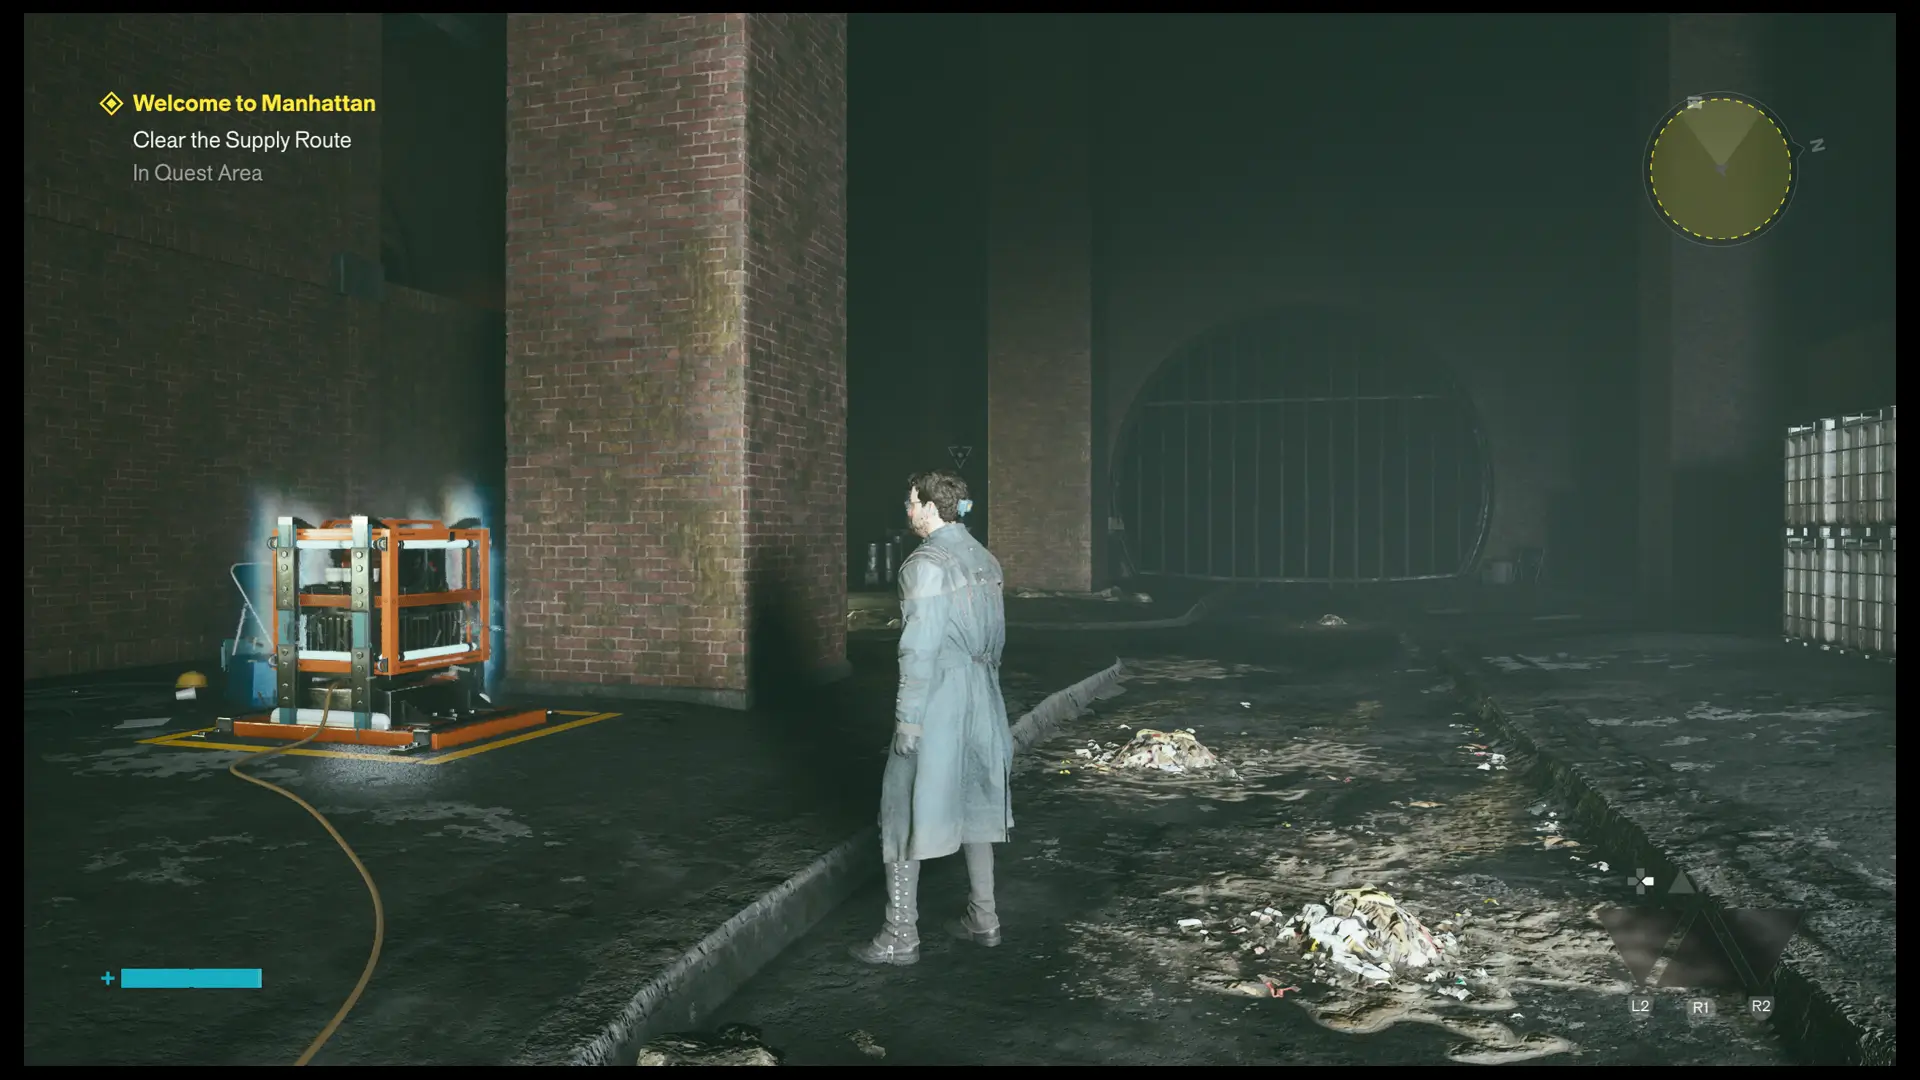
| Active Power Core StationWatchtowerActive Power Core Station | Watchtower | The Charged Power Core Station is found in the Underground Supply Route area, under the Watchtower. Look for it by the pillar in the large sewers hall after taking the Watchtower elevator. Use it to charge your weapon and carry the charge to the two Inactive Power Core Stations by the sealed doors. | |
| Inactive Power Core StationWatchtowerInactive Power Core Station | Watchtower | The Power Core Station is found in the Underground Supply Route area, under the Watchtower. Look for it next to a locked iron door on the upper ledge after taking the Watchtower elevator. Charge it using the nearby Active Power Core Station. | |
| Inactive Power Core StationWatchtowerInactive Power Core Station | Watchtower | The Power Core Station is found in the Underground Supply Route area, under the Watchtower. Look for it next to a large locked iron door on the upper ledge after taking the Watchtower elevator. Charge it using the nearby Active Power Core Station. | |
| Inactive Power Core StationWatchtowerInactive Power Core Station | Watchtower | The Power Core Station is found in the Underground Supply Route area, under the Watchtower. Look for it next to a locked iron door halfway through the sewers. Charge it using the nearby Active Power Core Station. Note: By activating this Power Core Station, you'll unlock the iron door next to it. Behind it is a tunnel leading back to the Watchtower elevator. It is a very useful shortcut. | |
| Active Power Core StationWatchtowerActive Power Core Station | Watchtower | The Charged Power Core Station is found in the Underground Supply Route area, in the hall where you must fight William. Use it to activate the Power Core Station in the nearby tunnel. | |
| Inactive Power Core StationCentralInactive Power Core Station | Central | Found on the wall of the small room on the roof of the building. You can charge it from the northeastern Power Station after you activate it. Make sure you stay on the rooftops. | |
| Active Power Core StationThe ParkActive Power Core Station | The Park | Found on the street outside the FBC Base. Use it to transfer power to the nearby Core Station and gain access to the Resource Crate under the mold. | |
| Inactive Power Core StationThe ParkInactive Power Core Station | The Park | Found on the street outside the FBC Base. Use it to transfer power from the nearby Core Station and gain access to the Resource Crate under the mold. | |
| Inactive Power Core StationThe ParkInactive Power Core Station | The Park | Found on the wall of the room on the roof of the FBC Base. You can activate it from the core on the street. | |
| Inactive Power Core StationThe ParkInactive Power Core Station | The Park | Found at the edge of the roof. You can activate it from the core on the room wall to power the nearby elevator. | |
| Inactive Power Core StationThe ParkInactive Power Core Station | The Park | Found under the elevator on the street north of the Park FBC Base. You can activate it from the southern Power Core to power up the elevator. | |
| Active Power Core StationCentralActive Power Core Station | Central | Found by the street south of Patterned Factory. Use it to charge your weapon and activate all nearby Inactive Power Cores. | |
| Inactive Power Core StationCentralInactive Power Core Station | Central | Found on the surface, on the wall of the Patterned Factory. You can charge it from the southwestern Active Power Core Station to open the door on the right side. | |
| Inactive Power Core StationCentralInactive Power Core Station | Central | Found on the upper floor of the Patterned Factory. You can activate it using the southern Active Power Core Station; however, you have to make sure that the eastern Patterned Factory door stays open because you'll need to get to the station in time. Once you activate the core, it will unlock the door to the generator room. | |
| Inactive Power Core StationCentralInactive Power Core Station | Central | Found in the Patterned Factory Warehouse. You can activate it from the Power Core Station outside the Generator Room after you loot both crates. | |
| Inactive Power Core StationCentralInactive Power Core Station | Central | Found at the base of the Patterned Factory Warehouse wall. You can activate it from the southeastern Active Power Core Station to activate the elevator on the wall. | |
| Inactive Power Core StationCentralInactive Power Core Station | Central | Found on the roof of the building. You can charge it from the northeastern Active Power Core Station, but you have to move fast. Once you charge the core, you'll open the door on the right side. | |
| Active Power Core StationThe ParkActive Power Core Station | The Park | Found outside the Mold Colony on the northern side of the Park. Use the Power Core Station to activate all nearby inactive cores. | |
| Active Power Core StationCentralActive Power Core Station | Central | Found on top of the mold formation. The Power Core Station powers the nearby elevator. | |
| Inactive Power Core Station x2The ParkInactive Power Core Station x2 | The Park | Found inside the room on the roof. You can get inside via the blue door covered in mold or by removing the Ability Barrier above. You can activate one of them from the western station. | |
| Inactive Power Core StationCentralInactive Power Core Station | Central | Found on the roof of the building. You can charge it from the northeastern Power Station after you activate it. This will activate the elevator that can take you to the Dig Site Threshold. | |
| Inactive Power Core StationThe ParkInactive Power Core Station | The Park | Found at the end of the street, under the elevator. You have to activate it from the Core Stations inside the small room on the roof to power up the elevator and reach the Dog's Toy. | |
| Active Power Core StationThe ParkActive Power Core Station | The Park | Found in the upper area of the Park FBC Testing Facility, the Core Station must be used to shut down the experiments after interacting with the nearby terminal. | |
| Active Power Core StationThe ParkActive Power Core Station | The Park | Found in the upper area of the Park FBC Testing Facility Vessey, the Core Station must be used to shut down the experiments after interacting with the nearby terminal. | |
| Inactive Power Core StationThe ParkInactive Power Core Station | The Park | Found in the central area of the Park FBC Testing Facility Vessey, the Core Station must be used to shut down the experiments after interacting with the nearby terminal. | |
| Inactive Power Core StationThe ParkInactive Power Core Station | The Park | Found in the central area of the Park Testing Facility Vessey, the Core Station must be used to shut down the experiments after interacting with the nearby terminal. | |
| Inactive Power Core StationThe ParkInactive Power Core Station | The Park | Found in the upper area of the Park Testing Facility, the Core Station must be used to shut down the experiments after interacting with the nearby terminal. |

© MapMaster.io 2024. All rights reserved.