How to Open Ability Barriers in Control Resonant
Control Resonant has 39 Ability Barriers across seven zones, and every one opens with Ground Slam, a fire ability, or a plain weapon strike. In the sequel many still call Control 2, that means 13 open the moment you reach them, while the rest wait on two Resonant fights. Downtown, Central, and The Park have eight each, and the Control Resonant Downtown interactive map is where the first rooftop panels appear.
Vlad Susanu found every barrier in our table while playing through Manhattan for Map Master, and our Control Resonant wiki ties them to the bosses, quests, and zone maps around them. Use the table for exact spots, and the sections below for which power to get first and when to come back.
How to Open Ability Barriers in Control Resonant: Roof Panels, Fire, and Switches
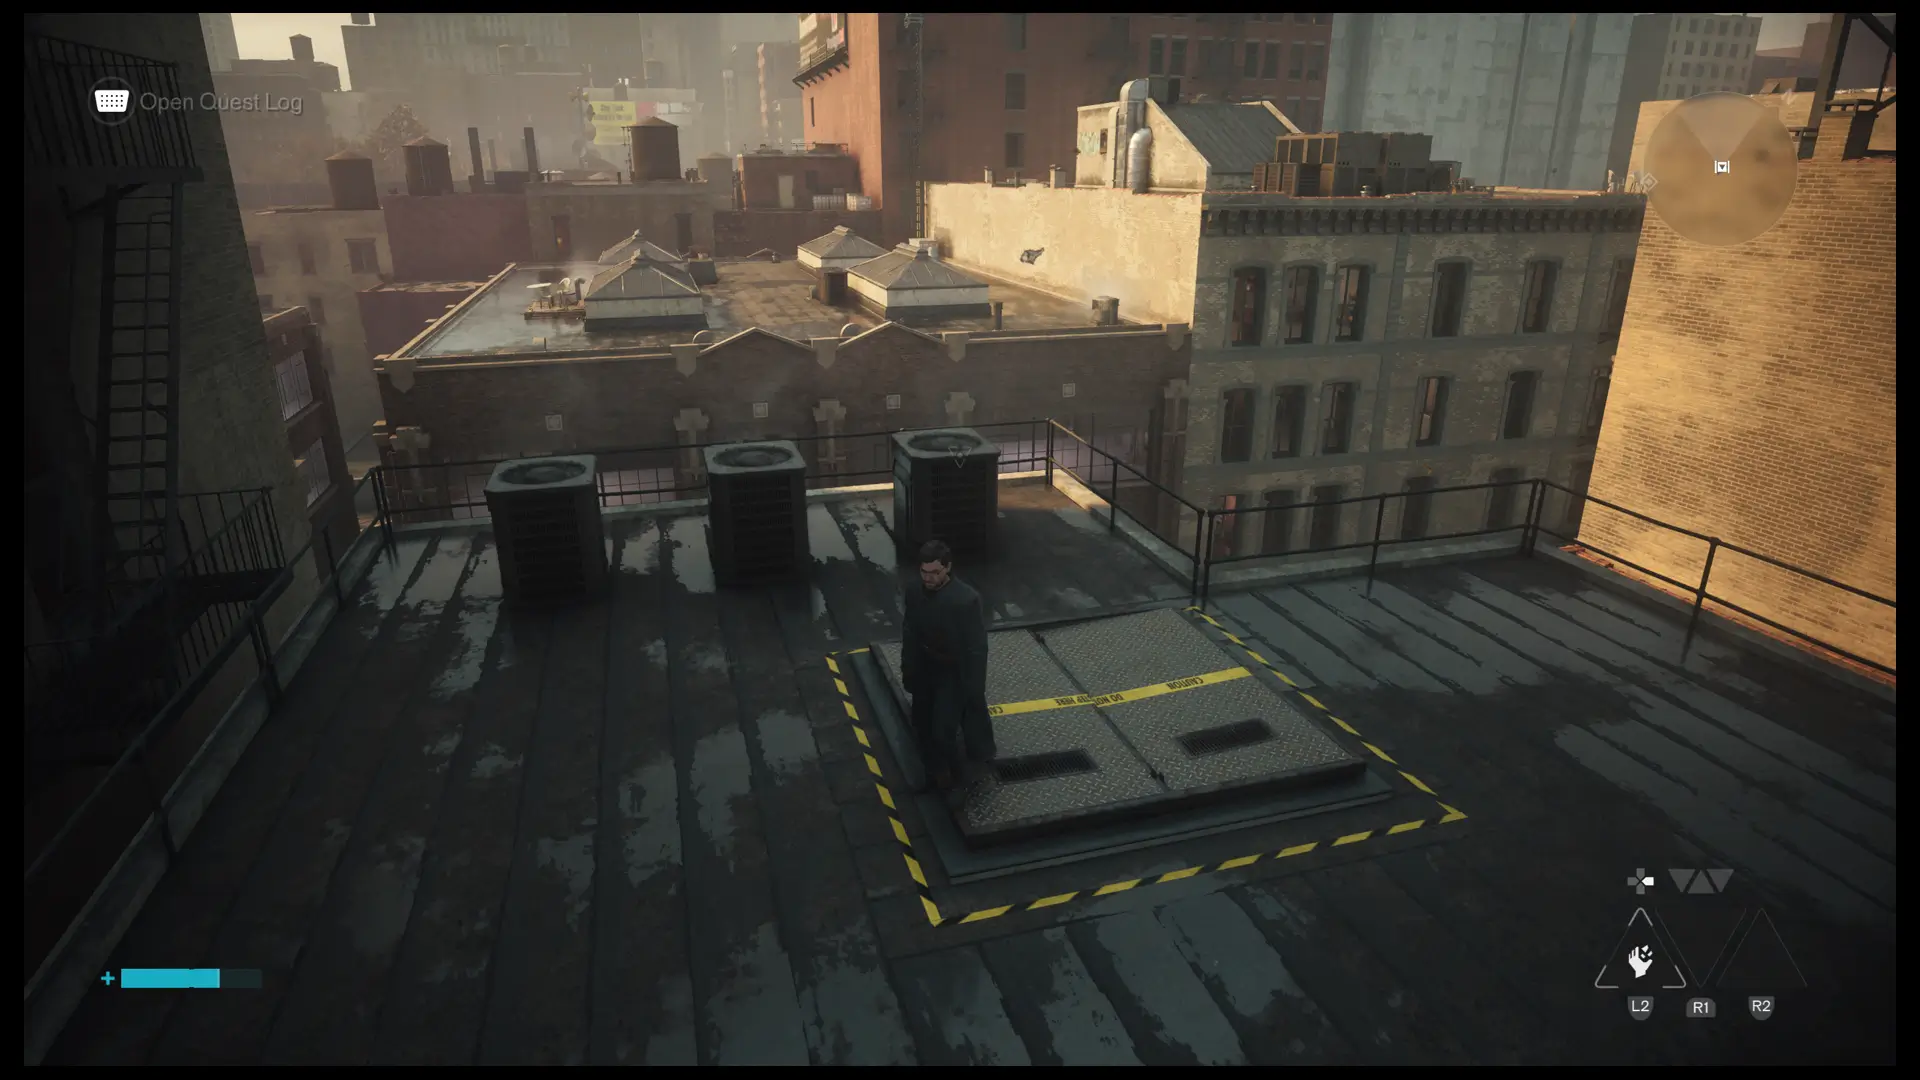
Ground Slam opens 16 barriers, almost all of them metal roof panels, and it comes from the Dancer in the West Incursion Zone. Fire opens 10, using Ignite or Inferno from the Deserter in Central to burn away mold or the nets strung across The Park. The other 13 are control panels and red switches that open with any melee hit.
Panel barriers are the only kind you can approach from the wrong side. Several doors in Central and Downtown open from inside the building, so if a panel isn’t in view, look for a roof door or an underground entrance instead of circling the street. Boarded-up storefronts aren’t Ability Barriers at all, though a few weapon swings break them too.
Ground Slam or Push? Opening Rooftop Ability Barriers Before the Dancer
You don’t have to wait for the Dancer. Charging a heavy attack with the Crush form smashes a roof panel, so a Crush build can open all 16 rooftop barriers early, and our guide to Crush and the other Aberrant Forms explains how to unlock it if it wasn’t your free pick.
When the Dancer falls, take Ground Slam over Push unless your build relies on Crush, because roof panels are the biggest barrier group. You can swap that pick freely until you leave the Gap, and changing it later costs a Reset Item, one of the rewards from the disguised Vending Machines in Control Resonant.
Chose Push anyway? After the story, Pope’s Research in the Unknown awards a Resonant Token. It adds one more power from your earlier Resonant choices without removing the one you took. Until then, a charged Crush still opens every roof panel, so picking Push costs little if Crush is in your loadout.
Fire-Gated Ability Barriers: Mold, Nets, and the Deserter
All 10 fire barriers wait on the Deserter, and either Ignite or Inferno works, so pick the one that suits your combat style. Our interactive map of Central places his Patterned Factory, which makes that fight the one to plan before chasing fire barriers in other zones.
The Control Resonant Park map has four of them, the most of any zone, including the nets along its northern street. The Underpass has two, and Downtown, the Evacuation Zone, the West Incursion Zone, and the Unknown have one each, so a single fire sweep after the Deserter touches six zones.
Control Resonant Ability Barriers by Zone, and the Seven That Need Shift
After the three eight-barrier zones come five on the West Incursion Zone map, four each in the Unknown and on the Evacuation Zone interactive map, and two in the Control Resonant Underpass map. The Watchtower has none. Downtown, Central, and The Park account for 24 of the 39, more than 60 percent of the set.
Seven barriers need Shift just to reach: three Downtown rooftops and alleys, three across the Unknown interactive map, and one on an Underpass ceiling. Shift comes from Jesse Sightings: The Incursion Fault, so wall-walking turns zones you’ve cleared into a short return trip.
Two of Central’s barriers belong to the Power Lines main mission and open as the story demands, and both are simple panels that need no power. Central’s back-alley switch is easiest to reach during Crossing the Threshold, one of the Control Resonant side quests.
When to Clear Every Control Resonant Ability Barrier
With Crush equipped, 29 of the 39 open before either Resonant power: the 13 panels and the 16 Ground Slam barriers. Break those as you pass, then sweep the 10 fire barriers once the Deserter is beaten and Shift is unlocked, which clears the full list in one trip per zone.
No barrier is lost for good, since every zone stays reachable after the story and even a skipped Ground Slam has two ways back. Rooftop barriers often lead to more than loot, too, as a few Freeze Frame Cameras in our Paranatural Freeze Camera locations can only be reached by dropping through one.
| Name | Map Location | Details | Found |
|---|---|---|---|
| Downtown Ability Barrier #3DowntownDowntown Ability Barrier #3 | Downtown | Found in the subway station accessed via the northern entrance. You can't reach it before dealing with the Deserter Resonant in Central Manhattan. To remove the barrier, you must hit it using a fire-based attack: Inferno or Ignite, unlocked by defeating the Central Resonant. | |
| Evacuation Zone Ability Barrier #1Evacuation ZoneEvacuation Zone Ability Barrier #1 | Evacuation Zone | Found along the northwestern street in the Evacuation Zone. To open it, hit the panel on the left side with your weapon. | |
| Evacuation Zone Ability Barrier #2Evacuation ZoneEvacuation Zone Ability Barrier #2 | Evacuation Zone | Found on the middle floor of the building under construction west of the Railyard Street Station in the Evacuation Zone. To unlock the door, you must attack it using a fire-based attack: Inferno or Ignite, unlocked by defeating the Resonant in Central Manhattan. | |
| Evacuation Zone Ability Barrier #3Evacuation ZoneEvacuation Zone Ability Barrier #3 | Evacuation Zone | Found at the end of the street north of the Railyard Street Station in the Evacuation Zone. To open it, hit the panel on the left side with your weapon. | |
| The Park Ability Barrier #8The ParkThe Park Ability Barrier #8 | The Park | Found on the upper side of Nomad Avenue Station. You can unlock it using a fire-based attack. | |
| Evacuation Zone Ability Barrier #4Evacuation ZoneEvacuation Zone Ability Barrier #4 | Evacuation Zone | Found on the roof of the building southeast of the Sinkhole in the Evacuation Zone. The barrier requires the Ground Slam ability, unlocked after defeating The Dancer Resonant. The Ability barrier grants access to the room below. | |
| Downtown Ability Barrier #4DowntownDowntown Ability Barrier #4 | Downtown | Found on the roof of the building northeast of the Lookout Point in Downtown. It requires the Ground Slam ability, unlocked after defeating The Dancer Resonant, and it grants access to the room below. | |
| West Incursion Zone Ability Barrier #1West Incursion ZoneWest Incursion Zone Ability Barrier #1 | West Incursion Zone | Found in the subway station, accessed via the eastern entrance. To remove the barrier, you must hit it with a fire-based attack: Inferno or Ignite, unlocked by defeating the Central Resonant. | |
| West Incursion Zone Ability Barrier #2West Incursion ZoneWest Incursion Zone Ability Barrier #2 | West Incursion Zone | The Ability Barrier is found on the top floor of the building under construction southwest of the House of Mirrors. It requires the Ground Slam ability, unlocked after defeating The Dancer Resonant. | |
| West Incursion Zone Ability Barrier #3West Incursion ZoneWest Incursion Zone Ability Barrier #3 | West Incursion Zone | Found inside the Parking Garage. You can find it on your way out after completing The Incursion Fault quest. Look for it on the first floor; you'll get to explore and hit the panel with a melee attack. | |
| West Incursion Zone Ability Barrier #4West Incursion ZoneWest Incursion Zone Ability Barrier #4 | West Incursion Zone | Found inside the underground West Supply Route Station, which you can access via the northern entrance. After reaching the subway station, continue up the stairs ahead, and you'll find it at the end of the corridor. Hit it with a melee attack to unlock a shortcut. | |
| Downtown Ability Barrier #5DowntownDowntown Ability Barrier #5 | Downtown | Found on the roof of the building you can reach using the Shift Ability. To remove it, you'll need the Ground Slam Ability, unlocked by defeating The Dancer Resonant. | |
| Downtown Ability Barrier #6DowntownDowntown Ability Barrier #6 | Downtown | Found on the roof of the building you can reach using the Shift Ability. To remove it, you'll need the Ground Slam Ability, unlocked after defeating The Dancer Resonant. | |
| Downtown Ability Barrier #7DowntownDowntown Ability Barrier #7 | Downtown | Found at the end of the alley east of the West Supply Route Station. You can get close to it using the Shift Ability. Hit the switch outside to remove it. | |
| Unknown Ability Barrier #1UnknownUnknown Ability Barrier #1 | Unknown | Found on the lower roof of the building. Consider using the Shift Ability if needed, then use the Ground Slam to remove it. | |
| Unknown Ability Barrier #2UnknownUnknown Ability Barrier #2 | Unknown | Found in the back of the Wash'em & Wear'em laundromat, past the freeze camera. Let the camera freeze you; then, once it vanishes, head inside and remove the ability barrier by hitting the panel on the wall. | |
| Downtown Ability Barrier #8DowntownDowntown Ability Barrier #8 | Downtown | Found on the ground floor of the Auction House. Hit the red panel on the left side to open the door to the Auction House. You can do it from inside after entering the building via the door on the roof. | |
| West Incursion Zone Ability Barrier #5West Incursion ZoneWest Incursion Zone Ability Barrier #5 | West Incursion Zone | Found on the lower street you'll cross on your way to the West Incursion Zone Resonant. Melee the panel by the garage door to get inside. | |
| Unknown Ability Barrier #3UnknownUnknown Ability Barrier #3 | Unknown | Found on the lower level of the mold-infected building under construction after using the Shift Ability. Use a fire-based attack to remove the barrier. | |
| Unknown Ability Barrier #4UnknownUnknown Ability Barrier #4 | Unknown | Found on the lower roof of a building after using the Shift Ability. Use Ground Slam to open it. | |
| Central Ability Barrier #7CentralCentral Ability Barrier #7 | Central | Found on the upper floor of the East Park Station. To reach the area behind it, you have to interact with the Calibration Device below until it teleports you to the locked room (Power Lines Quest mandatory step). Hit the panel with a melee attack to open the gate. | |
| Central Ability Barrier #8CentralCentral Ability Barrier #8 | Central | Found at the end of the upper section of the Vanished Section Platform B. You'll reach it during the Power Lines Quest, and you'll have to remove it to connect Platforms B and A. Simply attack the panel to lift the gate. | |
| Underpass Ability Barrier #1UnderpassUnderpass Ability Barrier #1 | Underpass | The Ability Barrier is found halfway up the stone wall in the unmapped area east of the Cable Car. Climb the pylons to spot it and use a fire-based attack to remove it. | |
| Underpass Ability Barrier #2UnderpassUnderpass Ability Barrier #2 | Underpass | Found on the ceiling, which you can reach using the Shift Ability. The barrier can be removed using a fire-based attack. | |
| Downtown Ability Barrier #1DowntownDowntown Ability Barrier #1 | Downtown | Found on the roof of a building in eastern Downtown. It requires the Ground Slam ability, unlocked after defeating The Dancer Resonant and it grants access to the room below. | |
| Downtown Ability Barrier #2DowntownDowntown Ability Barrier #2 | Downtown | Found on the roof of the building. To remove it, you'll need to use the Ground Slam Ability. | |
| Central Ability Barrier #1CentralCentral Ability Barrier #1 | Central | Found in the back alley southwest of the Field Office in Central Manhattan. To open the door, simply hit the red switch. The location is best approached while playing the Crossing the Threshold Side Quest. | |
| The Park Ability Barrier #1The ParkThe Park Ability Barrier #1 | The Park | Found on the roof of the building. It requires the Ground Slam ability, unlocked after defeating The Dancer Resonant. | |
| The Park Ability Barrier #2The ParkThe Park Ability Barrier #2 | The Park | Found on the roof of the FBC Base. It requires the Ground Slam ability, unlocked after defeating The Dancer Resonan, and it grants access to the office on the roof. | |
| The Park Ability Barrier #3The ParkThe Park Ability Barrier #3 | The Park | Found on the roof of the building north of the FBC Base. It requires the Ground Slam ability, unlocked after defeating The Dancer Resonant. | |
| The Park Ability Barrier #4The ParkThe Park Ability Barrier #4 | The Park | Found on the roof of the building north of the FBC Base. You can unlock it using a fire-based attack. | |
| Central Ability Barrier #2CentralCentral Ability Barrier #2 | Central | Found on the roof of the Patterned Factory Warehouse in Central. It requires the Ground Slam ability, unlocked after defeating The Dancer Resonant, and provides an alternative entrance to the Warehouse below. | |
| Central Ability Barrier #3CentralCentral Ability Barrier #3 | Central | Found on the roof of the building northeast of the Dig Site Threshold. It requires the Ground Slam ability, unlocked after defeating The Dancer Resonant. | |
| The Park Ability Barrier #5The ParkThe Park Ability Barrier #5 | The Park | Found on the eastern side of the Burris & Co. Reliable Adhesives Factory. You can burn the net using a fire-based attack such as Inferno or Ignite. | |
| The Park Ability Barrier #6The ParkThe Park Ability Barrier #6 | The Park | Found on the roof of the building. It requires the Ground Slam ability, unlocked after defeating The Dancer Resonan, and it grants access to the office on the roof. | |
| The Park Ability Barrier #7The ParkThe Park Ability Barrier #7 | The Park | Found along the northern street. You can burn the net using a fire-based attack such as Inferno or Ignite. | |
| Central Ability Barrier #4CentralCentral Ability Barrier #4 | Central | Found on the roof of the building. To open it, you need the Ground Slam ability unlocked after defeating The Dancer Resonant in the West Incursion Zone. The Barrier provides an alternative entrance to the warehouse. | |
| Central Ability Barrier #5CentralCentral Ability Barrier #5 | Central | Found on the street southwest of the Field Office, the door can be opened from the inside by striking the control panel on the right with a melee attack. You can enter the building via the northeastern door or the underground passage. | |
| Central Ability Barrier #6CentralCentral Ability Barrier #6 | Central | Found on the street southwest of the Field Office, the parking lot door can be opened from the inside by striking the control panel on the right with a melee attack. You can enter the building via the northeastern door or the underground passage. |

© MapMaster.io 2024. All rights reserved.