Doom The Dark Ages Artillery Cannons in Siege and Resurrection
Seven Artillery Cannons stand between you and two Mission Challenges in Doom The Dark Ages: 4 in Chapter 6, Siege Part 1, and 3 in Chapter 20, Resurrection. Each chapter’s set completes one: Siege Breaker for a Combat Shotgun skin and Cannon Crusher for 50 Gold.
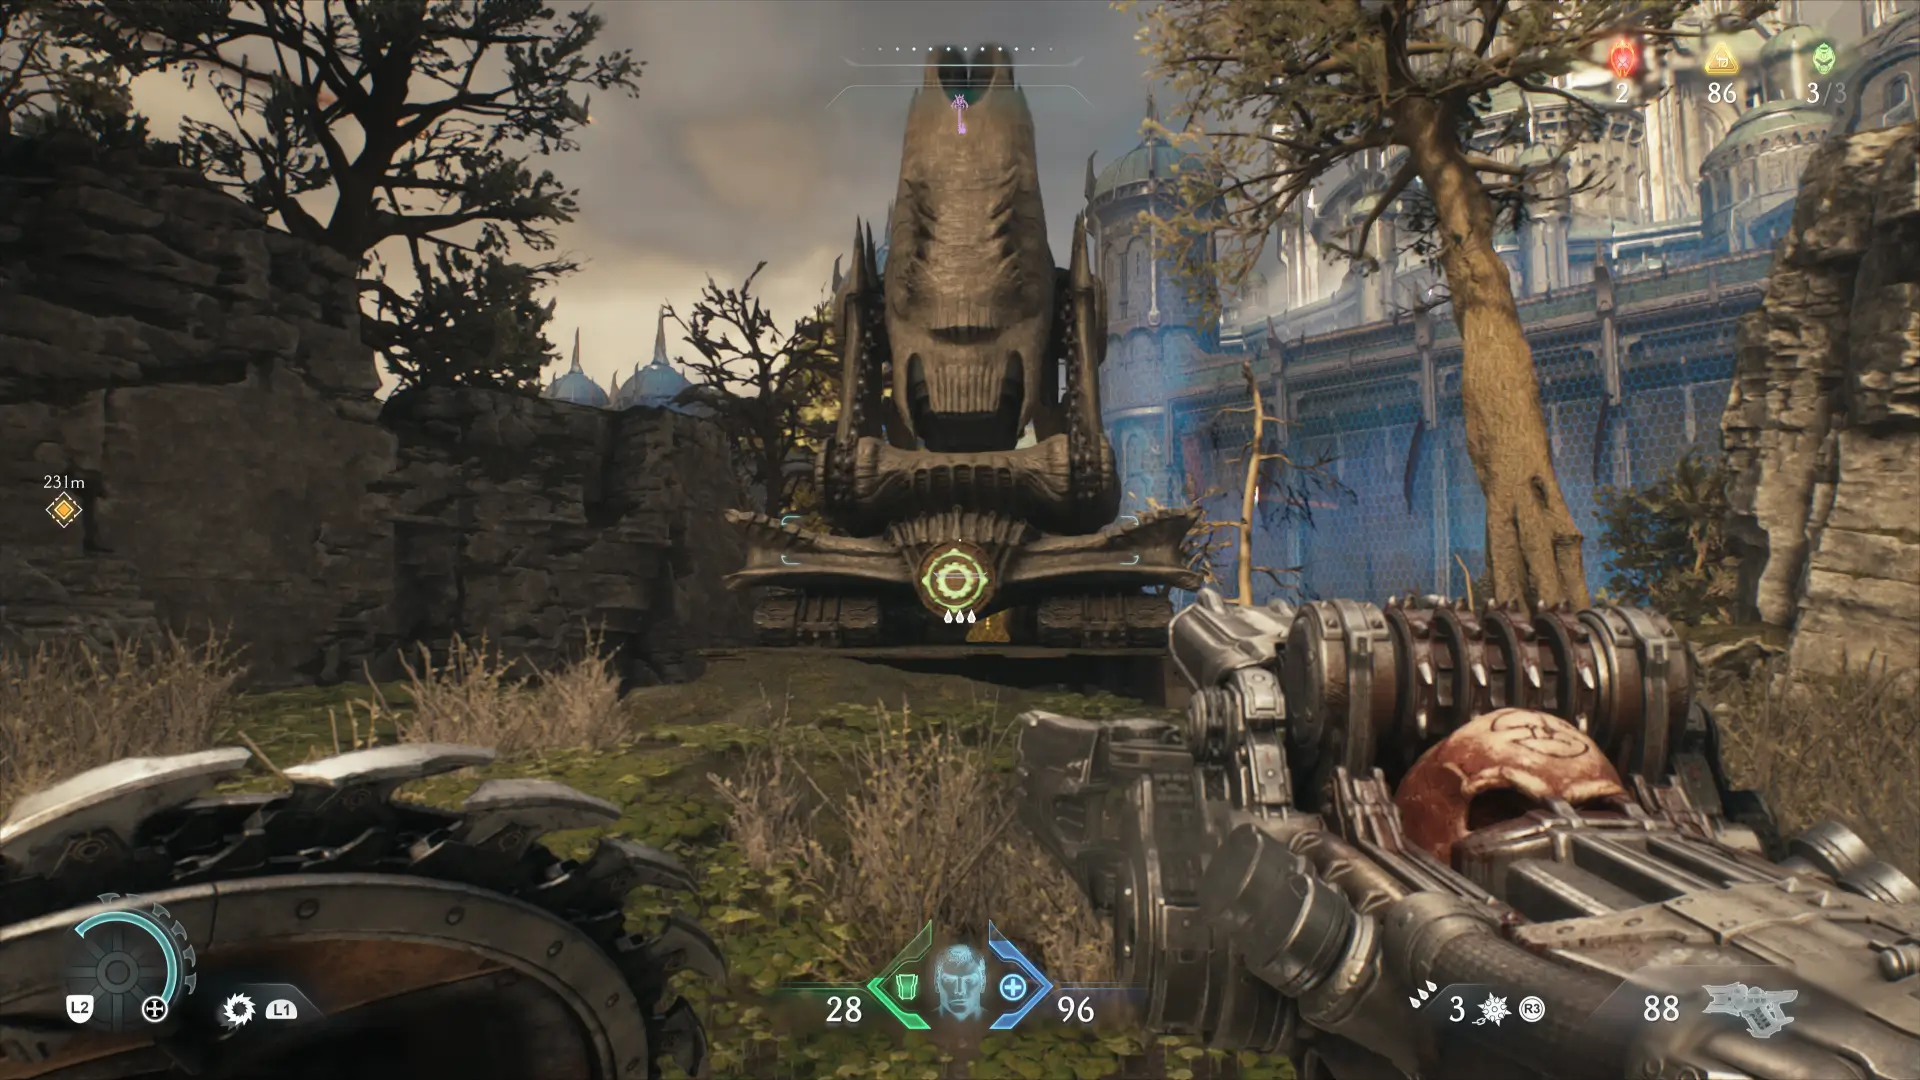
Our Doom The Dark Ages 100% completion guide puts the cannons on two chapter maps, and the Map Master team added where to hit each one. Bring the Shield, not your guns, because a Shield bash on the green target is what brings a cannon down.
How to Destroy a Doom The Dark Ages Artillery Cannon
Each cannon has a green target, and a Shield bash or Shield Charge into it destroys the whole thing. Several are easiest from behind, so circle around instead of charging straight into the barrel’s line of fire, and line the charge up before you commit to it.
The demons guarding them are the real fight, especially near the Siege cannons where shield-carrying soldiers stand in the way. Clear the area first, then take the cannon out, so you’re not bashing a target while you’re under fire from three sides.
Siege Part 1 Artillery Cannons and Siege Breaker
Chapter 6 spreads its four across the battlefield: one at the edge of a hill and three in the clearings, the last beside a large damaged wall. All four destroyed completes Siege Breaker, which unlocks the Reverent skin for the Combat Shotgun.
Our Chapter 6 Siege Part 1 interactive map pins each cannon on the biggest map in the game, which has 170 pins in all. Our weapon skin locations pin the other cosmetic rewards for the Combat Shotgun and the rest of the arsenal.
The Three Resurrection Artillery Cannons Behind Cannon Crusher
Chapter 20 has three, and destroying all of them completes Cannon Crusher for 50 Gold, which goes straight into upgrades with the rest of your Gold. The first is by a wall and a withered tree, and the third is up a wooden ramp once you clear the encounter in front of it.
The second is the one to remember. After you climb the wall and smash it, a hole opens underneath, and jumping in takes you to a hidden area with Gold, a Pulverizer weapon skin, and a Life Sigil. Our Chapter 20 Resurrection map pins the cannon and the hole together.
Replaying Doom The Dark Ages Chapters for a Skipped Artillery Cannon
Nothing in the game is missable, and Chapter Select lets you replay Siege Part 1 or Resurrection to finish either challenge. Collectible counters show on the map and in Chapter Select, so you can see what’s left before you go back in.
While you’re in Resurrection, the third cannon is close to the statue that guards a Wraithstone, and our Wraithstone locations explain how to break its barrier. Our Mission Challenge list has every other challenge in both chapters, so one replay can clear several at once.
| Name | Map Location | Details | Screenshot | Found |
|---|---|---|---|---|
| Artillery Cannon #1Chapter 6: Siege – Part 1 | Chapter 6: Siege – Part 1 | Found at the edge of the hill. Bash it with your shield to destroy it. | ||
| Artillery Cannon #2Chapter 6: Siege – Part 1 | Chapter 6: Siege – Part 1 | Found in the clearing. Bash it from behind to destroy it. | ||
| Artillery Cannon #3Chapter 6: Siege – Part 1 | Chapter 6: Siege – Part 1 | Found in the clearing. Bash the cannon from behind to destroy it. | ||
| Artillery Cannon #4Chapter 6: Siege – Part 1 | Chapter 6: Siege – Part 1 | Found in the clearing by the large damaged wall. Bash it with your shield to destroy it. | ||
| Artillery Cannon #1Chapter 20: Resurrection | Chapter 20: Resurrection | By a wall and a large, withered tree. Use Shield Charge to destroy it. | ||
| Artillery Cannon #2Chapter 20: Resurrection | Chapter 20: Resurrection | On the left side after climbing the wall. After destroying the Cannon you'll notice a hole under it. Jump into the hole to reach a Hidden Area. | ||
| Artillery Cannon #3Chapter 20: Resurrection | Chapter 20: Resurrection | Up a wooden ramp after clearing the Encounter. Use Shield Charge to destroy it. |

© MapMaster.io 2024. All rights reserved.