Castlevania: Belmont's Curse Key Items, Levers, and Boss Keys
Castlevania Belmont’s Curse has 92 Key Items across seven of our maps, and 79 of them are levers that open iron doors, unlock drop points, or move drawbridges. The rest are the three boss keys that open the sealed Catacombs gate, a few gear mechanisms and pressure plates, and a handful of story objects. Paris Streets is where the first ones turn up, so start with the Castlevania Belmont’s Curse Paris Streets map of the Prison Tower drawbridges.
Alexandru Popescu worked through every lever and key for Map Master, and the Castlevania Belmont’s Curse world map brings these puzzles together with every collectible they guard. Most Key Items are mandatory, so when a door or platform won’t move, a lever nearby is usually the answer.
How to Open the Catacombs Gate in Castlevania Belmont’s Curse: Three Key Items
The sealed door to the Catacombs needs three keys, and each one comes from a boss. The Fallen’s Key drops in Paris Streets, The Warrior’s Key comes from Joan on the Prison Tower roof, and The Prophetess’s Key comes from Medusa. The three gatekeeper bosses are the first three fights in the game, and the Holy Innocents’ Cemetery map of the Roman Baths covers the region’s nine levers, from the Cemetery Entrance to the Roman Baths gate.
Brauner’s Paintbrush is the other story key. It waits on a desk on the western side of the Observatory once Carmilla falls, and it lets Rose enter the Notre-Dame Painting in the Main Hall’s Gallery of Eternal Night. You’ll also need to defeat The Artist and The Builder first, so follow the Artist Clue trail before you try the painting.
Castlevania Belmont’s Curse Key Item Levers: Doors, Drop Points, and Drawbridges
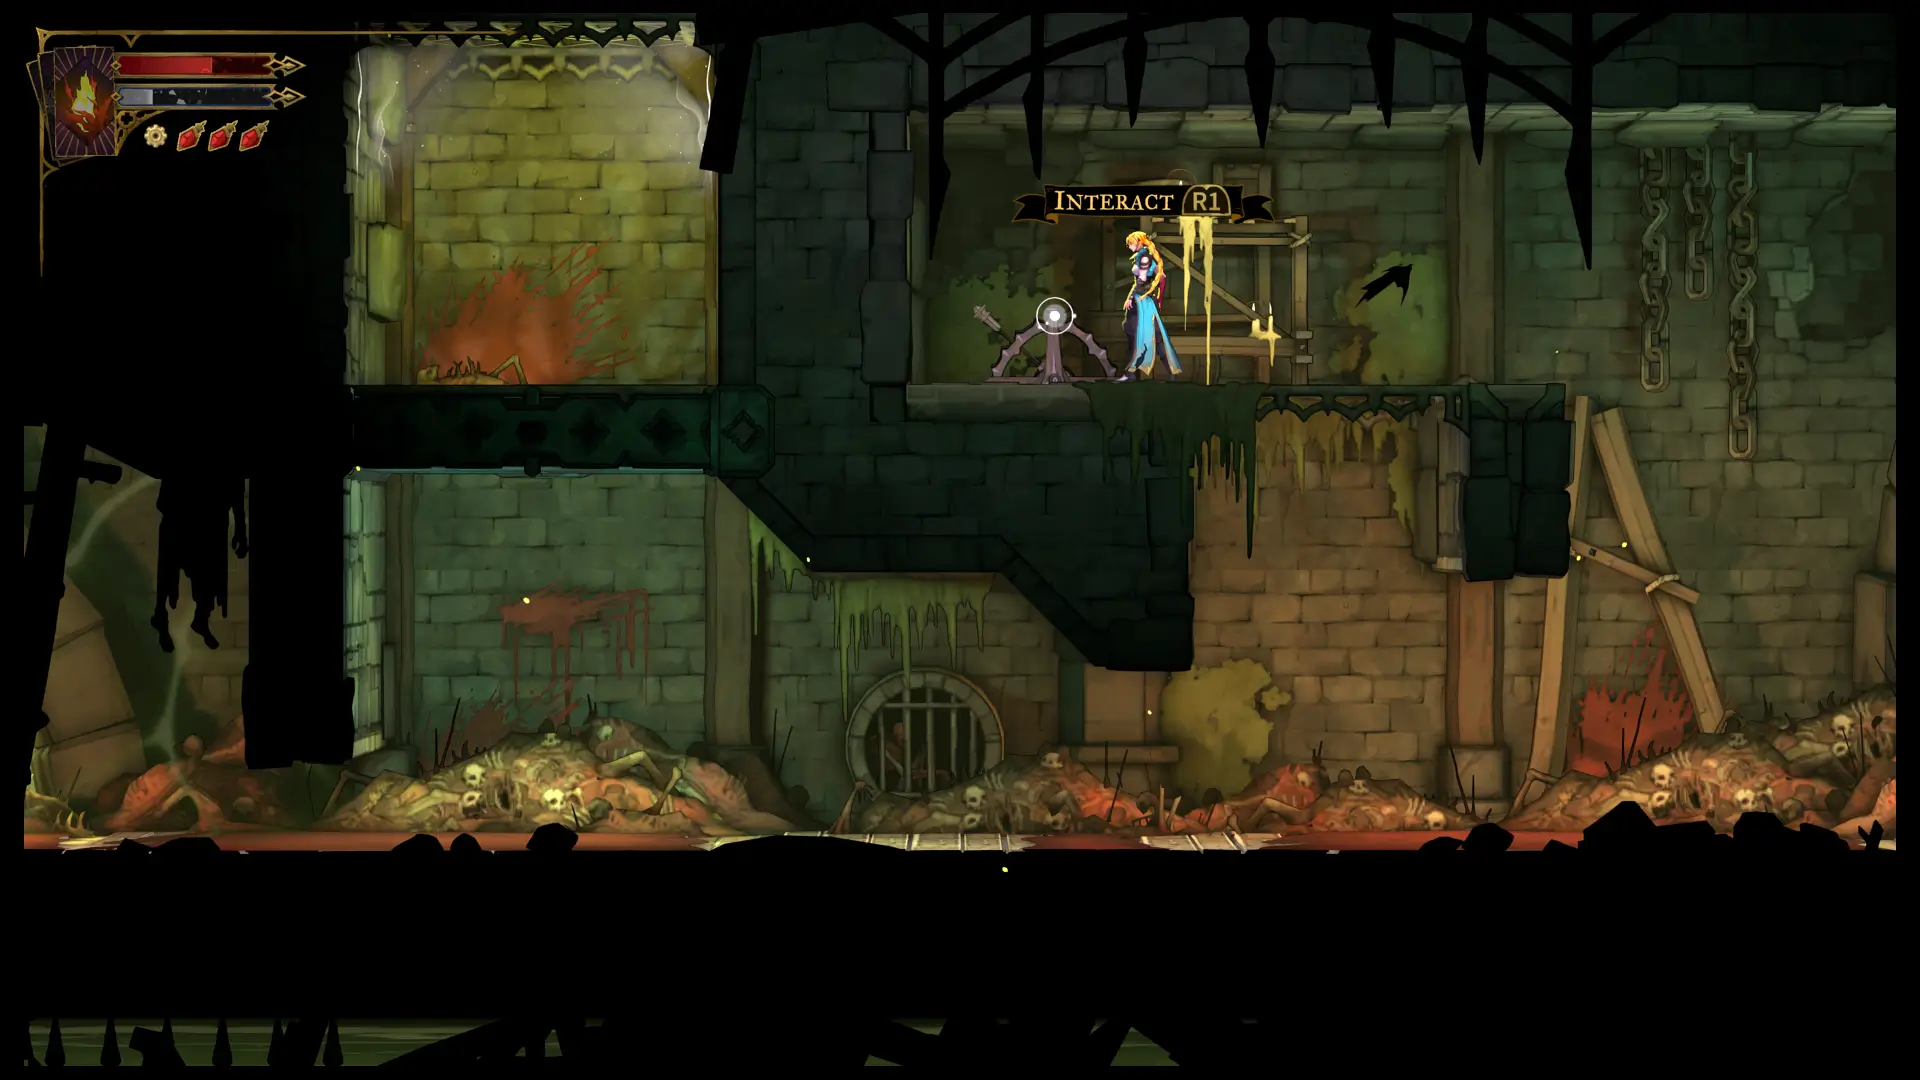
Every lever does one of a few jobs. It opens a locked iron door, unlocks a drop point platform, or shifts a drawbridge or bone platform so you can climb higher. Many are on ceilings or tucked above doors, so look up whenever a path seems blocked, especially in the Prison Tower, which has seven numbered levers of its own.
Main Hall has the most Key Items of any region, with 26, so study the Main Hall map of the Forgotten Basement before you push into the castle. The Armoury’s four levers work as a set, raising and lowering stone blocks so you can climb from one to the next. The Forgotten Basement levers switch which iron doors stand open, so pull one and check the room again before moving on.
Tricky Key Item Puzzles in Castlevania Belmont’s Curse
A few puzzles run on a timer. The second Watch Tower lever opens the iron door to a Treasure Chest behind a timed iron door for only a moment, and the lower path won’t get you there, so take the platforming route from the Luminous Anchor Portrait above. The Clock Tower map of the Eastern Access Shaft has three pressure plates that move bridges, and standing still on them means getting crushed.
Others ask you to choose. The two Entrance Corridor levers decide whether the west or east drop point opens, and the Watermill Wheel lever sends Rose east when it spins clockwise and west when it turns the other way. Gear mechanisms need a couple of quick strikes in a row, and the second Fountain of the Innocents lever triggers an ambush, so be ready to fight.
Castlevania Belmont’s Curse Key Items Tied to Clues
The Hidden Lever in the Ruined Market is easy to miss. Speak to the Spirit in the upper section, drop one level, and attack the wall on the left to find it behind one of the Hidden Area locations across Paris. Pulling it opens the Well Cover on the eastern side of the market and solves the A Lever for the Well Clue.
Two Library objects count toward the Occultist Clues in the Library. The Star Charts in the top right of the Drawing Room belong to Organic Astrology, and the Star Pattern Hint on the window by the chair in the Library map of the Natural Philosophy Shelves belongs to Blood Poem. Interact with both before you leave the Library.
What Counts as a Key Item in Castlevania Belmont’s Curse?
Anything you need to move the story or the map forward counts, from the three boss keys to the five levers that work the bone platforms of the Crossroads of the Dead. Plan that room with the Catacombs of Paris map of the Crossroads of the Dead beside you. The Ferryman’s Obol from Mammon’s Lair is also reported as a keepsake, traded to the Ferryman for an Arcana.
Levers make up nearly nine in ten Key Items, while only the three boss keys and Brauner’s Paintbrush gate the story itself. If a door won’t open even after you’ve found its lever, bring it to the Castlevania Belmont’s Curse Discord channel so it can be checked.
| Name | Map Location | Details | Found |
|---|---|---|---|
| Prison Tower Lever #7Paris StreetsPrison Tower Lever #7 | Paris Streets | Found between a transition door and some stairs in the Prison Tower Sub-Area. Interact with the lever to move the nearby drawbridge along with the Luminous Anchor on it. | |
| Upper Tower Lever #1Paris StreetsUpper Tower Lever #1 | Paris Streets | Found above the platform with the purple Luminous Anchor. Use the lever to move the nearby Drawbridge along with the Luminous Anchor on it. | |
| Upper Tower Lever #2Paris StreetsUpper Tower Lever #2 | Paris Streets | Found on a drop point platform in the Upper Tower. It can be reached with the help of the Luminous Anchor underneath. Use the lever to move the nearby Drawbridge along with the Luminous Anchor on it. | |
| Upper Tower Lever #3Paris StreetsUpper Tower Lever #3 | Paris Streets | Found under the transition door at the top of the Upper Tower. Use the lever to unlock the nearby drop point. | |
| The Warrior's KeyPrison TowerThe Warrior's Key | Prison Tower | The Warrior's Key is one of the three keys needed to open the sealed door to the Catacombs. It is obtained after defeating The Warrior (Joan), and it is a critical item for progressing the story. | |
| Stairs to the Tower Roof LeverPrison TowerStairs to the Tower Roof Lever | Prison Tower | Found behind a Granite Wall. Use the lever to open the Iron Locked Door to the east. | |
| Path of the Abyss LeverCatacombs of ParisPath of the Abyss Lever | Catacombs of Paris | Found on the ceiling above a Granite Wall in the Path of the Abyss Sub-Area. Use the lever to open the two locked iron gates in the same area. | |
| Charnel Galleries LeverCatacombs of ParisCharnel Galleries Lever | Catacombs of Paris | Found next to a locked iron door after dropping from the platform at the top of the Charnel Galleries. Use the lever to open the door next to it. | |
| Path of the Penitent LeverNotre-DamePath of the Penitent Lever | Notre-Dame | Found on the ceiling in the top right part of the Path of the Penitent Sub-Area. Use the lever to open the Iron Door to the right. To reach it, you need Double Jump. | |
| Chamber of Whispers LeverCatacombs of ParisChamber of Whispers Lever | Catacombs of Paris | Found on the wall between two drop point platforms in the Chamber of Whispers. Use the lever to unlock the drop point platform above. | |
| Reliquary Pressure PlateNotre-DameReliquary Pressure Plate | Notre-Dame | Found between the spikes on the eastern side of the Reliquary Sub-Area. Stand on the Pressure Plate to open the Iron Door to the east. To reach it, you require Double Jump and Aerial Rush. | |
| Crossroads of the Dead Lever #2Catacombs of ParisCrossroads of the Dead Lever #2 | Catacombs of Paris | Found next to some stairs in the Crossroads of the Dead Sub-Area. Use the lever to move the bone platforms below and above. | |
| Crossroads of the Dead Lever #1Catacombs of ParisCrossroads of the Dead Lever #1 | Catacombs of Paris | Found next to some stairs in the Crossroads of the Dead Sub-Area. Use the lever to move the bone platforms below and above. | |
| Crossroads of the Dead Lever #3Catacombs of ParisCrossroads of the Dead Lever #3 | Catacombs of Paris | Found next to some stairs in the Crossroads of the Dead Sub-Area. Use the lever to move the bone platforms below and above. | |
| Crossroads of the Dead Lever #4Catacombs of ParisCrossroads of the Dead Lever #4 | Catacombs of Paris | Found next to a transition door and a Luminous Anchor on the western side of the Crossroads of the Dead. Use the lever to move the Drawbridge under you. | |
| Crossroads of the Dead Lever #5Catacombs of ParisCrossroads of the Dead Lever #5 | Catacombs of Paris | Found on the ceiling next to a slide point in the room you can access after using another lever on the upper level. Use the lever to unlock the drop point and the bone platform above. | |
| Jaws of Limbo Lever #2Catacombs of ParisJaws of Limbo Lever #2 | Catacombs of Paris | Found at the end of the platforming challenge in the Jaws of Limbo Sub-Area. Use the lever to open the Locked Iron Door to the right. | |
| Jaws of Limbo Lever #1Catacombs of ParisJaws of Limbo Lever #1 | Catacombs of Paris | Found on the platform by the large skeleton head in the Jaws of Limbo main room. Use the lever to open the locked iron door below. | |
| Quarry Elevator LeverCatacombs of ParisQuarry Elevator Lever | Catacombs of Paris | Found by the elevator and the stairs in the Quarry Elevator Sub-Area. Pull the lever to unlock the Iron Door to the west. | |
| Daedalus Crossing Pressure Plate #1Clock TowerDaedalus Crossing Pressure Plate #1 | Clock Tower | Found between two slide points on the western side of the Daedalus Crossing Sub-Area. Step on the pressure plate to move the metal beams to the east. | |
| Daedalus Crossing Pressure Plate #2Clock TowerDaedalus Crossing Pressure Plate #2 | Clock Tower | Found under the destructible wall on the eastern side of the Daedalus Crossing Sub-Area. Cross over the Pressure Plate to move the metal beams to the east. | |
| Mechanic's Ascent Lever #2Clock TowerMechanic's Ascent Lever #2 | Clock Tower | Found on the wall at the top of the Mechanic's Ascent Sub-Area. It can be reached by dropping from above, and it can be used to open the Locked Iron Door to the east. | |
| Mechanic's Ascent Lever #1Clock TowerMechanic's Ascent Lever #1 | Clock Tower | Found on the ceiling above a Luminous Anchor and a Locked Iron Door. Use the lever to unlock the Locked Iron Door below. | |
| Daedalus Crossing Pressure Plate #3Clock TowerDaedalus Crossing Pressure Plate #3 | Clock Tower | Found between the two iron doors in the hidden area at the top of the Daedalus Crossing Sub-Area. If you step on the plate, the western iron door closes. | |
| Daedalus Crossing Gear MechanismClock TowerDaedalus Crossing Gear Mechanism | Clock Tower | Found on the ceiling, between the drop point platform and the transition door. Strike the mechanism quickly a couple of times to unlock the iron door to the west. | |
| Daedalus Crossing Pressure Plate #4Clock TowerDaedalus Crossing Pressure Plate #4 | Clock Tower | Found on the western side of the hidden area at the top of the Daedalus Crossing Sub-Area. Step on the plate to move the metal beams above. | |
| Cursed HorologiumClock TowerCursed Horologium | Clock Tower | Found in the Clock Tower Bridge Sub-Area. You can interact with it if you want, but you must first defeat Death and have the Soul Harvest Arcana equipped to toggle the spell. | |
| Clock Keeper's Atrium LeverClock TowerClock Keeper's Atrium Lever | Clock Tower | Found on the wall by the platform in the top right part of the Clock Keeper's Atrium Sub-Area. Use the lever to open the Iron Door below. | |
| Condemned Mineshaft LeverCatacombs of ParisCondemned Mineshaft Lever | Catacombs of Paris | Found between the elevator and the locked iron door in the Condemned Mineshaft Sub-Area. Use the lever to open the locked iron door. | |
| Stairway to Hell LeverCatacombs of ParisStairway to Hell Lever | Catacombs of Paris | Found next to a drop point platform with a Luminous Anchor in the Stairway to Hell Sub-Area. Use the lever to open the door to the right and the one to the bottom left. | |
| Eastern Summit LeverClock TowerEastern Summit Lever | Clock Tower | Found on the wall on the western side of the Eastern Summit Sub-Area. Use the lever to unlock the Drop Point below. | |
| The Gauntlet LeverClock TowerThe Gauntlet Lever | Clock Tower | Found on the ceiling of the Gauntlet's lower level. Use the lever to open the Iron Door to the east. | |
| The Way of the Fist Lever #1Clock TowerThe Way of the Fist Lever #1 | Clock Tower | Found on the wall above the drop point platform in the bottom right part of the Way of the Fist Sub-Area. Use the lever to open the iron door to the left. | |
| The Way of the Fist Lever #2Clock TowerThe Way of the Fist Lever #2 | Clock Tower | Found on the ceiling above the Luminous Anchor and the Treasure Chest in the bottom right part of the Way of the Fist Sub-Area. Use the lever to open the iron door to the left. | |
| Foundry Apex Lever #2Clock TowerFoundry Apex Lever #2 | Clock Tower | Found on the ceiling next to the elevator in the Foundry Apex Sub-Area. Use the lever to open the iron door below. | |
| Path of the Builder Lever #2Clock TowerPath of the Builder Lever #2 | Clock Tower | Found above the Treasure Chest next to the Locked Iron Door on the southern side of the Path of the Builder Sub-Area. To reach it, you require Double Jump. Use the lever to open the Iron Door. | |
| Curiosity Cabinet Lever #3LibraryCuriosity Cabinet Lever #3 | Library | Found in the bottom left part of the Curiosity Cabinet Sub-Area. Use the lever to open the Iron Door to the east. To reach it, you require Smash. | |
| Study Room Lever #2LibraryStudy Room Lever #2 | Library | Found on the wall to the left in the Hidden Area on the top level of the Study Room. To reach it, you need Double-Jump and Aerial Rush. Use the lever to unlock the Drop Point next to it. | |
| Court of Justice Lever #1Paris StreetsCourt of Justice Lever #1 | Paris Streets | Found between two locked iron doors on the lower level of the Court of Justice Sub-Area. Pull the lever to open the two doors. | |
| Court of Justice Lever #2Paris StreetsCourt of Justice Lever #2 | Paris Streets | Found down some stairs next to a locked drop point platform in the Court of Justice. Use the lever to unlock the drop point to the west. | |
| Justice District Sewers LeverParis StreetsJustice District Sewers Lever | Paris Streets | Found on the wall above the spikes in the Justice District Sewers Sub-Area. To reach it, you must start from the Drop Point at the entrance to the area and follow the path. Using the lever moves the Drawbridge above. | |
| Gate to the Stone Bridge LeverParis StreetsGate to the Stone Bridge Lever | Paris Streets | Found in front of the large gate in the Gate to the Stone Bridge Sub-Area. Use the lever to open the gate so you can reach the Main Hall. | |
| Notre-Dame Bridge LeverMain HallNotre-Dame Bridge Lever | Main Hall | Found on the ceiling between two Luminous Anchors. Use the lever to open the door to the east and unlock the bridge to the west. | |
| Hall of the Fallen Angels LeverCatacombs of ParisHall of the Fallen Angels Lever | Catacombs of Paris | Found on the ceiling on the lower level of the Hall of the Fallen Angels Sub-Area. To reach it, you must complete a platforming challenge that requires Double Jump, Aerial Rush, and Smash. | |
| Entrance Corridor Lever #1Main HallEntrance Corridor Lever #1 | Main Hall | Found on the wall by the ledge above the Locked Door in the Entrance Corridor Sub-Area. Use the lever to choose which Drop Point is unlocked: the one to the west or the one to the east. | |
| Entrance Corridor Lever #2Main HallEntrance Corridor Lever #2 | Main Hall | Found on the ceiling on the lower level of the Entrance Corridor Sub-Area. Use the lever to choose which Drop Point is unlocked: the one to the west or the one to the east. | |
| Circle of Greed LeverCatacombs of ParisCircle of Greed Lever | Catacombs of Paris | Found on the wall between two drop point platforms on the eastern side of the Circle of Greed Sub-Area. Use the lever to unlock the drop point above. | |
| Roman Baths Lever #2Holy Innocents' CemeteryRoman Baths Lever #2 | Holy Innocents' Cemetery | Found on the ceiling behind the Locked Iron Door in the bottom left part of the Roman Baths Sub-Area. Use the lever to open the Iron Door. | |
| Roman Baths Lever #1Holy Innocents' CemeteryRoman Baths Lever #1 | Holy Innocents' Cemetery | Found under some stairs in the Roman Baths. Interact with the lever to open the Iron Gate above. | |
| Hot Springs LeverHoly Innocents' CemeteryHot Springs Lever | Holy Innocents' Cemetery | Found on the wall between two drop point platforms on the western side of the Hot Springs Sub-Area. Use the lever to open the Iron Door below. | |
| Sewers LeverParis StreetsSewers Lever | Paris Streets | Found in the upper section on the eastern side of the Sewers. You can reach it by performing a wall jump directly under the metal grate. | |
| Roman Baths Lever #3Holy Innocents' CemeteryRoman Baths Lever #3 | Holy Innocents' Cemetery | Found on the wall next to the Drawbridge on the top level of the Roman Baths Sub-Area. Use the lever to lower the Drawbridge. | |
| Roman Baths Lever #4Holy Innocents' CemeteryRoman Baths Lever #4 | Holy Innocents' Cemetery | Found on a ledge between the spikes on the eastern side of the Roman Baths Sub-Area. Use the lever to lower the Drawbridge above. | |
| Hidden LeverParis StreetsHidden Lever | Paris Streets | The Hidden Lever is found in the hidden area of the Ruined Market. After speaking to the Spirit in the upper section, drop one level and attack the left-side wall to discover the Lever. Make sure you pull it to progress the story and solve the A Lever for the Well Clue. | |
| Well CoverParis StreetsWell Cover | Paris Streets | Found on the eastern side of the Ruined Market. You can open it by pulling the Hidden Lever while solving the A Lever for the Well Clue. | |
| Grand Hall Gear Mechanism #1Main HallGrand Hall Gear Mechanism #1 | Main Hall | Found on the level above the fireball traps in the Grand Hall Sub-Area. Strike the mechanism quickly a couple of times to unlock the platform above and the one below. | |
| Sewer Reservoir LeverParis StreetsSewer Reservoir Lever | Paris Streets | Found behind the locked iron door. You can reach it after going through the lower area of the Reservoir. Pull it to open the nearby door. | |
| The Fallen's KeyParis StreetsThe Fallen's Key | Paris Streets | The Fallen's Key is one of the three keys needed to open the sealed door to the Catacombs. It is obtained after defeating The Fallen, and it is a critical item for progressing the story. | |
| Brauner's Atelier Gear MechanismMain HallBrauner's Atelier Gear Mechanism | Main Hall | Found on the wall on the lower level of the Brauner's Atelier Sub-Area. Strike the mechanism quickly a couple of times to unlock the nearby locked iron doors. | |
| Pillaged Tombs LeverHoly Innocents' CemeteryPillaged Tombs Lever | Holy Innocents' Cemetery | Found at the end of the platforming challenge in the middle of the Pillaged Tombs Sub-Area. Use the lever to open the Iron Door to the west. | |
| Ancient Sewers Haunted CoffinHoly Innocents' CemeteryAncient Sewers Haunted Coffin | Holy Innocents' Cemetery | Found on the platform above the water in the top right part of the Ancient Sewers Sub-Area. | |
| West Hall Lever #1Main HallWest Hall Lever #1 | Main Hall | Found on the ceiling on the lower level of the West Hall Sub-Area. It can be reached from the west side. Use the lever to open the locked iron door to the east. | |
| Ancient Sewers Lever #2Holy Innocents' CemeteryAncient Sewers Lever #2 | Holy Innocents' Cemetery | Found next to the stairs in the top right part of the Ancient Sewers Sub-Area. Use the lever to open the door to the left. | |
| West Hall Lever #2Main HallWest Hall Lever #2 | Main Hall | Found on the wall by the drop point platform at the top of the West Hall Sub-Area. Use the lever to open the locked iron door in the bottom left. | |
| Cemetery Entrance Haunted CoffinHoly Innocents' CemeteryCemetery Entrance Haunted Coffin | Holy Innocents' Cemetery | Found in the middle of the Cemetery Entrance Sub-Area. | |
| Pillaged Tombs Haunted CoffinHoly Innocents' CemeteryPillaged Tombs Haunted Coffin | Holy Innocents' Cemetery | Found at the top of the Pillaged Tombs Sub-Area. | |
| Watch Tower Lever #1Main HallWatch Tower Lever #1 | Main Hall | Found on the wall next to the drop point platform at the bottom of the Watch Tower Sub-Area. Use the lever to open the Locked Iron Door to the west. | |
| Watch Tower Lever #2Main HallWatch Tower Lever #2 | Main Hall | Found behind an iron door at the bottom of the Watch Tower Sub-Area. Use the lever to open the Locked Iron Door with the Treasure Chest to the far east. You need to move quickly because the Iron Door will close again after a short period of time. Also, you can't go through the path below; you have to complete the platforming challenge starting with the Luminous Anchor Portrait above. | |
| Mass Grave Haunted CoffinHoly Innocents' CemeteryMass Grave Haunted Coffin | Holy Innocents' Cemetery | Found at the bottom of the Mass Grave. | |
| Watermill Wheel LeverParis StreetsWatermill Wheel Lever | Paris Streets | Found near the watermill wheel. Interact with it and make sure the wheel is rotating clockwise, then jump on the wooden platforms to reach the upper or eastern areas. | |
| Watermill Wheel LeverParis StreetsWatermill Wheel Lever | Paris Streets | Found near the watermill wheel. Interact with it and make sure the wheel is rotating counterclockwise, then jump on the wooden platforms to reach the upper or western areas. | |
| West Hall Lever #3Main HallWest Hall Lever #3 | Main Hall | Found on a ledge next to some spikes on the western side of the West Hall Sub-Area. Use the lever to open the two Locked Iron Doors above. | |
| West Hall Lever #4Main HallWest Hall Lever #4 | Main Hall | Found on the drop point platform on the western side of the West Hall Sub-Area. It can be reached using the Luminous Anchors below. Use the lever to open the locked iron door to the east. | |
| Armoury LeverMain HallArmoury Lever | Main Hall | Found on the wall between two dropping points. Use the lever to unlock the drop point below. | |
| Armoury Lever #1Main HallArmoury Lever #1 | Main Hall | Found between a door and a wall in the Armoury Sub-Area. Use the lever to lower the stone block under you. | |
| Armoury Lever #2Main HallArmoury Lever #2 | Main Hall | Found under a stone block in the Armoury Sub-Area. Use the lever to lower the stone block to the right and raise the one to the left. | |
| Armoury Lever #3Main HallArmoury Lever #3 | Main Hall | Found halfway up a stone block in the Armoury Sub-Area. You can reach it by using the other lever under the stone block. Use this lever to raise the stone blocks to the right. | |
| Armoury Lever #4Main HallArmoury Lever #4 | Main Hall | Found on a stone block in the Armoury Sub-Area. Use the lever to lower the stone blocks to the left. | |
| Hospital Lever #1HospitalHospital Lever #1 | Hospital | Found next to a wall in the top right part of the Hospital. Use the lever to unlock the drop point on the level below. | |
| Waterworks Lever #1Main HallWaterworks Lever #1 | Main Hall | Found up the stairs on the upper level of the Waterworks Sub-Area. Use the lever to open the iron door to the west. | |
| Forgotten Basement Lever #1Main HallForgotten Basement Lever #1 | Main Hall | Found in the top left part of the Forgotten Basement Sub-Area. Use the lever to switch which iron doors are opened in the room. | |
| Hospital Lever #2HospitalHospital Lever #2 | Hospital | Found on the wall in the bottom right part of the Hospital. Use the lever to unlock the drop point to the west. | |
| Forgotten Basement Lever #2Main HallForgotten Basement Lever #2 | Main Hall | Found in the top right part of the Forgotten Basement Sub-Area. Use the lever to switch which iron doors are opened in the room. | |
| Grand Hall Gear Mechanism #2Main HallGrand Hall Gear Mechanism #2 | Main Hall | Found after going through the door on the balcony surrounded by blade wheels in the Forgotten Basement. Strike the mechanism quickly a couple of times to move the stone blocks and unlock the area below. | |
| Ossuary of the Innocents Haunted CoffinHoly Innocents' CemeteryOssuary of the Innocents Haunted Coffin | Holy Innocents' Cemetery | Found on the platform with the Luminous Anchor on the upper level of the Ossuary of the Innocents Sub-Area. | |
| Collapsed CryptNotre-DameCollapsed Crypt | Notre-Dame | Found east of the Great Organ Room Sub-Area. | |
| Mausoleum of the Kings LeverHoly Innocents' CemeteryMausoleum of the Kings Lever | Holy Innocents' Cemetery | Found by the spikes on the western side of the Mausoleum of the Kings Sub-Area. Use the lever to unlock the drop point to the west. But move quickly because the lever is on a timer. | |
| Overgrown Crypt LeverHoly Innocents' CemeteryOvergrown Crypt Lever | Holy Innocents' Cemetery | Found on a wall with spikes above a drop point in the Overgrown Crypt Sub-Area. Use the lever to open the Iron Door to the west. But move quickly because the lever is on a timer. | |
| Chapel of Patience LeverNotre-DameChapel of Patience Lever | Notre-Dame | Found under the falling platform in the Chapel of Patience Sub-Area. To reach it, stand on the falling platform until it breaks. Use the lever to open the two Iron Doors on the western side. | |
| Waterworks Lever #2Main HallWaterworks Lever #2 | Main Hall | Found on the floor in the bottom right part of the Waterworks Sub-Area. Use the lever to open the iron door to the left. | |
| Path of the Penitent LeverNotre-DamePath of the Penitent Lever | Notre-Dame | Found on the wall next to a drop point platform on the eastern side of the Path of the Penitent Sub-Area. Pull the lever to open the Iron Door between the two Luminous Anchors in the middle of the Path of the Penitent Sub-Area. Move quickly because the lever is on a timer. | |
| Forgotten Basement Lever #3Main HallForgotten Basement Lever #3 | Main Hall | Found under the balcony with the Grand Hall Transition Door in the Forgotten Basement Sub-Area. Use the lever to move the stone blocks near you. | |
| Torture Chambers Lever #1Main HallTorture Chambers Lever #1 | Main Hall | Found on an arcade in the Torture Chambers Sub-Area. Use the lever to move the nearby stone block. | |
| Torture Chambers Lever #2Main HallTorture Chambers Lever #2 | Main Hall | Found on an arcade in the Torture Chambers Sub-Area. Use the lever to move the nearby stone blocks. | |
| Torture Chambers Lever #3Main HallTorture Chambers Lever #3 | Main Hall | Found on an arcade in the Torture Chambers Sub-Area. Use the lever to move the nearby stone block. | |
| Mirror Rooms LeverMain HallMirror Rooms Lever | Main Hall | Found on the wall above the locked iron door on the western side of the Mirror Rooms Sub-Area. Use the lever to open the door below. | |
| Narthex Pressure PlateNotre-DameNarthex Pressure Plate | Notre-Dame | Found on the wall next to the Luminous Anchors on the western side of the Narthex Sub-Area. Stand on the Pressure Plate to open the Iron Door to the west. | |
| Poetry Shelves Lever #1LibraryPoetry Shelves Lever #1 | Library | Found above a drop point platform in a Poetry Shelves Hidden Area. Use the lever to unlock the drop point below. | |
| Poetry Shelves Lever #2LibraryPoetry Shelves Lever #2 | Library | Found on the wall in the small room between two drop point platforms on the eastern side of the Poetry Shelves Sub-Area. Use the lever to unlock the lower drop point. | |
| Curiosity Cabinet Lever #1LibraryCuriosity Cabinet Lever #1 | Library | Found on the ceiling in the hidden area you can reach by sliding through the wall on the eastern side of the Curiosity Cabinet Sub-Area. Use the lever to open the locked iron door above. | |
| Small Tower Pressure PlateNotre-DameSmall Tower Pressure Plate | Notre-Dame | Found toward the top of the Small Tower. Stand on it to open the Iron Door above so you can progress. | |
| Star ChartsLibraryStar Charts | Library | Found in the top right part of the Drawing Room Sub-Area. The two star charts are part of the Organic Astrology Occultist Clue. | |
| Planetarium LeverLibraryPlanetarium Lever | Library | Found between two drop point platforms on the eastern side of the Planetarium. Use the lever to unlock the drop point below. | |
| West Triforium LeverNotre-DameWest Triforium Lever | Notre-Dame | Found on the wall on the western side of the West Triforium Sub-Area. Use the lever to unlock the Drop Point to the east. | |
| Fine Arts Shelves Lever #1LibraryFine Arts Shelves Lever #1 | Library | Found on the wall between two drop point platforms on the upper side of the Fine Arts Shelves Sub-Area. Use the lever to unlock the drop point below. | |
| Natural Philosophy Shelves LeverLibraryNatural Philosophy Shelves Lever | Library | Found on the wall by a drop point platform on the western side of the Natural Philosophy Shelves Sub-Area. Use the lever to open the locked door in the ceiling below. | |
| West Gallery Pressure PlateNotre-DameWest Gallery Pressure Plate | Notre-Dame | Found at the end of the platforming challenge on the eastern side of the West Gallery Sub-Area. Stand on the Pressure Plate to open the Iron Door to the west. To reach it, you require Aerial Rush (and Double Jump if you want to make it easier). | |
| Star Pattern HintLibraryStar Pattern Hint | Library | Found on the window by the chair you can interact with on the eastern side of the Natural Philosophy Shelves Sub-Area. The star pattern is part of the Blood Poem Occultist Clue. | |
| Study Room Lever #1LibraryStudy Room Lever #1 | Library | Found between a drop point platform and a slide point you can reach after jumping on the Large Star Jump point below. Use the lever to unlock the drop point below. | |
| Secret MelodyNotre-DameSecret Melody | Notre-Dame | Found on the lower level of the Sealed Scriptorium Sub-Area. Use the stained glass windows with candles (the correct order is obtained by counting the candles on each window) to get the combinations of keys for the Secret Melody you can use at the Giant Organ:
| |
| Brauner's PaintbrushLibraryBrauner's Paintbrush | Library | Brauner's Paintbrush is a critical item required to enter the Notre-Dame Painting in the Main Hall Gallery of Eternal Night (you will also need to defeat The Artist and The Builder). It can be obtained from the desk on the western side of the Observatory after defeating Carmilla (The Occultist). | |
| Fine Arts Shelves Lever #2LibraryFine Arts Shelves Lever #2 | Library | Found on the left wall after completing the short platforming challenge. Use the lever to unlock the drop point below. | |
| Curiosity Cabinet Lever #2LibraryCuriosity Cabinet Lever #2 | Library | Found next to a Luminous Anchor, on the wall between two platforms, in the top left part of the Curiosity Cabinet Sub-Area. Use the lever to unlock the drop point below. | |
| La Flèche LeverNotre-DameLa Flèche Lever | Notre-Dame | Found at the bottom of the La Flèche Sub-Area. Use the lever to open the Iron Door close above and the one at the top of the same area. Note that the Lever is on a timer, and if you want to reach the Iron Door at the top, you have to be fast. | |
| Eastern Access Shaft Lever #1Clock TowerEastern Access Shaft Lever #1 | Clock Tower | Found between a Locked Iron Door and a Transition Door. Use the lever to open the Locked Iron Door next to it. | |
| Nave Lever #1Notre-DameNave Lever #1 | Notre-Dame | Found between two sets of stairs on the lower level of the Nave Sub-Area. To reach it, you must first unlock either the Treble Clef or the Alto/Tenor Clef corrupted pipes from the Giant Organ. | |
| Eastern Access Shaft Pressure Plate #1Clock TowerEastern Access Shaft Pressure Plate #1 | Clock Tower | Found next to some chains on the western side of the Eastern Access Shaft Sub-Area. Step on the plate to unlock the bridge ahead. Move quickly, or you'll get crushed. | |
| Eastern Access Shaft Pressure Plate #2Clock TowerEastern Access Shaft Pressure Plate #2 | Clock Tower | Found next to some chains on the eastern side of the Eastern Access Shaft Sub-Area. Step on the plate to change the position of the bridges ahead. | |
| Eastern Access Shaft Pressure Plate #3Clock TowerEastern Access Shaft Pressure Plate #3 | Clock Tower | Found next to some chains on the western side of the Eastern Access Shaft Sub-Area. Step on the plate to unlock the bridge to the east. Move quickly, or you'll get crushed. | |
| Eastern Access Shaft Lever #2Clock TowerEastern Access Shaft Lever #2 | Clock Tower | Found between a locked iron door and a drop point platform at the bottom of the Eastern Access Shaft Sub-Area. Use the lever to open the iron door to the west. | |
| Nave Lever #2Notre-DameNave Lever #2 | Notre-Dame | Found on the wall in the top left part of the Nave Sub-Area. To reach it, use the Luminous Anchors in the room, starting with the one next to the door below. Use the lever to unlock the Drop Point and Luminous Anchor below. | |
| Counterweight Chamber LeverClock TowerCounterweight Chamber Lever | Clock Tower | Found on the ceiling above a drop point platform in the Counterweight Chamber Sub-Area. Use the lever to unlock the drop point platform to the east. | |
| Smelting Room LeverClock TowerSmelting Room Lever | Clock Tower | Found between the drop point platforms in the bottom right part of the Smelting Room. Use the lever to unlock the drop point above. | |
| Architect's Gate LeverClock TowerArchitect's Gate Lever | Clock Tower | Found between the transition door and the locked iron doors. Use the lever to open the iron doors on the western side. | |
| Path of the Builder Lever #1Clock TowerPath of the Builder Lever #1 | Clock Tower | Found on the wall in the bottom left part of the Path of the Builder Sub-Area. Use the lever to open the locked iron door to the upper right. | |
| Foundry Apex Lever #1Clock TowerFoundry Apex Lever #1 | Clock Tower | Found next to the elevator at the bottom of the Foundry Apex Sub-Area. Use the lever to unlock the drop point above. | |
| Builder's Bureau LeverClock TowerBuilder's Bureau Lever | Clock Tower | Found between two drop point platforms on the eastern side of the Builder's Bureau Sub-Area. Use the lever to unlock the drop point above. | |
| Mechanic's Ascent Pressure PlateClock TowerMechanic's Ascent Pressure Plate | Clock Tower | Found next to a drawbridge on the eastern side of the Mechanic's Ascent Sub-Area. Step on the plate to change the position of the drawbridge to the east. | |
| West Tower Base LeverClock TowerWest Tower Base Lever | Clock Tower | Found on the ceiling above a locked iron door in the top left part of the West Tower Base Sub-Area. Use the lever to open the iron door below. | |
| Sewer Entrance LeverParis StreetsSewer Entrance Lever | Paris Streets | Found above the door, in the upper section on the eastern side of the Sewer Entrance. You can reach it by performing a wall jump from underneath. | |
| Central Sewer Drain LeverParis StreetsCentral Sewer Drain Lever | Paris Streets | Found next to the movable bridge on the middle level of the Central Sewer Drain. | |
| Western Ascent Pressure Plate #1Clock TowerWestern Ascent Pressure Plate #1 | Clock Tower | Found on the upper level of the Western Ascent Sub-Area. Use Smash on it to move the nearby mechanism. | |
| Western Ascent Pressure Plate #2Clock TowerWestern Ascent Pressure Plate #2 | Clock Tower | Found on the upper level of the Western Ascent Sub-Area. Use Smash on it to move the nearby mechanism. | |
| Western Ascent Pressure Plate #3Clock TowerWestern Ascent Pressure Plate #3 | Clock Tower | Found on the upper level of the Western Ascent Sub-Area. Use Smash on it to move the nearby mechanism. | |
| Central Sewer Drain LeverParis StreetsCentral Sewer Drain Lever | Paris Streets | Found next to the movable bridge on the upper level of the Central Sewer Drain. | |
| Western Ascent Pressure Plate #4Clock TowerWestern Ascent Pressure Plate #4 | Clock Tower | Found on the lower level of the Western Ascent Sub-Area. Use Smash on it to move the nearby mechanism. | |
| Serpent Pinion Gear MechanismClock TowerSerpent Pinion Gear Mechanism | Clock Tower | Found on the western wall toward the top of the Serpent Pinion Sub-Area. Strike the mechanism quickly a couple of times to unlock the platform above. | |
| Prison Tower Lever #1Paris StreetsPrison Tower Lever #1 | Paris Streets | Found in front of a gap. Pull it to move the bridge forward so you can cross the gap. | |
| Prison Tower Lever #2Paris StreetsPrison Tower Lever #2 | Paris Streets | Found next to the drawbridge. Pull the lever to draw the bridge so you can jump on it and reach the upper level. You can pull the lever again to lower the bridge if you need to. | |
| Prison Tower Lever #3Paris StreetsPrison Tower Lever #3 | Paris Streets | Found next to the drawbridge. Pull the lever to lower or raise the bridge. | |
| Prison Tower Lever #4Paris StreetsPrison Tower Lever #4 | Paris Streets | Found on the ceiling, on the lower level of the Prison Tower section. Use the lever to clear the way toward the nearby Luminous Anchor. | |
| Cemetery Entrance Lever #1Holy Innocents' CemeteryCemetery Entrance Lever #1 | Holy Innocents' Cemetery | Found on the wall above a Cemetery Entrance Locked Iron Door. You can reach it with the help of the nearby Luminous Anchor. | |
| Sepulcher of the Knight LeverHoly Innocents' CemeterySepulcher of the Knight Lever | Holy Innocents' Cemetery | Found on the wall next to an XP Statue and a Luminous Anchor. Pull the lever to unlock the nearby drop point. | |
| Cloister LeverHoly Innocents' CemeteryCloister Lever | Holy Innocents' Cemetery | Found on the wall next to some stairs on the western side of the Cloister. Use the lever to make the drawbridge cover the nearby drop point. | |
| Cemetery Entrance Lever #2Holy Innocents' CemeteryCemetery Entrance Lever #2 | Holy Innocents' Cemetery | Found on the wall between the two Luminous Anchors on the western side of the Cemetery Entrance. Use the lever to unlock the drop point below your feet. | |
| Eastern Steps LeverClock TowerEastern Steps Lever | Clock Tower | Found on the wall next to some spikes in the western part of the Eastern Steps Sub-Area. Use the lever to unlock the drop point above. | |
| Fountain of the Innocents Lever #1Holy Innocents' CemeteryFountain of the Innocents Lever #1 | Holy Innocents' Cemetery | Found in the Hidden Area next to the spikes with the falling platform in the Fountain of the Innocents. Use the lever to unlock the Drop Point to the west. | |
| Fountain of the Innocents Lever #2Holy Innocents' CemeteryFountain of the Innocents Lever #2 | Holy Innocents' Cemetery | Found under a Luminous Anchor on the western side of the Fountain of the Innocents. Use the lever to unlock the Wall Jump spot to the east. But be prepared for an ambush. | |
| Giant OrganNotre-DameGiant Organ | Notre-Dame | Found at the bottom of the Great Organ Room. Press different combinations of keys to disable the Bass Clef sign, Treble Clef sign, and Alto/Tenor Clef sign corrupted pipes to unlock new areas:
| |
| Great Tower Pressure Plate #2Notre-DameGreat Tower Pressure Plate #2 | Notre-Dame | Found next to the spikes on the right side toward the top of the Great Tower. Step on the Pressure Plate to open one of the Iron Doors above. | |
| Great Tower Pressure Plate #1Notre-DameGreat Tower Pressure Plate #1 | Notre-Dame | Found next to the spikes on the left side toward the top of the Great Tower. Step on the Pressure Plate to open one of the Iron Doors above. | |
| Ancient Sewers Lever #1Holy Innocents' CemeteryAncient Sewers Lever #1 | Holy Innocents' Cemetery | Found on the ceiling on the upper level of the Ancient Sewers. Use the lever to open the nearby hatch. | |
| The Prophetess's KeyHoly Innocents' CemeteryThe Prophetess's Key | Holy Innocents' Cemetery | The Prophetess's Key is one of the three keys needed to open the sealed door to the Catacombs. It is obtained after defeating Medusa, and it is a critical item for progressing the story. | |
| Prison Tower Lever #5Paris StreetsPrison Tower Lever #5 | Paris Streets | Found on a level between two transition doors in Prison Tower. Pull the lever to move the two nearby drawbridges. You can reach the lever after exiting the Guard Level through the door at the top of the stairs. | |
| Prison Tower Lever #6Paris StreetsPrison Tower Lever #6 | Paris Streets | Found down some stairs next to a transition door on the western side of the Prison Tower Sub-Area. Use the lever to move the nearby drawbridge along with the Luminous Anchor on it. |

© MapMaster.io 2024. All rights reserved.