Castlevania: Belmont's Curse Hidden Areas and Breakable Walls
Castlevania Belmont’s Curse has 76 Hidden Areas across nine of our maps, from the streets of Paris to the Library in Dracula’s Castle. Most open in one of three ways: you break a cracked wall, slide through a false one, or launch through a ceiling from a Luminous Anchor. The Catacombs lead the count with 21, so the Castlevania Belmont’s Curse Catacombs of Paris map of the Charnel Galleries is the best place to start looking.
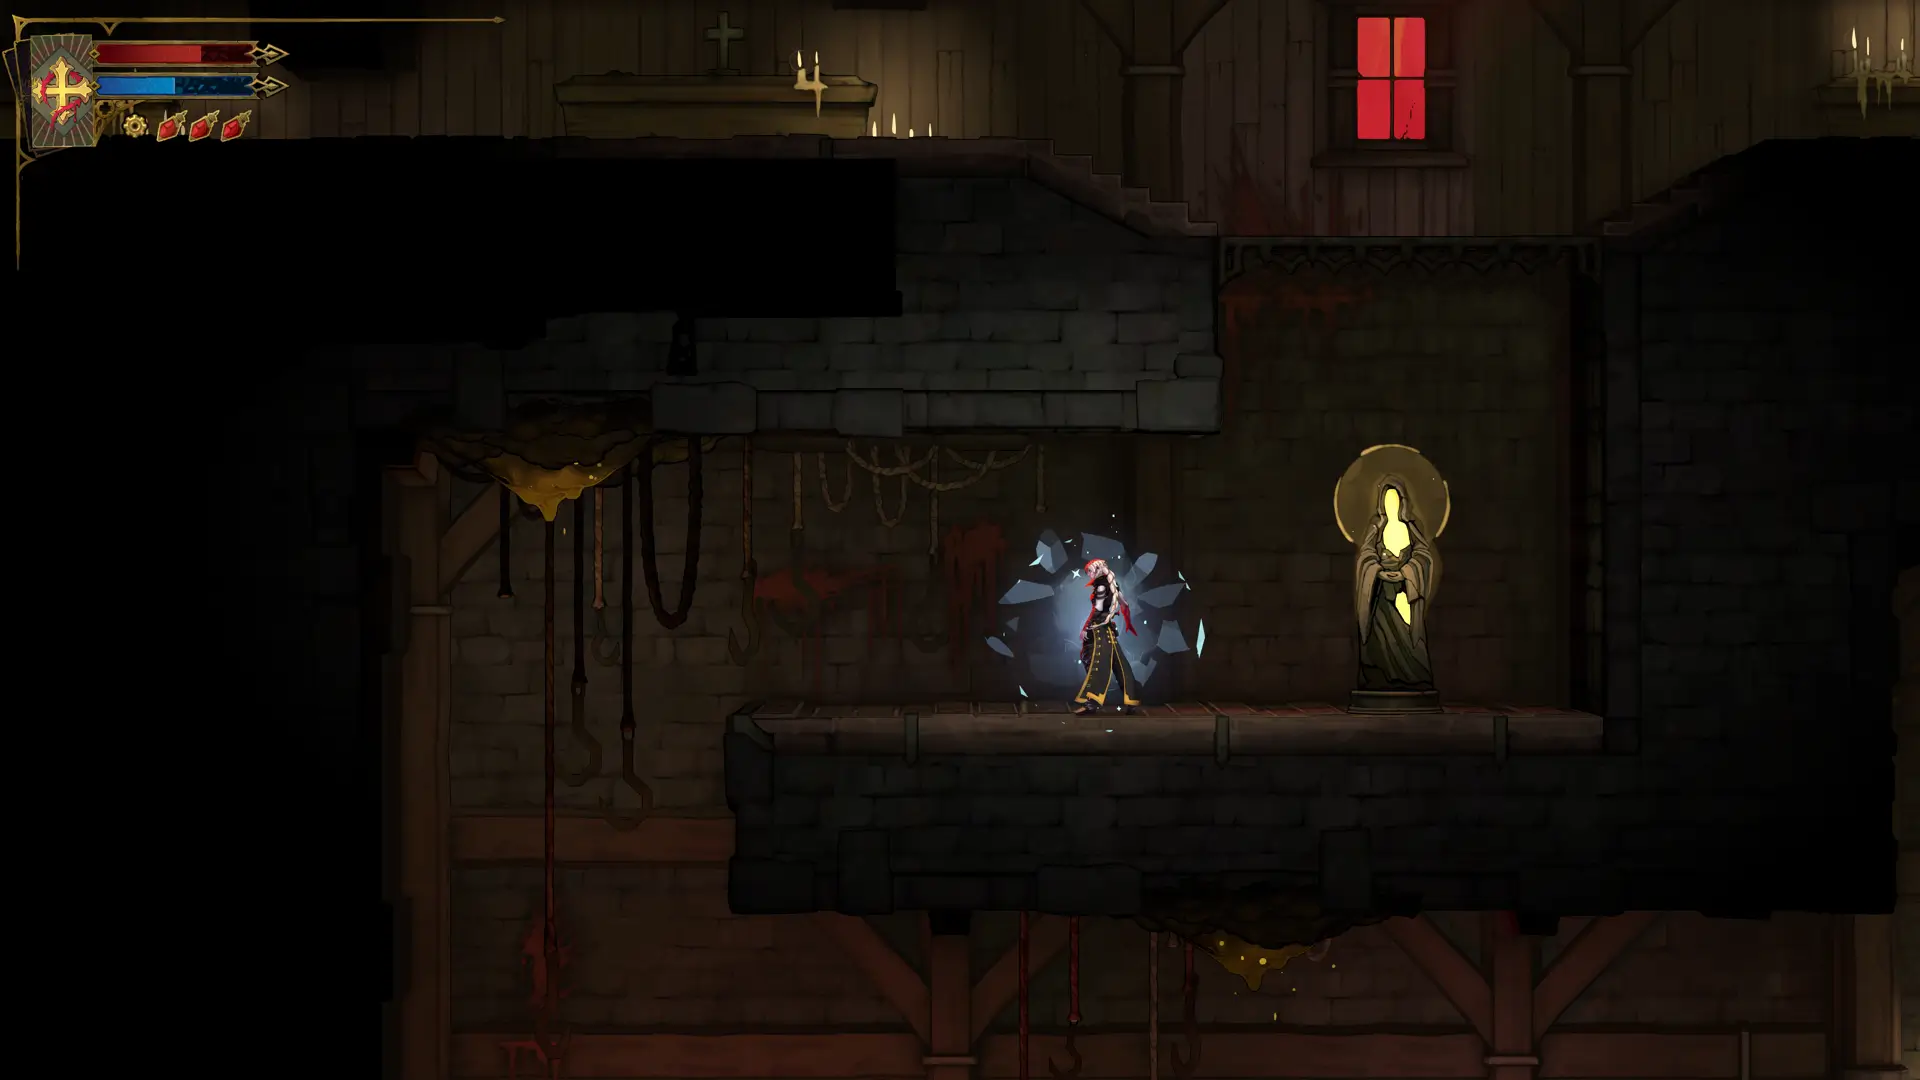
Alexandru Popescu found each of these rooms for Map Master, and the Castlevania Belmont’s Curse 100% map connects them to every other collectible in the game. Hidden Areas are where much of the loot waits, from Heart Fragments to XP Statues, so a thorough run checks every suspicious wall.
How to Find Hidden Areas in Castlevania Belmont’s Curse
About 30 of the 76 are behind a breakable wall. Look for a cracked panel and hit it a few times until it crumbles. A wall next to an XP Statue or a drop point platform is a common giveaway, as in the Charnel Galleries, the Chamber of Whispers, and the Morgue.
Another 15 open when you slide through or under a wall, usually a low gap at the edge of a room, like the corners of the Catacomb Entrance or the stairs in the Fountain of the Innocents. Slide into any wall that looks slightly out of place, since these false walls often show no crack at all.
Belmont’s Curse Hidden Areas That Need Anchors, Star Jumps, or Holy Light
Many castle secrets are overhead. Swing from a Luminous Anchor or dash from a Luminous Anchor Portrait and you’ll pass through the ceiling, which is how the Ballrooms and Abandoned Workshop secrets open up. The Main Hall map of the Entrance Corridor leads to another reached the same way. Large Star Jump points do the same job in the Rhetoric Shelves and across the Library map of the Curiosity Cabinet.
Two secrets need a specific tool. The Sewer Reservoir room opens only once you have the Arcane Whip from The Fallen, and the De Rais Necropolis room needs Holy Light to pass a Granite Wall. One Curiosity Cabinet secret is behind a locked door in the ceiling, so check the keys that open locked doors if it won’t budge.
Hidden Area Locations by Region in Castlevania Belmont’s Curse
Paris Streets has 10 and Holy Innocents’ Cemetery has 8, while the Prison Tower, the Bishop’s Office, the Morgue, and the Seer’s Hovel add eight more between them. The Fountain of the Innocents alone has three slide-through walls, so the Holy Innocents’ Cemetery map of the Fountain of the Innocents is a good place to train your eye. The Paris Streets map of the Sewer Reservoir leads you to the whip-only room.
Underground, the Blood Pits have five of the Catacombs’ 21, more than any other Sub-Area on our maps. Dracula’s Castle adds 29, with 18 in the Library and 11 in the Main Hall. The Curiosity Cabinet’s four make it the busiest room in the Library, and two of them are up in the ceiling.
What’s Inside Castlevania Belmont’s Curse Hidden Areas
Hidden Areas usually reward you with a pickup rather than a shortcut. Four of the Brave Heart Fragments tucked behind secret walls are in them, in the Blood Pits, the Armoury, the Poetry Shelves, and the Library Foyer. The Wise Heart Fragments that raise Rose’s magic turn up in secret rooms too.
Expect food and XP Statues hidden in side rooms as well, plus the Skill Books behind cracked walls that raise Rose’s stats, one of them reported in the Abandoned Sewers. The Collapsed Path of Orpheus has a Hidden Area just east of the Catacombs Ferryman’s Wharf, a quick check every time you arrive by boat.
Do Hidden Areas Count Toward 100% in Castlevania Belmont’s Curse?
Yes, Hidden Areas count toward the Progress percentage on the System tab, the figure behind the Perfectionist Hunter trophy for 100% completion. That makes all 76 part of a full clear, with the upgrades inside as a bonus on top. One secret has a trophy of its own, Always the Same Roof, for a hidden ceiling space in the Master’s Quarters.
The Gloomstone is reported to alert Rose to nearby secrets, so add it from the relics that help you spot secrets once you reach the Master’s Quarters. The team adds new finds raised in the Belmont’s Curse community Discord, so post any wall that crumbles where our maps show nothing.
| Name | Map Location | Details | Found |
|---|---|---|---|
| Prison Tower Hidden Area #2Paris StreetsPrison Tower Hidden Area #2 | Paris Streets | Found above an XP Statue on the eastern side of the Prison Tower Sub-Area. To reveal the hidden area, you must swing on the nearby Luminous Anchor a few times. | |
| Upper Tower Hidden AreaParis StreetsUpper Tower Hidden Area | Paris Streets | Found behind a breakable wall on the top level of the Upper Tower Sub-Area. You can reach it after using the Luminous Anchor and the Falling Platform toward the bottom, then wall-jumping quickly past the spike traps, and finally using the Luminous Anchor above the spikes. Destroy the wall to reveal the hidden area. | |
| Stairs to the Tower Roof Hidden AreaPrison TowerStairs to the Tower Roof Hidden Area | Prison Tower | Found after sliding through the wall between two Granite Walls in the Stairs to the Tower Roof. | |
| Roof of the Tower Hidden AreaPrison TowerRoof of the Tower Hidden Area | Prison Tower | Found behind a breakable wall between two drop-point platforms in the Roof of the Tower Sub-Area. Attack the wall to reveal the hidden area. | |
| Catacomb Entrance Hidden Area #1Catacombs of ParisCatacomb Entrance Hidden Area #1 | Catacombs of Paris | Found above a drop point platform on the western side of the Catacomb Entrance Sub-Area. Jump on the walls and go through the ceiling to reach the hidden area. | |
| Catacomb Entrance Hidden Area #2Catacombs of ParisCatacomb Entrance Hidden Area #2 | Catacombs of Paris | Found in the southwestern corner of the Catacomb Entrance Sub-Area. Slide through the wall to reach the hidden area. | |
| Quarry Elevator Hidden AreaCatacombs of ParisQuarry Elevator Hidden Area | Catacombs of Paris | Found by sliding through the wall to the right after entering the Quarry Elevator Sub-Area by dropping from above. | |
| Charnel Galleries Hidden Area #1Catacombs of ParisCharnel Galleries Hidden Area #1 | Catacombs of Paris | Found behind a breakable wall on the top level of the Charnel Galleries Sub-Area. Destroy the wall to reveal the hidden area behind it. | |
| Charnel Galleries Hidden Area #2Catacombs of ParisCharnel Galleries Hidden Area #2 | Catacombs of Paris | Found past the XP Statue in the bottom right corner of the Charnel Galleries. Destroy the wall to reveal the hidden area behind it. | |
| Reliquary Hidden AreaNotre-DameReliquary Hidden Area | Notre-Dame | Found behind the breakable wall on the lower level of the Reliquary Sub-Area. Destroy the wall to reveal the area behind it. | |
| Chamber of Whispers Hidden Area #1Catacombs of ParisChamber of Whispers Hidden Area #1 | Catacombs of Paris | Found next to a drop point platform in the Chamber of Whispers Sub-Area. Destroy the wall to reveal the area behind it. | |
| Crossroads of the Dead Hidden Area #1Catacombs of ParisCrossroads of the Dead Hidden Area #1 | Catacombs of Paris | Found behind a breakable wall on the western side of the Crossroads of the Dead. Attack the wall to reveal the area behind it. | |
| Gallery of Teeth Hidden Area #1Catacombs of ParisGallery of Teeth Hidden Area #1 | Catacombs of Paris | Found next to the cross in the Gallery of Teeth. Destroy the wall to reveal the area behind it. | |
| Gallery of Teeth Hidden Area #2Catacombs of ParisGallery of Teeth Hidden Area #2 | Catacombs of Paris | Found behind a breakable wall in the Gallery of Teeth. Break the wall to reveal the area behind it. You can also reach the area from the nearby drop point. | |
| Crossroads of the Dead Hidden Area #2Catacombs of ParisCrossroads of the Dead Hidden Area #2 | Catacombs of Paris | Found next to a drop point and a transition door on the eastern side of the Crossroads of the Dead Sub-Area. | |
| Chamber of Whispers Hidden Area #2Catacombs of ParisChamber of Whispers Hidden Area #2 | Catacombs of Paris | Found behind the breakable wall next to the XP Statue on the lower level of the Chamber of Whispers. Break the wall to reveal the area behind it. | |
| De Rais Necropolis Hidden AreaCatacombs of ParisDe Rais Necropolis Hidden Area | Catacombs of Paris | Found behind the Granite Wall on the eastern side of the De Rais Necropolis Sub-Area. Use the Holy Light to pass through the Granite Wall and reach the hidden area. | |
| Jaws of Limbo Hidden AreaCatacombs of ParisJaws of Limbo Hidden Area | Catacombs of Paris | Found up the stairs in the Jaws of Limbo main room. Break the wall to reveal the hidden area. | |
| Throat of Hell Hidden Area #1Catacombs of ParisThroat of Hell Hidden Area #1 | Catacombs of Paris | Found in the Throat of Hell Sub-Area after swinging from the nearby Luminous Anchor a couple of times. | |
| Apse Hidden AreaNotre-DameApse Hidden Area | Notre-Dame | Found on the western side of the Apse Sub-Area. Slide through the wall to reach the hidden area. | |
| Chapel Hidden Area #1Notre-DameChapel Hidden Area #1 | Notre-Dame | Found in the top right part of the Chapel. Slide through the wall to reach the hidden area. | |
| Chapel Hidden Area #2Notre-DameChapel Hidden Area #2 | Notre-Dame | Found in the top left part of the Chapel. Slide through the wall to reach the hidden area. | |
| Daedalus Crossing Hidden Area #1Clock TowerDaedalus Crossing Hidden Area #1 | Clock Tower | Found behind a breakable wall on the eastern side of the Daedalus Crossing Sub-Area. Destroy the wall to reveal the area behind it. | |
| East Galley Hidden AreaNotre-DameEast Galley Hidden Area | Notre-Dame | Found behind the breakable wall on the lower level, in the middle of the East Gallery. Destroy the wall to reveal the area behind it. | |
| Western Maintenance Shaft Hidden AreaClock TowerWestern Maintenance Shaft Hidden Area | Clock Tower | Found in the bottom left part of the Western Maintenance Shaft Sub-Area. Slide through the wall to reach the hidden area. | |
| Blood Pits Hidden Area #1Catacombs of ParisBlood Pits Hidden Area #1 | Catacombs of Paris | Found behind the breakable wall next to the Falling Platform in the Blood Pits Sub-Area. Destroy the wall to reveal the area behind it. | |
| Daedalus Crossing Hidden Area #3Clock TowerDaedalus Crossing Hidden Area #3 | Clock Tower | Found above a stone fist trap on the lower level of the Daedalus Crossing Sub-Area. You must Double Jump on the first stone fist (from right to left) to reach the Hidden Area. | |
| Daedalus Crossing Hidden Area #2Clock TowerDaedalus Crossing Hidden Area #2 | Clock Tower | Found behind a locked iron door at the top of the Daedalus Crossing Sub-Area. To reveal the hidden area, use the Gear Mechanism to the east. | |
| Blood Pits Hidden Area #2Catacombs of ParisBlood Pits Hidden Area #2 | Catacombs of Paris | Found behind the breakable wall next to the drop point platform with the Luminous Anchor in the Blood Pits Sub-Area. Destroy the wall to reveal the area behind it. | |
| Blood Pits Hidden Area #3Catacombs of ParisBlood Pits Hidden Area #3 | Catacombs of Paris | Found after sliding under a wall toward the bottom of the Blood Pits. | |
| Clock Keeper's Atrium Hidden AreaClock TowerClock Keeper's Atrium Hidden Area | Clock Tower | Found next to the XP Statue on the ledge on the eastern side of the Clock Keeper's Atrium Sub-Area. Approach to reveal the Hidden Area. | |
| Blood Pits Hidden Area #4Catacombs of ParisBlood Pits Hidden Area #4 | Catacombs of Paris | Found behind a breakable wall at the bottom of the Blood Pits. Break the wall to reveal the area behind it. | |
| Blood Pits Hidden Area #5Catacombs of ParisBlood Pits Hidden Area #5 | Catacombs of Paris | Found behind the breakable wall next to the green symbol at the bottom of the Blood Pits. Break the wall to reveal the area behind it. | |
| Hall of the Fallen Angels Hidden AreaCatacombs of ParisHall of the Fallen Angels Hidden Area | Catacombs of Paris | Found behind the breakable wall in the Hall of the Fallen Angels. Break the wall to reveal the area behind it. | |
| The Way of the Fist Hidden Area #1Clock TowerThe Way of the Fist Hidden Area #1 | Clock Tower | Found above a fist trap on the western side of the Way of the Fist Sub-Area. To reach it, climb the first fist from the west and ride it to the top. | |
| The Way of the Fist Hidden Area #2Clock TowerThe Way of the Fist Hidden Area #2 | Clock Tower | Found in the ceiling, on the upper level of the Way of the Fist. To reach it, you must use the Luminous Anchor below. | |
| The Way of the Fist Hidden Area #3Clock TowerThe Way of the Fist Hidden Area #3 | Clock Tower | Found behind the fist trap and the breakable wall on the eastern side of the Way of the Fist Sub-Area. Destroy the wall to reveal the area behind it. | |
| Collapsed Path of Orpheus Hidden AreaCatacombs of ParisCollapsed Path of Orpheus Hidden Area | Catacombs of Paris | Found behind the breakable wall east of the Catacombs of Paris Ferryman's Wharf. Destroy the wall to reveal the area behind it. | |
| Old Gallery Hidden AreaMain HallOld Gallery Hidden Area | Main Hall | Found in the top right part of the Old Gallery Sub-Area. Use the Luminous Anchor portrait below to dash through the drop point platform and reach the hidden area. You require the Aerial Rush to reach the Luminous Anchor portrait. | |
| Rhetoric Shelves Hidden Area #3LibraryRhetoric Shelves Hidden Area #3 | Library | Found under the Destructible Rock on the western side of the Rhetoric Shelves Sub-Area. | |
| Bishop's Office Hidden Area #1Bishop's OfficeBishop's Office Hidden Area #1 | Bishop's Office | Found behind the breakable wall in the bottom right part of the Bishop's Office. Destroy the wall to reveal the area behind it. | |
| Bishop's Office Hidden Area #2Bishop's OfficeBishop's Office Hidden Area #2 | Bishop's Office | Found on the upper level of the Bishop's Office, after jumping on the walls below. | |
| Bishop's Office Hidden Area #3Bishop's OfficeBishop's Office Hidden Area #3 | Bishop's Office | Found in the top-right part of the Bishop's Office. Slide through the wall to reach the hidden area. | |
| Docks Hidden AreaParis StreetsDocks Hidden Area | Paris Streets | Found after sliding under the wall in the bottom left part of the Docks Sub-Area. | |
| Notre-Dame Bridge Hidden AreaMain HallNotre-Dame Bridge Hidden Area | Main Hall | Found next to a Luminous Anchor on the eastern side of the Notre-Dame Bridge Sub-Area. Use the Luminous Anchor and go through the wall to reach the hidden area. | |
| Entrance Corridor Hidden Area #1Main HallEntrance Corridor Hidden Area #1 | Main Hall | Found behind the breakable wall in front of the stairs on the east side of the Entrance Corridor Sub-Area. Strike the wall to reveal the area behind it. | |
| Abandoned Workshop Hidden AreaMain HallAbandoned Workshop Hidden Area | Main Hall | Found on the upper level of the Abandoned Workshop Sub-Area. Use the Luminous Anchor Portrait below and dash directly up to reach the hidden area. | |
| Hot Springs Hidden Area #3Holy Innocents' CemeteryHot Springs Hidden Area #3 | Holy Innocents' Cemetery | Found behind a wall on the lower level of the Hot Springs Sub-Area (on the western side). Slide through the wall to reach the Hidden Area. | |
| Grand Hall Hidden Area #1Main HallGrand Hall Hidden Area #1 | Main Hall | Found on the western side of the Main Hall. Use the nearby Luminous Anchor Portrait to go through the wall and reach the Hidden Area. | |
| Prison Tower Hidden Area #3Paris StreetsPrison Tower Hidden Area #3 | Paris Streets | Found behind the breakable wall next to the drop point platform that you can reach by dropping through the Granite Wall above. Destroy the wall to reveal the area behind it. | |
| Ballrooms Hidden AreaMain HallBallrooms Hidden Area | Main Hall | Found on the top level of the Ballrooms Sub-Area. Dash to the right from the nearby Luminous Anchor Portrait to reach the hidden area. | |
| Path of the Rat Hidden AreaParis StreetsPath of the Rat Hidden Area | Paris Streets | Found on the lower side of the Path of the Rat. Hit the wall to reveal the area behind it. | |
| Grand Hall Hidden Area #2Main HallGrand Hall Hidden Area #2 | Main Hall | Found under a hidden drop point platform on the eastern side of the Grand Hall. Drop to reach the hidden area. | |
| Abandoned Sewers Hidden AreaParis StreetsAbandoned Sewers Hidden Area | Paris Streets | Found in the upper section of the Abandoned Sewers. Use the Luminous Shard above the water to grapple and swing onto the ledge, then walk through the wall. | |
| Brauner's Atelier Hidden AreaMain HallBrauner's Atelier Hidden Area | Main Hall | Found on the platform above the painting of the Master's son in the Brauner's Atelier Sub-Area. To reach it, use the Luminous Anchor on the wall to the west and jump through the wall. | |
| Pillaged Tombs Hidden AreaHoly Innocents' CemeteryPillaged Tombs Hidden Area | Holy Innocents' Cemetery | Found at the bottom of the Pillaged Tombs Sub-Area. Slide through the wall to the east to reveal the Hidden Area. | |
| Entrance Corridor Hidden Area #2Main HallEntrance Corridor Hidden Area #2 | Main Hall | Found on the upper level of the Entrance Corridor Sub-Area. To reach it, dash through the ceiling to the left from the nearby Luminous Anchor Portrait. | |
| Sewer Reservoir Hidden AreaParis StreetsSewer Reservoir Hidden Area | Paris Streets | Found in the upper section of the Sewer Reservoir. To reach the area, you'll need the Arcane Whip obtained after defeating The Fallen. Once you have it, head back to the Sewer Reservoir, jump, and launch the Whip towards the upper-right wall to grab onto the Luminous Anchor. | |
| Ossuary of the Innocents Hidden AreaHoly Innocents' CemeteryOssuary of the Innocents Hidden Area | Holy Innocents' Cemetery | Found under the hidden drop point platform at the bottom of the Ossuary of the Innocents Sub-Area. | |
| Mass Grave Hidden AreaHoly Innocents' CemeteryMass Grave Hidden Area | Holy Innocents' Cemetery | Found on the western side of the Mass Grave Sub-Area. Slide through the wall next to the platform to reach the Hidden Area. | |
| Roman Baths Hidden Area #1Holy Innocents' CemeteryRoman Baths Hidden Area #1 | Holy Innocents' Cemetery | Found between the transition door and the breakable wall in the top left part of the Roman Baths Sub-Area. | |
| Roman Baths Hidden Area #2Holy Innocents' CemeteryRoman Baths Hidden Area #2 | Holy Innocents' Cemetery | Found on the right side of the XP Statue in the top left part of the Roman Bath Sub-Area. Approach the wall to the right to reveal the Hidden Area. | |
| Court of Miracles Hidden AreaParis StreetsCourt of Miracles Hidden Area | Paris Streets | Found in the upper section of the Court of Miracles. Use the western Luminous Shard to grapple and swing onto the ledge, then walk through the wall. | |
| Pauper's Grave Hidden AreaHoly Innocents' CemeteryPauper's Grave Hidden Area | Holy Innocents' Cemetery | Found at the bottom of the Pauper's Grave Sub-Area. Wall Jump through the platform at the top of the Ruins Entrance Sub-Area to reach the Hidden Area. | |
| Armoury Hidden AreaMain HallArmoury Hidden Area | Main Hall | Found in a stone block on the lower level of the Armoury. Slide through the wall to reach the hidden area. | |
| Hospital Hidden Area #1HospitalHospital Hidden Area #1 | Hospital | Found in the Hospital. It is revealed after using the lever above. | |
| Hospital Hidden Area #2HospitalHospital Hidden Area #2 | Hospital | Found on the eastern side of the Hospital. Jump onto the ledge and go through the wall to reveal the hidden area. | |
| Hospital Hidden Area #3HospitalHospital Hidden Area #3 | Hospital | Found behind the door on the bottom level of the Hospital. | |
| Notre-Dame Undercroft Hidden AreaNotre-DameNotre-Dame Undercroft Hidden Area | Notre-Dame | Found in the top right part of the Notre-Dame Undercroft. Go through the wall to reveal the hidden area. To reach it, you can either use Double Jump or grapple to one of the skeleton head mobs when they are in the right position. | |
| Great Organ Room Hidden Area #1Notre-DameGreat Organ Room Hidden Area #1 | Notre-Dame | Found in the Hidden Area on the top level of the Great Organ Room. To reach it, you must drop through the platform to the west, use Aerial Rush to reach the wall to the east, and wall jump through the ceiling. | |
| Great Organ Room Hidden Area #2Notre-DameGreat Organ Room Hidden Area #2 | Notre-Dame | Found behind the breakable wall on the western side of the Great Organ Room. Destroy the wall to reveal the area behind it. | |
| Collapsed Crypt Hidden AreaNotre-DameCollapsed Crypt Hidden Area | Notre-Dame | Found in the Collapsed Crypt Sub-Area after dropping on the falling platform to the east and sliding through the wall. | |
| Boudoirs Hidden AreaMain HallBoudoirs Hidden Area | Main Hall | Found on a platform on the bottom level of the Boudoirs Sub-Area. To reach it, you must wall-jump to the platform from underneath. | |
| Torture Chambers Hidden AreaMain HallTorture Chambers Hidden Area | Main Hall | Found in the bottom left part of the Torture Chambers Sub-Area. You can reach it by using the Luminous Anchor Portrait below to jump onto the granite wall, then jump onto the ledge to the left and go through the wall. | |
| Tomb of the Chevaliers Hidden Area #1Notre-DameTomb of the Chevaliers Hidden Area #1 | Notre-Dame | Found behind the breakable wall in the bottom right part of the Tomb of the Chevaliers Sub-Area. Destroy the wall to reveal the area behind it. | |
| Tomb of the Chevaliers Hidden Area #2Notre-DameTomb of the Chevaliers Hidden Area #2 | Notre-Dame | Found behind a hidden iron door at the bottom of the Tomb of the Chevaliers Sub-Area. To unlock it, swing from the Luminous Anchor to the east a couple of times. | |
| Tomb of the Chevaliers Hidden Area #3Notre-DameTomb of the Chevaliers Hidden Area #3 | Notre-Dame | Found in the top middle part of the Tomb of the Chevaliers Sub-Area. You can reach it by using the Luminous Anchor below and going through the Granite Wall. | |
| Tomb of the Chevaliers Hidden Area #4Notre-DameTomb of the Chevaliers Hidden Area #4 | Notre-Dame | Found in the top right part of the Tomb of the Chevaliers Sub-Area. You can reach it by using the Luminous Anchor below and going through the Granite Wall. | |
| Tomb of the Chevaliers Hidden Area #5Notre-DameTomb of the Chevaliers Hidden Area #5 | Notre-Dame | Found on the western side of the Tomb of the Chevaliers Sub-Area. Slide through the wall to reach the hidden area. | |
| Tomb of the Chevaliers Hidden Area #6Notre-DameTomb of the Chevaliers Hidden Area #6 | Notre-Dame | Found above the hidden drop point platform on the upper level of the Tomb of the Chevaliers Sub-Area. You can reach it by wall-jumping from underneath. | |
| Tower Entrance Hidden Area #2Notre-DameTower Entrance Hidden Area #2 | Notre-Dame | Found behind the breakable wall in the bottom right part of the Tower Entrance Sub-Area. Destroy the wall to reveal the area behind it. | |
| Tower Entrance Hidden Area #1Notre-DameTower Entrance Hidden Area #1 | Notre-Dame | Found behind a breakable wall next to a drop point platform and a Luminous Anchor on the eastern side of the Tower Entrance Sub-Area. Destroy the wall to reveal the area behind it. | |
| Poetry Shelves Hidden Area #1LibraryPoetry Shelves Hidden Area #1 | Library | Found next to a star jump point on the western side of the Poetry Shelves Sub-Area. Slide through the wall next to the star jump point to reach the hidden area. | |
| Poetry Shelves Hidden Area #2LibraryPoetry Shelves Hidden Area #2 | Library | Found above a Luminous Anchor in the Poetry Shelves Sub-Area. Use the Luminous Anchor to jump through the ceiling and reveal the hidden area. | |
| Rhetoric Shelves Hidden Area #1LibraryRhetoric Shelves Hidden Area #1 | Library | Found behind the breakable wall in the bottom left part of the Rhetoric Shelves Sub-Area. Destroy the wall to reveal the area behind it. | |
| Library Foyer Hidden Area #1LibraryLibrary Foyer Hidden Area #1 | Library | Found on the upper level of the Library Foyer Sub-Area. You can reach it by jumping on the stars to the east and going through the wall. | |
| Library Foyer Hidden Area #2LibraryLibrary Foyer Hidden Area #2 | Library | Found behind the breakable wall by the drop point platform in the top left part of the Library Foyer Sub-Area. Break the wall to reveal the area behind it. | |
| Planetarium Hidden AreaLibraryPlanetarium Hidden Area | Library | Found behind the breakable wall in the bottom right part of the Planetarium Sub-Area. Break the wall to reveal the area behind it. | |
| Lecture Room Hidden AreaLibraryLecture Room Hidden Area | Library | Found behind a breakable wall in the top right part of the Lecture Room Sub-Area. Destroy the wall to reveal the area behind it. | |
| Exhibition Room Hidden AreaLibraryExhibition Room Hidden Area | Library | Found next to a drop point platform on the western side of the Exhibition Room Sub-Area. Use the star jump point below to reach the platform and reveal the hidden area. | |
| Curiosity Cabinet Hidden Area #1LibraryCuriosity Cabinet Hidden Area #1 | Library | Found on the western side of the Curiosity Cabinet Sub-Area. Go through the wall to reach the hidden area. | |
| Curiosity Cabinet Hidden Area #2LibraryCuriosity Cabinet Hidden Area #2 | Library | Found on the eastern side of the Curiosity Cabinet Sub-Area. Slide through the wall opposite the transition door to reach the hidden area. | |
| Curiosity Cabinet Hidden Area #3LibraryCuriosity Cabinet Hidden Area #3 | Library | Found behind a locked door in the ceiling, on the eastern side of the Curiosity Cabinet Sub-Area. | |
| Small Tower Hidden AreaNotre-DameSmall Tower Hidden Area | Notre-Dame | Found on the western side of the Small Tower. You can reach it by going through the door in the bottom right part of the Tree of Saints Sub-Area. | |
| Fine Arts Shelves Hidden AreaLibraryFine Arts Shelves Hidden Area | Library | Found between two drop point platforms on the top side of the Fine Arts Shelves Sub-Area. Use the Large Star Jump point below to go through the ceiling and reach the hidden area. | |
| Study Room Hidden Area #1LibraryStudy Room Hidden Area #1 | Library | Found on the top level of the Study Room. To reach it, use the Luminous Anchor below. | |
| Study Room Hidden Area #2LibraryStudy Room Hidden Area #2 | Library | Found behind the breakable wall west of the stars that you can jump on in the Study Room. Destroy the wall to reveal the area behind it. | |
| Natural Philosophy Shelves Hidden Area #1LibraryNatural Philosophy Shelves Hidden Area #1 | Library | Found behind a breakable wall on the bottom level of the Natural Philosophy Shelves Sub-Area. Destroy the wall to reveal the area behind it. | |
| Natural Philosophy Shelves Hidden Area #2LibraryNatural Philosophy Shelves Hidden Area #2 | Library | Found behind a breakable wall under a drop point platform on the bottom level of the Natural Philosophy Shelves Sub-Area. Break the wall to reveal the area behind it. | |
| Sealed Scriptorium Hidden AreaNotre-DameSealed Scriptorium Hidden Area | Notre-Dame | Found on the lower level of the Sealed Scriptorium Sub-Area. You can reach it by going through the Destructible Rock above. | |
| Rhetoric Shelves Hidden Area #2LibraryRhetoric Shelves Hidden Area #2 | Library | Found at the top of the Rhetoric Shelves Sub-Area, after jumping on the Large Star Jump point below. | |
| Curiosity Cabinet Hidden Area #4LibraryCuriosity Cabinet Hidden Area #4 | Library | Found at the top of the Curiosity Cabinet Sub-Area after jumping on the Large Star Jump point below. | |
| Transept Hidden AreaNotre-DameTransept Hidden Area | Notre-Dame | Found on a ledge, behind a breakable wall, at the top of the Transept Sub-Area. Strike the wall to reveal the area behind it. | |
| East Triforium Hidden AreaNotre-DameEast Triforium Hidden Area | Notre-Dame | Found behind a breakable wall on the western side of the East Triforium Sub-Area. Strike the wall to reveal the area behind it. | |
| Central Fuel Reservoir Hidden AreaClock TowerCentral Fuel Reservoir Hidden Area | Clock Tower | Found behind the breakable wall under the trap toward the bottom of the Central Fuel Reservoir Sub-Area. Destroy the wall to reveal the area behind it. | |
| West Tower Base Hidden AreaClock TowerWest Tower Base Hidden Area | Clock Tower | Found on a ledge in the middle of the West Tower Base Sub-Area. Use the nearby Luminous Anchor to go through the wall and reach the hidden area. | |
| Path of the Builder Hidden Area #1Clock TowerPath of the Builder Hidden Area #1 | Clock Tower | Found behind the breakable wall under a Luminous Anchor in the Path of the Builder Sub-Area. Destroy the wall to reveal the area behind it. | |
| Path of the Builder Hidden Area #2Clock TowerPath of the Builder Hidden Area #2 | Clock Tower | Found behind a wall that you can slide under, in the Path of the Builder Sub-Area. | |
| Final Trap Hidden AreaClock TowerFinal Trap Hidden Area | Clock Tower | Found at the top of the Final Trap Sub-Area. You can reach it by using the nearby Luminous Anchor, then wall jumping. | |
| Mechanic's Ascent Hidden Area #1Clock TowerMechanic's Ascent Hidden Area #1 | Clock Tower | Found behind the breakable wall in the bottom left part of the Mechanic's Ascent Sub-Area. Destroy the wall to reveal the area behind it. | |
| Western Ascent Hidden AreaClock TowerWestern Ascent Hidden Area | Clock Tower | Found above a drop point platform with a Luminous Anchor in the Clock Tower Sub-Area. Jump through the ceiling to reach the hidden area. | |
| Mechanic's Ascent Hidden Area #2Clock TowerMechanic's Ascent Hidden Area #2 | Clock Tower | Found in the top right part of the Mechanic's Ascent Sub-Area. You can reach it by wall-jumping on the Drawbridge below after using the Pressure Plate. | |
| Serpent Pinion Hidden Area #1Clock TowerSerpent Pinion Hidden Area #1 | Clock Tower | Found at the bottom of the Serpent Pinion Sub-Area. You can reach it using Aerial Dash and wall jumping from below. | |
| Street of the Tomb Masons Hidden AreaParis StreetsStreet of the Tomb Masons Hidden Area | Paris Streets | Found in the upper section of the Street of the Tomb Masons. Use the nearby Luminous Anchor to grapple and swing onto the platform. | |
| Serpent Pinion Hidden Area #2Clock TowerSerpent Pinion Hidden Area #2 | Clock Tower | Found in an alcove on the eastern side of the Serpent Pinion Sub-Area. Use the nearby Luminous Anchor to reach the hidden area. | |
| Morgue Hidden AreaMorgueMorgue Hidden Area | Morgue | Found under a platform in the Morgue. You can drop from the platform. Destroy the wall next to the XP Statue to reveal the Hidden Area. | |
| Prison Tower Hidden Area #1Paris StreetsPrison Tower Hidden Area #1 | Paris Streets | Found next to the spike trap on the lower level of the Prison Tower, after dropping from above and sliding through the wall to the left. | |
| Burned District Hidden AreaParis StreetsBurned District Hidden Area | Paris Streets | Found on the western side of the Burned District. Hit the wall to reveal the area behind it. | |
| Seer's Hovel Hidden AreaSeer's HovelSeer's Hovel Hidden Area | Seer's Hovel | Found next to the Burned District Transition Door. Slide through the wall to reveal the hidden area. | |
| Cemetery Entrance Hidden AreaHoly Innocents' CemeteryCemetery Entrance Hidden Area | Holy Innocents' Cemetery | Found on the eastern side of the Cemetery Entrance. Hit the wall to reveal the area behind it. | |
| Cloister Hidden AreaHoly Innocents' CemeteryCloister Hidden Area | Holy Innocents' Cemetery | Found on the top level of the Cloister, after using the nearby Luminous Anchor, then jumping on the wall to the east, and jumping through the wall to the west. | |
| Eastern Steps Hidden AreaClock TowerEastern Steps Hidden Area | Clock Tower | Found between the upper and the lower levels on the western side of the Eastern Steps Sub-Area. To reach it, you require Holy Light and Aerial Rush. | |
| Fountain of the Innocents Hidden Area #1Holy Innocents' CemeteryFountain of the Innocents Hidden Area #1 | Holy Innocents' Cemetery | Found next to the spikes with the falling platform in the Fountain of the Innocents. Slide through the wall to reveal the Hidden Area. | |
| Fountain of the Innocents Hidden Area #2Holy Innocents' CemeteryFountain of the Innocents Hidden Area #2 | Holy Innocents' Cemetery | Found under some stairs in the Fountain of the Innocents. Slide through the wall to reveal the Hidden Area. | |
| Middle Gallery Hidden AreaClock TowerMiddle Gallery Hidden Area | Clock Tower | Found behind the breakable wall next to the Luminous Anchor on the western side of the Middle Gallery Sub-Area. Break the wall to reveal the area behind it. | |
| Fountain of the Innocents Hidden Area #3Holy Innocents' CemeteryFountain of the Innocents Hidden Area #3 | Holy Innocents' Cemetery | Found under some stairs on the western side of the Fountain of the Innocents. Slide through the wall to reveal the Hidden Area. | |
| Narthex Hidden AreaNotre-DameNarthex Hidden Area | Notre-Dame | Found behind a breakable wall in the upper part of the Narthex Sub-Area. To reach it from the platform to the west, you need Double Jump and Aerial Rush. Destroy the wall to reveal the area behind it. | |
| Ancient Sewers Hidden AreaHoly Innocents' CemeteryAncient Sewers Hidden Area | Holy Innocents' Cemetery | Found above the XP Statue in the Ancient Sewers. Grapple towards above the XP Statue to reach a hidden Luminous Anchor. | |
| Hot Springs Hidden Area #1Holy Innocents' CemeteryHot Springs Hidden Area #1 | Holy Innocents' Cemetery | Found behind a breakable wall in the Hot Springs Sub-Area. Destroy the wall on the left side of the drop-point platform to reveal the hidden area. | |
| Hot Springs Hidden Area #2Holy Innocents' CemeteryHot Springs Hidden Area #2 | Holy Innocents' Cemetery | Found on the drop point platform in the room with the razor wheel. Jump on the wall at the dead end to the right. | |
| Guard Level Hidden AreaPrison TowerGuard Level Hidden Area | Prison Tower | Found on the western side in the area with spike traps and swinging blades. Slide through the wall to reveal the area behind it. | |
| The Forest Hidden AreaThe ForestThe Forest Hidden Area | The Forest | Found under the transition door. Drop from the falling platform above to reveal the hidden area. |

© MapMaster.io 2024. All rights reserved.