Beast of Reincarnation: Key Locations & Interactive Tracking Guide
Beast of Reincarnation's Key guide tracks every item, card, control panel, generator, and mechanism that gates zone progression, from the three Ogouchi story keys through the Giant Tree Card Key network. Every access point is visible and explained on our Beast of Reincarnation zone progression maps.
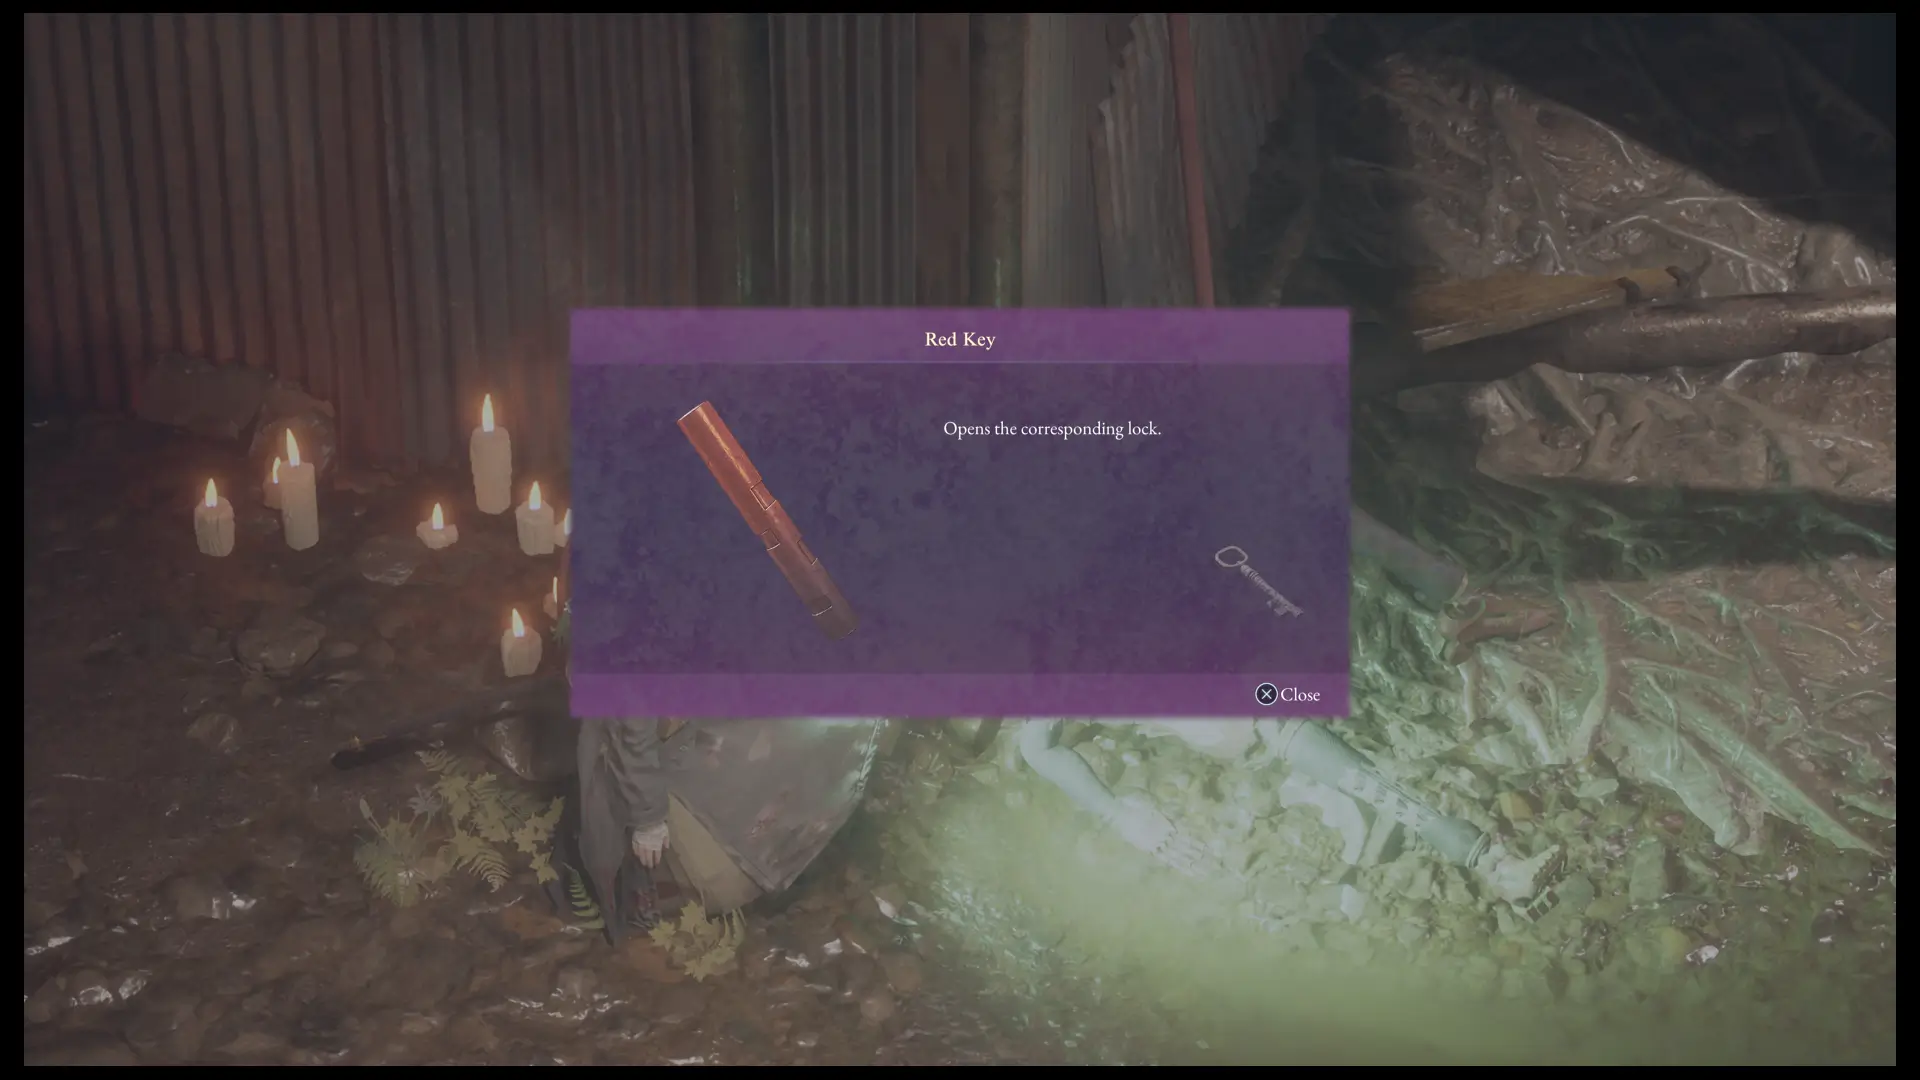
The Three Ogouchi Buffer Zone Keys All Require Meeting the Retired Gatekeeper First
None of the three Ogouchi keys appear until after the first Nushi encounter sends Emma into Subcity 03 to meet the Retired Gatekeeper.
- Red Key: given directly by the Retired Gatekeeper.
- Blue Key: found at the Lookout Shack Enemy Lair in front of a broken Golem, but it won't spawn before the Subcity 03 meeting.
- Yellow Key: given by the Golem with Key inside Tailwater Cave, but reaching that Golem requires the Tailwater Key first, which drops from the Elite Bear that only spawns after the Gatekeeper meeting.
The Tailwater Key is the fourth Ogouchi key, unlocking the Tailwater Cave Locked Door. All four are mandatory story items that cannot be missed.
The Giant Tree Zone Uses Three Card Keys That Unlock Separate Cable Car Lines
The Giant Tree Zone access system is the most complex in the game.
- Card Key Line Zero is given by the Rusted Golem next to the Camp behind the Giant Tree Bulkhead, free and with no combat.
- Card Key Line One drops automatically after defeating Corvus in the Boss fight.
- Card Key Line Two is looted from a Rusted Golem next to the Cable Car Line 2 Control Panel.
Each Card Key unlocks its corresponding cable car line only. The three keys must be collected in the sequence the story provides them.
The Giant Tree Key Is Dropped by the Keymaster Golem, Not Found in a Chest
Players who reach the Giant Tree Bulkhead Control Panel expecting a simple chest pickup get sent on an extra step.
The Ancient Golem beside the Control Panel reveals that the Giant Tree Key is inside a building marked by red smoke behind it.
Ride any nearby cable car to reach the building's roof, defeat the Keymaster Golem (Level 17) on top, and the Key drops. Return to the Control Panel with the Key to open the Bulkhead.
The Ancient Civilization Zone Generators Are Both Required Before the Reservoir Gate Opens
Two mandatory Generators must be activated in sequence to open Reservoir Gate B1-4.
Generator 1 is at the end of the underground train station, reached through the Northern Tunnel Ruins Door.
Generator 2 is also inside the train station, reached via the elevator in the upper section of the main hall.
The Lightning Stone is also needed before the Water Tank Control Panel becomes interactive. It drops from the Elite Golem attacking Mikoto in the main hall.
The Pilgrim's Zone Belfry Requires Three Braziers Lit Before the Bell Can Be Struck
Access to Nushi's Lair in Pilgrim's Zone doesn't use a key. It uses a ritual.
Moon Brazier, Sun Brazier, and Earth Brazier are all on the central platform in the Belfry and must all be lit before the Bell Striker on the upper level becomes interactive.
Strike the bell only after all three are active, or the Nushi's Lair gate stays sealed regardless of story progress.
Every Access Mechanism in Our Guide Answers the Same Question: Why Won't This Door Open?
The answer is almost always one of four things. A story key item hasn't been collected yet.
A Control Panel on the opposite side of the gate hasn't been interacted with. A Generator or Brazier in the sequence hasn't been activated.
Or the Retired Gatekeeper in Subcity 03 hasn't been met yet, which blocks multiple Ogouchi Buffer Zone items simultaneously. The Entrance guide covers the physical locations of every gate and Bulkhead.
This guide covers what's needed to open them, with Giant Tree Zone and Starfall Tower holding the most complex multi-step access sequences in the game.
| Name | Map Location | Details | Screenshot | Found |
|---|---|---|---|---|
| Cable CarsInukami River Zone | Inukami River Zone | Use the moving Cable Cars to get past the locked Bulkhead. | ||
| Control PanelStarfall Tower | Starfall Tower | Found next to the glass wall, down some stairs on the upper level. Interact with it to open the nearby gate, up the ramp. | ||
| Control PanelStarfall Tower | Starfall Tower | |||
| Control PanelStarfall Tower | Starfall Tower | Found by the windows in a small room. | ||
| Control PanelStarfall Tower | Starfall Tower | Found in a room with large windows. | ||
| Control PanelStarfall Tower | Starfall Tower | Found by the large window in an upper room. | ||
| Control PanelStarfall Tower | Starfall Tower | Found in the metal building, up by the mountain wall. Interact with it to open the nearby gate. | ||
| KanzashiStarfall Tower | Starfall Tower | The Kanzashi is obtained automatically during a cutscene after going through the Locked Gate. | ||
| Control PanelStarfall Tower | Starfall Tower | Found by the large Bulkhead and the Starfall Tower: Control Room Campsite. Interact with it to open the Bulkhead. To power it, you must first interact with these control panels in the exact order: | ||
| Red KeyOgouchi Buffer Zone | Ogouchi Buffer Zone | The Red Key is a quest item Emma receives from the Retired Gatekeeper in Subcity 03. The key is also used to open the Abandoned Village Locked Door. | ||
| Blue KeyOgouchi Buffer Zone | Ogouchi Buffer Zone | The Blue Key is a quest item that Emma can pick up after talking to the Retired Gatekeeper in Subcity 03. The key is also used to open the Cavern Storage Door. The key sits in front of a droid in the Lookout Shack Enemy Lair; however, it will not spawn before meeting the Retired Gatekeeper. | ||
| Tailwater KeyOgouchi Buffer Zone | Ogouchi Buffer Zone | The Tailwater Key is a quest item that Emma receives after defeating the Elite Bear in the upper Tailwater Cave. The beast, however, spawns only after talking to the Retired Gatekeeper in Subcity 03. The key is used to open the Tailwater Cave Locked Door. | ||
| Yellow KeyOgouchi Buffer Zone | Ogouchi Buffer Zone | The Yellow Key is a quest item that Emma receives from the Rusted Golem in Tailwater Cave. Obtaining it is a mandatory step to progress the story, the Path to the Sealed Lair Mission, and to complete the first area. | ||
| Control PanelAncient Civilization Zone | Ancient Civilization Zone | Found in the building on the upper side of the ravine. Examine it to open the two Bulkheads, thus creating a very useful shortcut back to the Cleanse Walker. | ||
| Water Tank Control PanelAncient Civilization Zone | Ancient Civilization Zone | Found on the upper floor of the underground Reservoir Control Room. You'll get to reach this area after fighting Lacerta the first time in the Ancient Civilization Zone. Activating the Control Panel is a mandatory step to progress Emma's story, and it requires the Lightning Stone. | ||
| Control PanelThe Great Wall Terraces | The Great Wall Terraces | Found inside the metal shack, on the lower side of the valley. You can reach it after engaging the Nue Malefact the third time. The control panel allows you to extend the bridge nearby, creating a very useful shortcut. | ||
| ElevatorThe Great Wall Terraces | The Great Wall Terraces | Found on the lower side of the area. Interact with it to move the platform up the wall and head for the final section of the region. | ||
| Generator #1Ancient Civilization Zone | Ancient Civilization Zone | Found at the end of the underground train station, which you can reach by going throuhg the northern section accessed via the Northern Tunnel Ruins Door. Activating the first Generator is a mandatory step for progressing Emma's story objective (Opening Reservoir Gate B1-4), and it will also power up the elevator nearby. | ||
| Generator #2Ancient Civilization Zone | Ancient Civilization Zone | Found at the end of the underground train station, which you can reach via the elevator in the upper section of the main hall. Activating the first Generator is a mandatory step for progressing Emma's story objective (Opening Reservoir Gate B1-4), and it will also power up the elevator nearby. | ||
| Lightning StoneAncient Civilization Zone | Ancient Civilization Zone | The Lightning Stone is a key item you'll need to obtain to progress Emma's story. After defeating Lacerta for the first time and finding the water tank control panel, you'll need to obtain the Lightning Stone to activate the control panel. The Lightning Stone is dropped by the elite golem trying to kill Mikoto in the main hall. Defeat the golem to get the stone. | ||
| Moon BrazierPilgrim's Zone | Pilgrim's Zone | Found on the central platform in the belfry. Light it to progress the story. | ||
| Sun BrazierPilgrim's Zone | Pilgrim's Zone | Found on the central platform in the belfry. Light it to progress the story. | ||
| Earth BrazierPilgrim's Zone | Pilgrim's Zone | Found on the central platform in the belfry. Light it to progress the story. | ||
| Bell StrikerPilgrim's Zone | Pilgrim's Zone | Found on the upper level in the belfry. After lighting the three braziers below, use it to strike the bell and progress the story. | ||
| Bridge Control PanelFuji Frontier Zone | Fuji Frontier Zone | Found in the Control Room next to the campsite and the painting on the main path. Activate the Control Panel to create a shortcut to the starting area. | ||
| Control PanelFuji Frontier Zone | Fuji Frontier Zone | Found by the Bulkhead past the gap. Interact with the Control Panel to open the Bulkhead. Activating the Control Panel is a mandatory step to progress Emma's story. | ||
| Control PanelFuji Frontier Zone | Fuji Frontier Zone | Found by the Bulkhead past the gap. Interact with the Control Panel to open the Bulkhead. Activating the Control Panel is a mandatory step to progress Emma's story. | ||
| Giant Tree KeyGiant Tree Zone | Giant Tree Zone | The Giant Tree Key is a mandatory key item required to interact with the Control Panel and open the Giant Tree Bulkhead. It is dropped by the Elite Enemy on top of the Ruined Tower. | ||
| Control PanelGiant Tree Zone | Giant Tree Zone | Found right next to the large Bulkhead in the middle of the Giant Tree Zone. Interact with it to open the Bulkhead. Requires the Giant Tree Key. | ||
| Card Key (Line Zero)Giant Tree Zone | Giant Tree Zone | The Card Key (Line Zero) is obtained by talking to the Rusted Golem next to the camp behind the large Bulkhead in the middle of the Giant Tree Zone. The Card Key (Line Zero) Unlocks: | ||
| Cable Car - Line 1Giant Tree Zone | Giant Tree Zone | Found on the platform up the stairs. You require the Card Key (Line One) to use this Cable Car. Transitions To: | ||
| Cable Car - Line 0Giant Tree Zone | Giant Tree Zone | Found on the platform up the stairs. You require the Card Key (Line Zero) to use this Cable Car. Transitions To: | ||
| Cable Car - Line 1Giant Tree Zone | Giant Tree Zone | Found on the platform up the stairs. You require the Card Key (Line One) to use this Cable Car. Transitions To: | ||
| Cable Car - Line 1 Control PanelGiant Tree Zone | Giant Tree Zone | Found on a metal platform. You require the Card Key (Line One) to use this Cable Car. Transitions To: | ||
| Card Key (Line Two)Giant Tree Zone | Giant Tree Zone | The Card Key (Line Two) is obtained by looting the Rusted Golem next to the control panel in the Cable Car - Line 2 in the Giant Tree Zone. The Card Key (Line Two) Unlocks: | ||
| Cable Car - Line 2Giant Tree Zone | Giant Tree Zone | Found up the stairs, on the platform. You require the Card Key (Line Two) to use this Cable Car. Transitions To: | ||
| Cable Car - Line 2Giant Tree Zone | Giant Tree Zone | Found up the stairs, next to the metal platform. You require the Card Key (Line Two) to use this Cable Car. Transitions To: | ||
| Cable Car - Line 1Giant Tree Zone | Giant Tree Zone | Found on the metal platform. You require the Card Key (Line One) to use this Cable Car. Transitions To: | ||
| Cable Car - Line 2Giant Tree Zone | Giant Tree Zone | Found up the stairs, on the metal platform. You require the Card Key (Line Two) to use this Cable Car. Transitions To: | ||
| Cable Car - Line 2Giant Tree Zone | Giant Tree Zone | Found on the metal platform up the stairs. You require the Card Key (Line Two) to use this Cable Car. Transitions To: | ||
| Cable Car - Line 2Giant Tree Zone | Giant Tree Zone | Found up the stairs, on the same metal platform as the Cableway - Line 2: Checkpoint Camp. You require the Card Key (Line Two) to use this Cable Car. Transitions To: | ||
| Cable Car - Line 2Giant Tree Zone | Giant Tree Zone | Found up the stairs, on the metal platform. You require the Card Key (Line Two) to use this Cable Car. Transitions To: | ||
| Cable Car - Line 0 Control PanelGiant Tree Zone | Giant Tree Zone | Found on a metal platform. You require the Card Key (Line Zero) to use this Cable Car. Transitions To: | ||
| Card Key (Line One)Giant Tree Zone | Giant Tree Zone | The Card Key (Line One) is obtained automatically after defeating Corvus in the Giant Tree Zone. The Card Key (Line One) Unlocks: | ||
| Control Panel #1Crater Zone | Crater Zone | Found halfway up the reactor, past the Lake Base: Outer Wall Campsite. Activate it to continue Emma's story and to lift the platform in the center of the reactor. | ||
| Control Panel #2Crater Zone | Crater Zone | Found on top of the platform you'll get to lift as part of the main mission. Activate it to continue Emma's story and to open the northern Bulkhead. |

© MapMaster.io 2024. All rights reserved.