Beast of Reincarnation: Elite Enemy Locations & Interactive Tracking Guide
Beast of Reincarnation's Elite Enemies are the 34 minibosses guarding Strongbox codes, story progression doors, and Koo's exclusive Skill Ambers. Every location is documented in the following list, and every spawn point is marked on our Beast of Reincarnation complete companion maps.
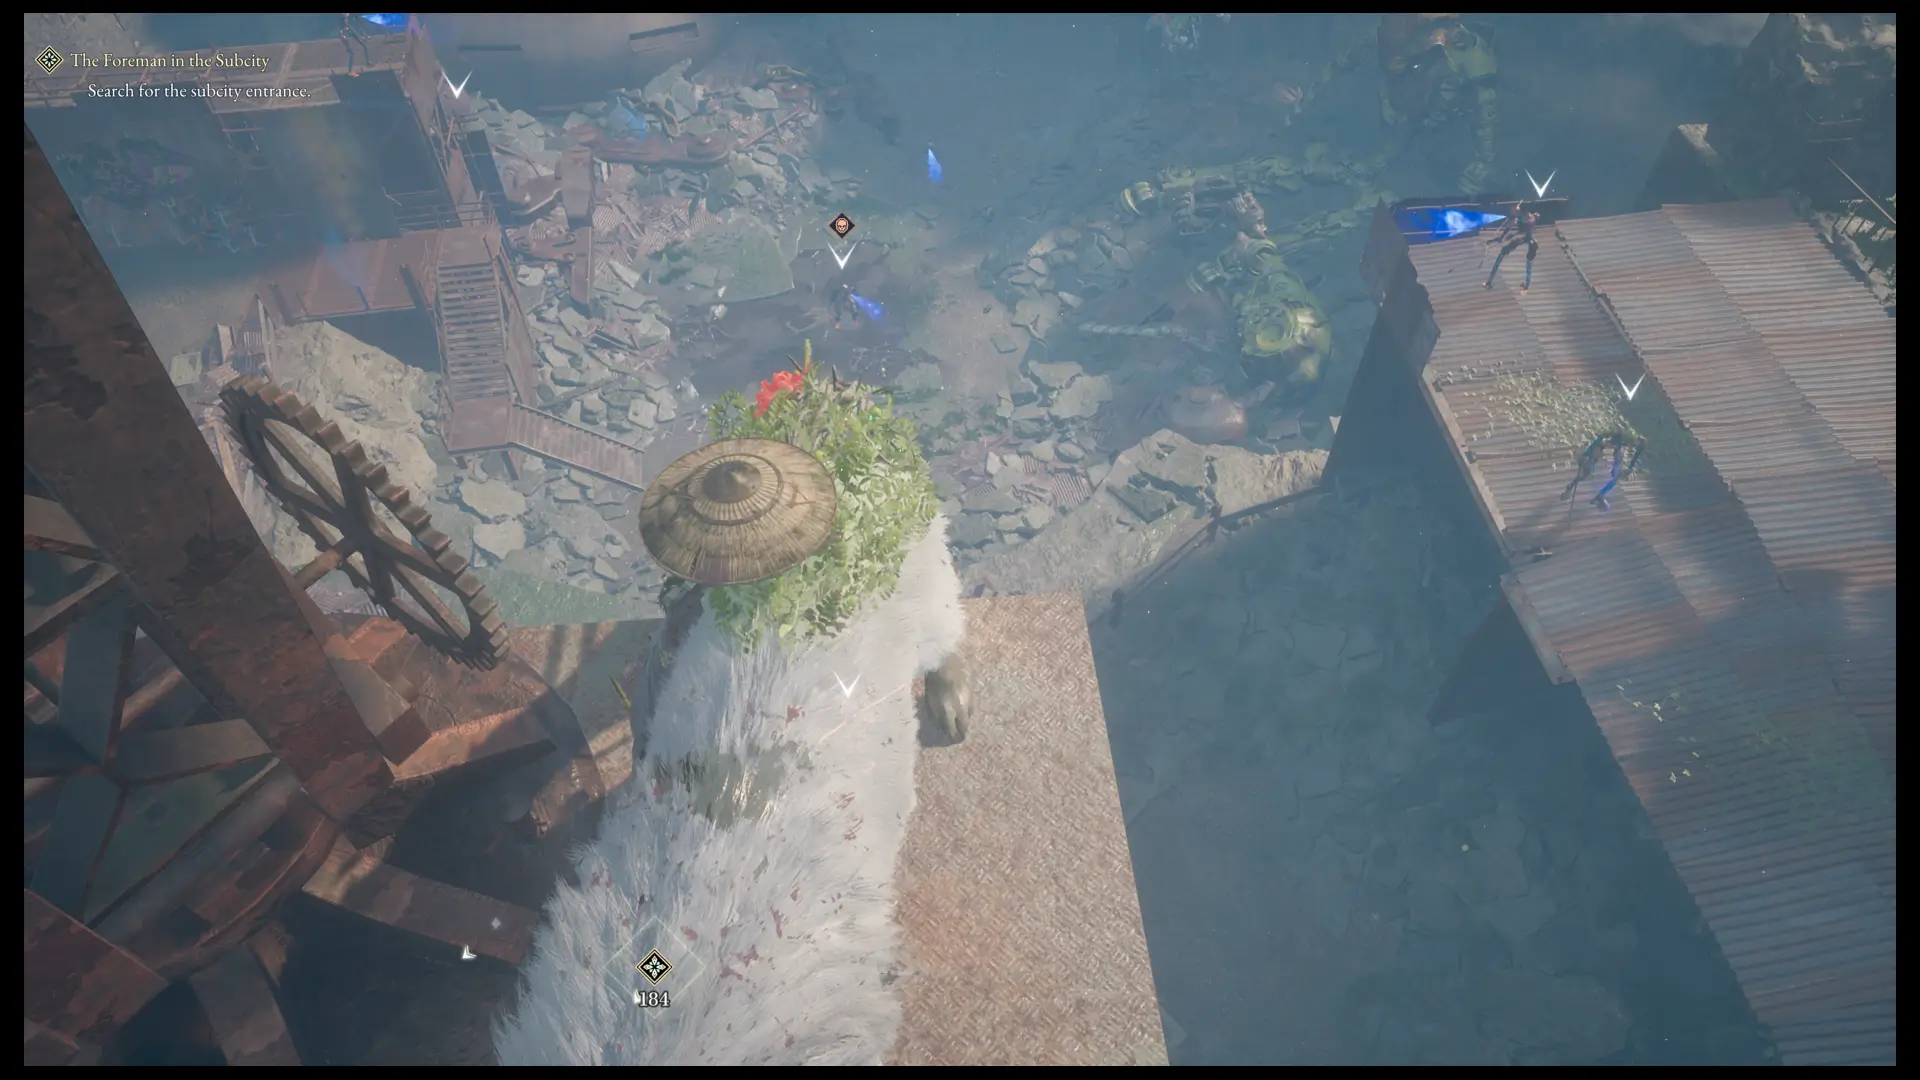
Wandering Duelist Requires All 34 Elite Enemies, and Codes Never Change Between Playthroughs
The Trophy requires defeating every Elite Enemy. But there's a time-saving fact worth knowing: Strongbox codes are identical across every playthrough.
The Disposal Site box is always 04180. Cliffside Village is always 08110. Subcity of Flowers is always 01498. You can walk up to any Strongbox and enter its code directly without fighting the Elite Enemy guarding it.
The fight is still required for Wandering Duelist, but on cleanup runs or at low levels, grabbing the loot first and fighting later is a legitimate option.
Four Elite Enemies Are Mandatory for Story Progression and Cannot Be Skipped
Most Elite Enemies are optional encounters. Four are not.
- Ogouchi Buffer Zone Elite Enemy #6 is a mandatory droid in Subcity 01 whose defeat opens the story door.
- Ogouchi Buffer Zone Elite Enemy #8 is a corrupted bear in Tailwater Cavern that drops the Tailwater Key, story-gated behind meeting the Retired Gatekeeper in Subcity 03 first.
- Ancient Civilization Zone Elite Enemy #4 is a large Samurai Golem that introduces Kunai and unlocks the Biting Tempest Nushi Skill on defeat.
- Giant Tree Zone Elite Enemy #1 on top of the Ruined Tower gates story progression and drops the Fall Thunder Sword and Giant Tree Key simultaneously.
Elite Enemy Loot Is Permanent and Does Not Reset After Resting
Every Elite Enemy in our table is a one-time encounter. Their loot, codes, Skill Ambers, and story items do not respawn after resting at a Camp.
Defeat one, collect everything in the area, and the pickup is gone permanently.
Skill Amber Is Koo's Exclusive Reward From Elite Enemies, Different From Regular Amber
Most Elite Enemies drop a Strongbox code, story item, or Enemy Lair access. Some drop Skill Amber instead, entirely separate from the currency Amber.
Skill Amber is an equippable item for Koo that enhances his combat abilities, similar in function to Spirit Stones for Emma. Great Wall Terraces Elites drop Shocking Fang, Aquatic Fang, and Bull Incense Skill Ambers.
Pilgrim's Zone contributes Tenacity Incense and Corrosive Fang. Crater Zone rewards include Entangled Fang, Final Fang, and Puppet Fang on defeat. Each is a permanent Koo upgrade worth the fight.
Elite Enemy Seven in Ogouchi Buffer Zone Guards a Keeper Golem, So Don't Skip It
One Elite Enemy in this table gates a collectible harder to replace than a Strongbox code.
The seventh Ogouchi Buffer Zone Elite Enemy, on the roof of the Ruined Tower, blocks access to a tent containing a Keeper Golem.
There are only 30 Keeper Golems in the entire game, each answering exactly one question before going silent. Skipping this Elite Enemy means skipping one of those 30 permanently on that run. Fight this one regardless of level.
Giant Tree Zone Elite Enemy One Won't Spawn Until You Activate the Control Panel and Talk to the Ancient Golem
One Elite Enemy has a unique spawn condition.
Giant Tree Zone Elite Enemy #1, on top of the Ruined Tower in the middle of the zone, only appears after Emma interacts with the Control Panel and speaks to the Ancient Golem nearby.
Walking past the Ruined Tower before those two interactions leaves the roof empty. It's not a missed encounter; it just hasn't spawned yet.
| Name | Map Location | Details | Screenshot | Found |
|---|---|---|---|---|
| Starfall Tower Elite EnemyStarfall Tower | Starfall Tower | The Starfall Tower Elite Enemy is found on the main path after getting past the Locked Gate and obtaining the Kanzashi. | ||
| Ogouchi Buffer Zone Elite Enemy #1Ogouchi Buffer Zone | Ogouchi Buffer Zone | The first Elite Enemy in Ogouchi Buffer Zone is found in the Disposal Site Lair. Defeat him to obtain his code: 04180, which is used to open the Disposal Site Locked Strongbox. | ||
| Ogouchi Buffer Zone Elite Enemy #2Ogouchi Buffer Zone | Ogouchi Buffer Zone | The second Elite Enemy in Ogouchi Buffer Zone is found on the northern side of the area. Look for him on the upper ledge in a small cave at the end of a canyon, which you can reach by using Emma's hair to get to the upper section. | ||
| Ogouchi Buffer Zone Elite Enemy #3Ogouchi Buffer Zone | Ogouchi Buffer Zone | The third Elite Enemy in Ogouchi Buffer Zone is found in the Quarry Lair. Look for him on the upper side you can reach using the two elevators. Defeat him to be able to collect the loot in the building behind him. | ||
| Ogouchi Buffer Zone Elite Enemy #4Ogouchi Buffer Zone | Ogouchi Buffer Zone | The fourth Elite Enemy in Ogouchi Buffer Zone is found in the Cliffside Village Lair. Look for him on the upper balcony of the western facility. Defeat the Elite Enemy to obtain his code 08110, which is used to open the Cliffside Village Locked Strongbox. | ||
| Ogouchi Buffer Zone Elite Enemy #5Ogouchi Buffer Zone | Ogouchi Buffer Zone | Found on the upper ledge northwest of Downstream Bridge Area Campsite in the northern Ogouchi Buffer Zone. To reach the Elite Enemy, climb the southeastern wall and surprise him with an attack from the back. | ||
| Ogouchi Buffer Zone Elite Enemy #6Ogouchi Buffer Zone | Ogouchi Buffer Zone | The sixth Elite Droid in Ogouchi Buffer Zone is found in the underground Subcity 01 Lair. Look for him behind the first locked door, and make sure you defeat him to open the door leading to the storage room. Unlike other Elite Enemies, this droid is mandatory for progressing Emma's story. | ||
| Ogouchi Buffer Zone Elite Enemy #7Ogouchi Buffer Zone | Ogouchi Buffer Zone | The seventh Elite Enemy in Ogouchi Buffer Zone is found in the Ruined Tower Lair. Look for him on the roof of the demolished building. Defeat the Elite Enemy to be able to access the Keeper Golem in the tent behind him. | ||
| Ogouchi Buffer Zone Elite Enemy #8Ogouchi Buffer Zone | Ogouchi Buffer Zone | The eighth Ogouchi Buffer Zone Elite Enemy is found in the upper Tailwater Cavern. Unlike other Elites, it is a corrupted bear that is story-gated. You won't be able to fight the bear until you meet the Retired Gatekeeper in Subcity 03. Defeating the bear is also mandatory for Emma's story because the beast will drop the Tailwater Key. | ||
| Ancient Civilization Zone Elite Enemy #1Ancient Civilization Zone | Ancient Civilization Zone | The first Ancient Civilization Zone Elite enemy is a corrupted wolf waiting for you in the clearing halfway up the eastern side of the southern canyon. Rewards:
| ||
| Ancient Civilization Zone Elite Enemy #2Ancient Civilization Zone | Ancient Civilization Zone | The first Ancient Civilization Zone Elite Enemy is a golem you'll encounter after opening the second Bulkhead using the Control Panel. He is located in the clearing past the Bulkhead Gate. | ||
| Ancient Civilization Zone Elite Enemy #3Ancient Civilization Zone | Ancient Civilization Zone | The third Elite Enemy in the Ancient Civilization Zone is a corrupted crow flying above the eastern canyon. Take it down using a ranged weapon. | ||
| The Great Wall Terraces Elite Enemy #1The Great Wall Terraces | The Great Wall Terraces | The first Great Wall Terraces Elite Enemy is, in fact, a pair of Golems you'll encounter on the large suspended concrete bridge connecting the southwestern and southeastern sides of the large mountainous region. You'll find them behind a train cart. Defeating them is a mandatory step to obtain the code 07230, required to open the Locked Strongbox under the bridge. | ||
| The Great Wall Terraces Elite Enemy #2The Great Wall Terraces | The Great Wall Terraces | The second Great Wall Terraces Elite Enemy is found in the upper room of the Maze of Sin. Make sure you deal with him to obtain the Oil Container Manual. | ||
| The Great Wall Terraces Elite Enemy #3The Great Wall Terraces | The Great Wall Terraces | The third Great Wall Terraces Elite Enemy is a Ronin Golem located in the middle of the road north of Great Forest Clearing: Approach Campsite. | ||
| The Great Wall Terraces Elite Enemy #4The Great Wall Terraces | The Great Wall Terraces | The fourth Great Wall Terraces Elite Golem is found in the Subcity of Flowers. You'll find it in the third large room as you explore the underground area accessed via the northern hatch. Once defeated, you can use the code 01498 to open the locked strongbox in front of the large statue. Rewards:
| ||
| The Great Wall Terraces Elite Enemy #5The Great Wall Terraces | The Great Wall Terraces | The fifth Elite Enemy in the The Great Wall Terraces area of Beast of Reincarnation is another corrupted wolf, which you'll be able to hunt in the clearing northwest of Flower Square: Forefront Camp. Rewards:
| ||
| The Great Wall Terraces Elite Enemy #6The Great Wall Terraces | The Great Wall Terraces | The sixth Elite Enemy in The Great Wall Terraces is a corrupted wolf, which you'll be able to track down in the clearing northwest of Ruined Road Square. Rewards:
| ||
| The Great Wall Terraces Elite Enemy #7The Great Wall Terraces | The Great Wall Terraces | The seventh Elite Golem in the Great Wall Terraces is found in a large clearing halfway up the western concrete building, northwest of Ruined Road Square Campsite. | ||
| Pilgrim's Zone Elite Enemy #2Pilgrim's Zone | Pilgrim's Zone | The second Elite Enemy in Pilgrim's Zone is found on the ledge with the Wandering Duelist's Cavern Campsite. | ||
| Pilgrim's Zone Elite Enemy #3Pilgrim's Zone | Pilgrim's Zone | The third Elite Enemy in Pilgrim's Zone is found on the ledge with the Wandering Duelist's Cavern Campsite. Rewards:
| ||
| Pilgrim's Zone Elite Enemy #1Pilgrim's Zone | Pilgrim's Zone | The first Elite Enemy in Pilgrim's Zone is found in the cave on the eastern side of the region. Defeat him to obtain his code: 02984, which is used to open the Cave Locked Strongbox. | ||
| Pilgrim's Zone Elite Enemy #4Pilgrim's Zone | Pilgrim's Zone | The fourth Elite Enemy in Pilgrim's Zone is found in the open, north of the Stone Chamber. Defeating the elite wolf rewards you with the Corrosive Fang Skill Amber. Rewards:
| ||
| Ancient Civilization Zone Elite Enemy #4Ancient Civilization Zone | Ancient Civilization Zone | The fourth Ancient Civilization Zone Elite Enemy is a large Samurai Golem you'll fight while working on reaching the northern generator room. It is a story-related enemy that introduces Kunai, an NPC who will eventually help Emma. The large golem is mandatory for story progression, and once defeated, it will unlock the Biting Tempest Nushi Skill. Rewards:
| ||
| Ancient Civilization Zone Elite Enemy #5Ancient Civilization Zone | Ancient Civilization Zone | Another Elite Enemy is waiting for Emma in the Ancient Civilization Zone Shopping Mall, behind the passage where you find the Thick Cuirass. | ||
| Ancient Civilization Zone Elite Enemy #6Ancient Civilization Zone | Ancient Civilization Zone | The sixth Elite Enemy in the Ancient Civilization Zone spawns later, after you fight Lacerta for the first time. You'll find him in the central hall, trying to kill Mikoto. Defeat him to obtain the Lightning Stone required to activate the water tank control panel. | ||
| Matsukawa Zone Elite Enemy #1Matsukawa Zone | Matsukawa Zone | Another Elite Enemy is found inside the Matsukawa Colony Cube, in the Library Hall. The room is best reached by climbing to the third floor of the moving cylinder. Once you get inside the Library Hall, look for the Elite Golem in the back of the large room, halfway up the shelves. | ||
| Matsukawa Zone Elite Enemy #2Matsukawa Zone | Matsukawa Zone | The second Matsukawa Zone Elite Enemy is a lizard-like creature found in the valley southwest of the Ruins: Approach Campsite. | ||
| Matsukawa Zone Elite Enemy #3Matsukawa Zone | Matsukawa Zone | The third Matsukawa Zone Elite Enemy is found inside the Prayer Room. Look for him past the Prayer Room Campsite. It is best reached after climbing to the fourth floor of the moving cylinder and after activating the Matsukawa Zone Dragon Vein Shrine #4. Defeating him grants you the code 68457, required to open the Strongbox in the same room. | ||
| Matsukawa Zone Elite Enemy #5Matsukawa Zone | Matsukawa Zone | The fifth elite enemy in the Matsukawa Zone is a rat-like creature found just south of the Ruins: Outskirts campsite. You can deal with this miniboss on your way to the Colony. | ||
| Matsukawa Zone Elite Enemy #6Matsukawa Zone | Matsukawa Zone | A boar-like Elite Enemy can be found in the northern swamp area of the Matsukawa Zone. Make sure you deal with it on your way to the Colony. | ||
| Matsukawa Zone Elite Enemy #7Matsukawa Zone | Matsukawa Zone | Another Elite Enemy is found inside the Matsukawa Colony Cube, in the Tranquil Hall. The room is best reached by climbing to the second floor of the moving cylinder. Look for Tranquil Hall behind some wooden doors. | ||
| Fuji Frontier Zone Elite Enemy #2Fuji Frontier Zone | Fuji Frontier Zone | The second Fuji Frontier Zone Elite Enemy is found in a side room on the upper level of the Defense Outpost. You can reach it after activating the Defense Outpost: Interior Campsite. Rewards:
| ||
| Fuji Frontier Zone Elite Enemy #1Fuji Frontier Zone | Fuji Frontier Zone | The first Elite Enemy in Fuji Frontier Zone is found in the circular arena while chasing Shidou's malefact. Defeat him to obtain his code: 42354, which is used to open the nearby Locked Strongbox. | ||
| Fuji Frontier Zone Elite Enemy #3Fuji Frontier Zone | Fuji Frontier Zone | The third Elite Enemy in Fuji Frontier Zone is found at the base of a large blue flower right after getting past the Defense Outpost: Wall Campsite. Rewards:
| ||
| Matsukawa Zone Elite Enemy #8Matsukawa Zone | Matsukawa Zone | Another Elite Enemy in the Matsukawa Zone can be found inside the northern cavern that you'll have to cross on your way to the Matsukawa Colony. It will spawn in the large cave past the burning tunnel. The stag-like enemy is mandatory for progressing through the cave. | ||
| Matsukawa Zone Elite Enemy #9Matsukawa Zone | Matsukawa Zone | Another Elite Enemy will be waiting for you inside the Matsukawa Colony cube. He is found on the ground floor, several steps away from the Upper Matsukawa Colony (Front) Campsite. | ||
| Giant Tree Zone Elite Enemy #1Giant Tree Zone | Giant Tree Zone | The first Elite Enemy in the Giant Tree Zone is found on top of the Ruined Tower (reachable with the Cable Car) in the middle of the area. You need to kill him for story progression. This Elite Enemy spawns only after interacting with the Control Panel and talking to the Ancient Golem. Rewards:
| ||
| Giant Tree Zone Elite Enemy #2Giant Tree Zone | Giant Tree Zone | The second Elite Enemy in the Giant Tree Zone is found at the exit of the cave northeast of the Cableway - Line 1: Base Station Campsite. Rewards:
| ||
| Giant Tree Zone Elite Enemy #3Giant Tree Zone | Giant Tree Zone | The third Elite Enemy in Giant Tree Zone is found on the bottom level of the ruined building in the area you can reach after using the Cable Car - Line 2 and following the path. Defeat him to obtain his code: 81239, which is used to open the nearby Locked Strongbox. | ||
| Matsukawa Zone Elite Enemy #4Matsukawa Zone | Matsukawa Zone | The third Matsukawa Elite Enemy is found inside the Mausoleum Room. Look for him past the Mausoleum Campsite. It is best reached after climbing to the fourth floor of the moving cylinder and after activating the Matsukawa Zone Dragon Vein Shrine #4. Defeating him will unlock the Resurrection Incense Skill Amber. Rewards:
| ||
| Giant Tree Zone Elite Enemy #4Giant Tree Zone | Giant Tree Zone | The fourth Elite Enemy in the Giant Tree Zone is found next to a large tree on top of a building. The area can be reached by going southwest of Cableway - Line 0: Base Station Camp (drop from the large root). | ||
| Crater Zone Elite Enemy #1Crater Zone | Crater Zone | The second Elite Enemy in the Crater Zone is found inside the southeastern cave accessed via the entrance in the tent. | ||
| Crater Zone Elite Enemy #2Crater Zone | Crater Zone | The second Elite Enemy in the Crater Zone area is found inside the southeastern cave accessed via the entrance in the tent. | ||
| Crater Zone Elite Enemy #3Crater Zone | Crater Zone | The third Elite Enemy in the Crater Zone region is found inside the southeastern cave accessed via the entrance in the tent. | ||
| Crater Zone Elite Enemy #4Crater Zone | Crater Zone | The fourth Elite Enemy in Crater Zone is found inside the large cave on the southern side of the region. You can access the cave via the Cave Entrance to the northeast. | ||
| Crater Zone Elite Enemy #5Crater Zone | Crater Zone | The fifth Elite Enemy in the Crater Zone is a corrupted lion found in front of the large building in the western crater. Defeating it alongside the other Elite Enemy, unlocks the Entangled Fang Skill Amber. Rewards:
| ||
| Crater Zone Elite Enemy #8Crater Zone | Crater Zone | The eighth Elite Enemy in the Crater Zone is a corrupted lion found in front of the large building in the eastern crater. Defeating it alongside the other Elite Enemy, unlocks the Puppet Fang Skill Amber. Rewards:
| ||
| Crater Zone Elite Enemy #9Crater Zone | Crater Zone | The ninth Elite Enemy in the Crater Zone is a corrupted lion found in front of the large building in the eastern crater. Defeating it alongside the other Elite Enemy, unlocks the Puppet Fang Skill Amber. Rewards:
| ||
| Crater Zone Elite Enemy #6Crater Zone | Crater Zone | The sixth Elite Enemy in the Crater Zone is a corrupted lion found in front of the large building in the western crater. Defeating it alongside the other Elite Enemy unlocks the Entangled Fang and Final Fang Skill Ambers. Rewards:
| ||
| Crater Zone Elite Enemy #7Crater Zone | Crater Zone | The Seventh Elite Enemy in the Crater Zone is found on the metal platform on the northern side of the region. You'll encounter it on your way to the fortress in the crater. Once you defeat him, use the code 95889 to open the Strongbox on the suspended platform nearby. | ||
| Crater Zone Elite Enemy #10Crater Zone | Crater Zone | Another Elite Enemy in the Crater Zone will wait for you on the bridge on top of the reactor, past the Lake Base: Interior Campsite. It is a mandatory miniboss you'll need to defeat to reach the central area of the fortress in the crater. | ||
| Inukami River Zone Elite EnemyInukami River Zone | Inukami River Zone | The only Elite Enemy in the Inukami River Zone is found at the end of the tunnel next to the Ruined Plaza Campsite. When you approach him, remember that Emma fights alone and focus on parrying his attacks. |

© MapMaster.io 2024. All rights reserved.